Resene paint effects projects, project 18
There are as many techniques for marbling as there are varieties of natural marble.
Before you start, look at some natural marbles to see the colours and how the veins are formed. Colours generally range from soft creams through to browns, greens, greys and blacks. Keep your work simple.
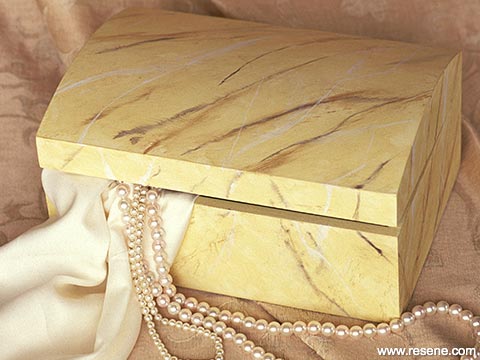
Paint an marble effect on a jewellery box
Before you start your project try out different combinations and practice your application method on a piece of card until you are happy with the result. Resene FX Paint Effects Medium is available in 60ml testpots from your Resene ColorShop.
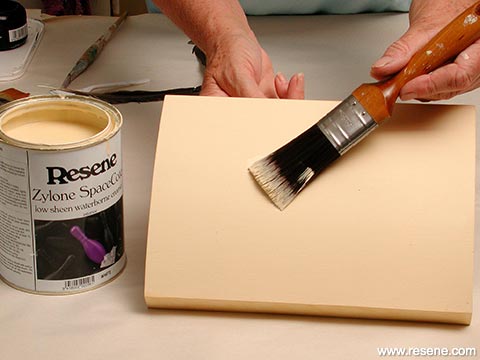
Step 1: Sand the box smooth and apply two coats of Resene Splash, sanding between coats.
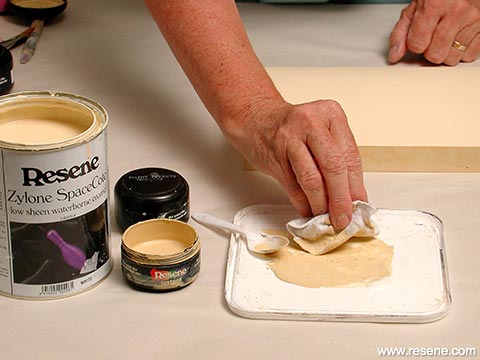
Step 2: Mix three parts Resene FX Paint Effects Medium to one part Resene Chalky to make an effects finish. Using a small piece of cloth scrunched into a pad, pick up some of the effects finish and pad on the side of the dish to remove the excess.
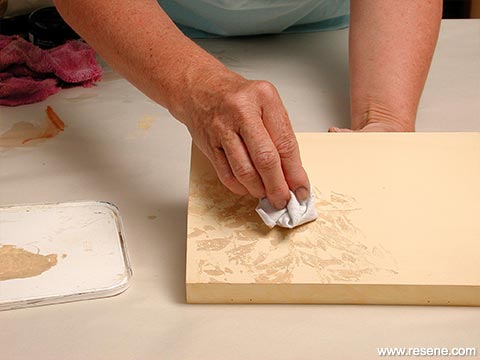
Step 3: Press the cloth gently onto the surface, changing the direction of your hand with each press. Move randomly over the area, filling in gaps until it is evenly covered. Do one side of the box at a time.
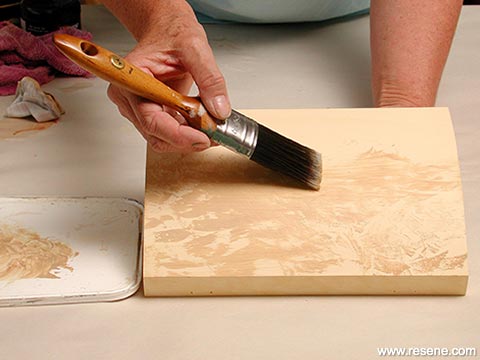
Step 4: Before the paint dries, use a soft, dry brush to blend and soften any hard edges of the ragging.
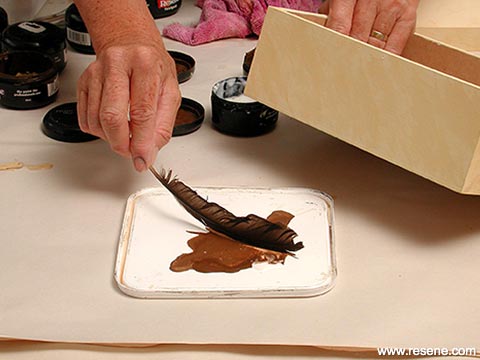
Step 5: The remaining colours are for the veins. The colours you use for the veining are up to you. You can use all of them or just one or two. Mix equal amounts of colour, Resene FX Paint Effects Medium and water on a dish. Drag the edge of a feather through the paint. Don’t pick up too much.
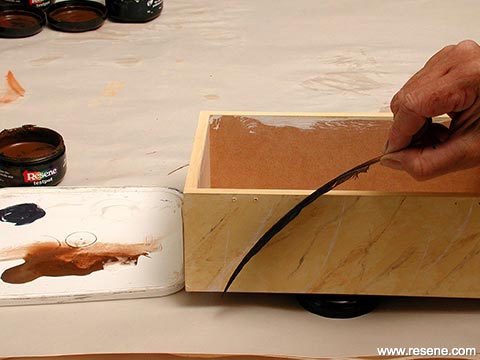
Step 6: Hold the feather loosely between your thumb and forefinger and lightly drag it across the surface to create the vein. Add more veins, working generally in the same direction. The veins should look a bit like a lightning fork or tree branches.
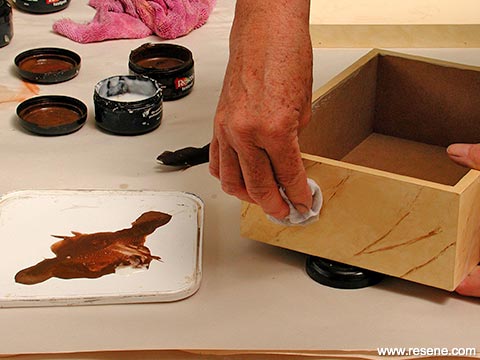
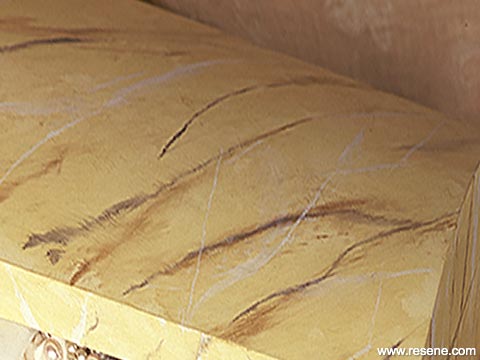
Step 7: Use a rag or a dry brush to soften and blur some of the veins but leave some of them stronger in colour. Seal with Resene Aquaclear when dry to provide a protective coat over the finish.
› Download this project as a PDF
Project by Janet Scard. Photography by Joseph Zou.
![]() Get inspired ! Subscribe
Get inspired ! Subscribe ![]() Get saving ! Apply for a DIY card
Get saving ! Apply for a DIY card
![]()
Can't find what you're looking for? Ask us!
Company profile | Terms | Privacy policy | Quality and environmental policy | Health and safety policy
Colours shown on this website are a representation only. Please refer to the actual paint or product sample. Resene colour charts, testpots and samples are available for ordering online. See measurements/conversions for more details on how electronic colour values are achieved.
What's new | Specifiers | Painters | DIYers | Artists | Kids | Sitemap | Home | TOP ⇧


