Resene paint effects projects, project 17
Spattering is showering a fine spray of paint onto a surface by running your finger across a paint-loaded brush.
Superb colour effects may be built up using three or four variations or tones of the same colour over the basecoat. Include a very light and a very dark tone to give variety. The basecoat usually remains the overall dominant colour – sponging, ragging or stippling this coat makes a nice base for spattering over.
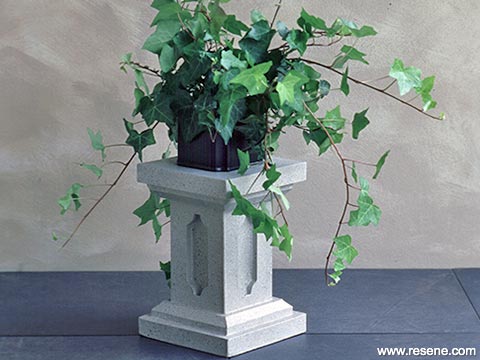
Create a spattered paint effect on a pedestal base
Spattering is quite a messy paint effects finish to create so lay out plenty of newspaper or cover sheets. A large cardboard carton is ideal for placing smaller items in, as it acts as a spray booth and contains the overspray, of which there will be plenty!
Toothbrushes, stencil brushes and old short bristled paintbrushes are all ideal tools to use. Whichever brush you use, practice on paper first. This allows you to check the consistency of the paint and the distance you will hold the brush from the surface. If the paint is too watery, it will drip down a vertical surface.
Before you start your project, try out different combinations and practice your application method on a piece of card until you are happy with the result.
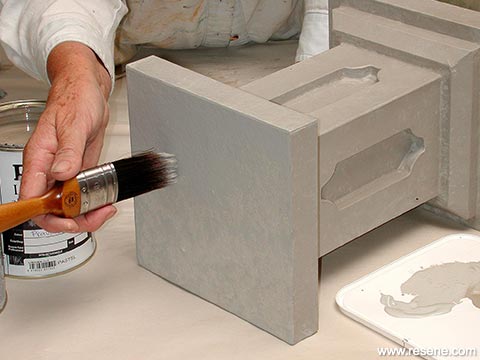

Step 1: Lightly sand the pedestal if necessary to remove any roughness and apply a good coat of Resene Triple Concrete.
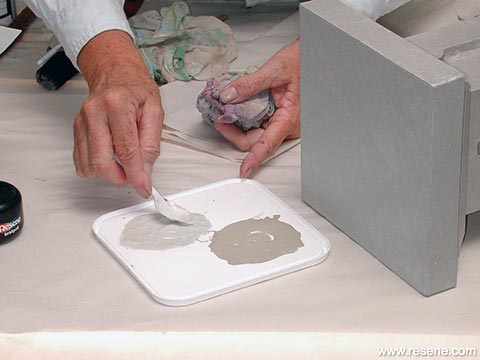
Step 2: Mix equal amounts of Resene Seashell and Resene Pravda on the dish. Dip the tip of the brush in the paint, pounce on the edge of the dish to distribute the paint through the bristles, and in a pouncing action apply over the first coat. You want to achieve a mottled look, so leave some of the original colour showing through.
Step 3: Pour small amounts of Resene Seashell, Resene Pravda, Resene Gargoyle and Resene Zeus onto the dishes and thin with a little water. Check the consistency of the paint before you start on the real thing. Load the toothbrush with paint. Hold it 10 – 20cms from the area you are spattering on and pull your finger across the brush towards you to send a spray of paint onto the surface. The blunt edge of a knife blade may be used across the toothbrush instead of your finger.
Step 4: When you are pleased with the result start on the pedestal. Apply each colour in turn and continue until the mix of colours looks right to you.
› Download this project as a PDF
Project by Janet Scard. Photography by Joseph Zou.
Order online now:
Testpots |
Paints |
Primers and Sealers |
Stains |
Clears |
Accessories
![]() Get inspired ! Subscribe
Get inspired ! Subscribe ![]() Get saving ! Apply for a DIY card
Get saving ! Apply for a DIY card
Can't find what you're looking for? Ask us!
Company profile | Terms | Privacy policy | Quality and environmental policy | Health and safety policy
Colours shown on this website are a representation only. Please refer to the actual paint or product sample. Resene colour charts, testpots and samples are available for ordering online. See measurements/conversions for more details on how electronic colour values are achieved.
What's new | Specifiers | Painters | DIYers | Artists | Kids | Sitemap | Home | TOP ⇧

