From the Resene decorating blog
Prepare for and repair damage from damp, leaks and floods.

It can be tempting to begin repairs as soon as possible after a major leak or flood, but it is essential to make sure your house has completely dried out before repainting.
The wall in this room is Resene Silver Chalice with floor in Resene Colorwood Shade. Sideboard in Resene Rivergum, coffee table in Resene Half Stack, dog bed in Resene Armadillo, Resene Spanish Green and Resene Half Stack with lettering in Resene Rivergum, lightshade in Resene Spanish Green, vase on sideboard in Resene Armadillo with bowl in Resene Spanish Green and plant pot and coffee table vase in Resene Rivergum. Dog bed, grey cushion and throw from The Warehouse, sofa and rug from Nood, check and green cushions from Mocka. Project by Vanessa Nouwens, image by Bryce Carleton.
Unless you’re enjoying a nice, hot bath, water is usually not your friend when it comes to preserving the life of your home’s surfaces.
Whether it’s just a touch of damp to more serious leaks or flooding, water can do major damage to painted or wallpapered surfaces. The good news is there are things you can do to prevent damp causing problems, and mitigate the damage caused by leaks.
Here are some tips from the Resene advice team.
When it comes to stopping damp damaging your painted or wallpapered surfaces it all starts with correct preparation.
After you have stripped back any old wallpaper and sanded back any previous paint, do a thorough check of the room for any signs of damp or leaks on the walls, floor and ceilings.
Ashleigh Strange from Resene’s Advice Team says these may include yellow or brown discolouration on surfaces, patches that are colder to touch, crumbling plaster, peeling paint, lifting wallpaper, or spores of black mould that can resemble dirt or pinkish mould often found in bathrooms.
Your next step is to find the source of the leak and repair it so you’re not just repainting over the problem. Check all possible sources of water, such as pipes, tanks, cylinders and guttering, not just rain. You may also need to replace any sections of plasterboard that have become wet.
Ashleigh says it is vital to start at the source and fix any dampness or moisture before painting, or redecorating because mould can and will continue to grow through any new paint system. This is true for exterior surfaces as well as interiors.
“Hydrostatic pressure from moisture is powerful and has the strength to push any coatings off the surface,” Ashleigh says. “It is common to fix one area of concern only for the moisture to make a new channel and make its way out in a new spot.” Resene HydraBlock can be applied to concrete areas where there is hydrostatic pressure and can help to control rising damp and efflorescence.
If you have visible mould or mildew on your surfaces give them a good clean to wash off any loose flaked paint and treat the area with one part Resene Moss & Mould Killer diluted in five parts water. Leave the product for 48 hours then thoroughly clean again before leaving to fully dry. Once dry, you can proceed with applying a good primer like Resene Sureseal and then topcoat.
Wash down silt or mud-covered concrete surfaces with Resene Paint Prep and Housewash for a thorough clean.
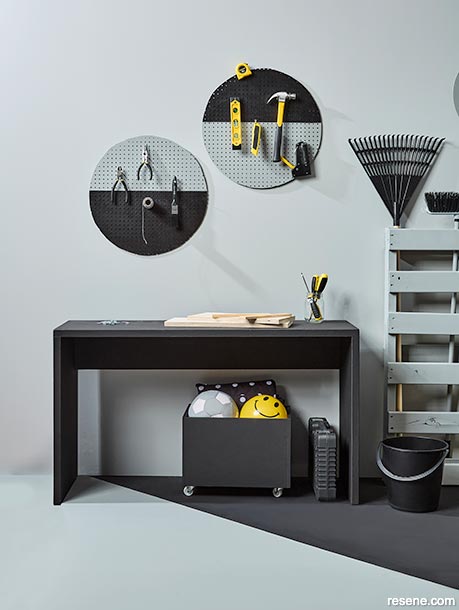
This shed wall is painted in Resene Silver Chalice and the floor is Resene Stack and Resene Nero. Pallet rack in Resene Stack, bench and box on wheels in Resene Nero and pegboard holders in Resene Nero and Resene Stack. Rake and balls from The Warehouse, Project by Vanessa Nouwens, image by Bryce Carleton.

Before decorating your room check for signs of damp such as lifting wallpaper or stained areas on the wall.
Wall feature in Resene Wallpaper Collection 37990-3 with adjacent wall painted in Resene Bitter. Floor in Resene Moon Mist, coffee table in Resene Bud, cabinet in Resene Aspiring, pendant light and plant pot in Resene Hemlock and small pot in Resene Cape Palliser. Linen cushion from H&M Home. Project by Vanessa Nouwens, image by Bryce Carleton.
“Treating and killing mould is a must, rather than just wiping it away or water blasting. By the time the naked eye can see mould it has already taken hold and it does need to be killed.”
As well as coming from leaks, mould can be caused by excess moisture in the air inside your house. You’ll often see it as condensation on the windows on a cool morning. This moisture can come from a range of things like cooking, drying laundry inside, showering without an extractor fan and simply breathing.
Good ventilation is your best friend to combat moisture inside, Ashleigh says. Open windows where you can to move moisture around and out, or use a dehumidifier to reduce moisture levels.
Top tip: Water marks or white streaks on new paint, known as surfactant leaching, are generally caused by high humidity or condensation on freshly applied waterborne paints. It is most common in bathrooms. Clean the surface as soon as possible with a mild detergent and warm water. The problem may recur until all the leachable material is removed.
For more serious water damage stemming from major leaks, such as a broken pipe or flood damage, it’s important to allow your home to fully dry out before undertaking any redecorating.
If you’re making an insurance claim you should also take photos of the damage and contact your insurance company as soon as possible – and before starting any repair work.
Be sure to kill off any mould rather than just clean it to prevent it returning and spreading.
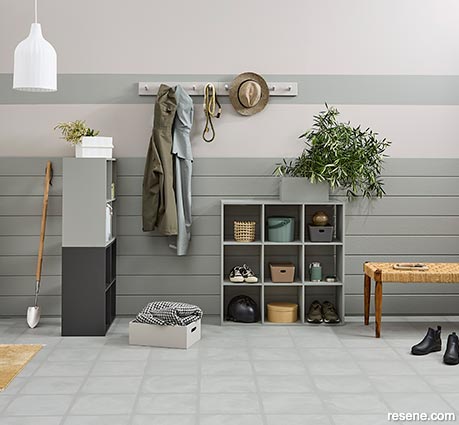
The floor of this mudroom is Resene Tino Pai with a topcoat in Resene Foundation mixed with Resene FX Paint Effects Medium. Wall and lighter cubbies painted in Resene Stepping Stone, stripe and lower boards in Resene Tino Pai, coat rack in Resene Stepping Stone, dark cubby in Resene Boris and single boxes in Resene Tino Pai and Resene Stepping Stone. Project by Kate Alexander, image by Bryce Carleton.
It might be tempting to get things repainted as soon as possible, Ashleigh says, but starting too soon can also cause future problems like mould or timber decay.
In cases of more serious flooding, it’s also important to remember floodwaters can be contaminated so please seek advice from local officials on how and when to proceed.
Once you have the all-clear, the best place to start on the exterior is with a deep clean using Resene Paint Prep and Housewash. Be sure to remove any mud or silt from wall cavities and leave the house to dry thoroughly.
Scrape or sand away any flaking paint and repair any cracks. Once the repaired areas have been sanded, you can proceed with priming then topcoating the walls.
Clean flat surfaces such as concrete driveways or timber decks with Resene Moss & Mould Killer. Wash down concrete surfaces with Resene Paint Prep and Housewash and use Resene Timber and Deck Wash for the deck, followed by your choice of colour in Resene Woodsman stain or Resene Woodsman Decking Oil Stain, or for a lightly oiled look use Resene Furniture and Decking Oil.
If you have interior flood damage, you’ll need to check your plasterboard, skirtings and architraves. They may need to be replaced. It will be easier to assess the full extent of damage once everything is fully dry.
Clean painted surfaces in need of repair thoroughly to remove dirt, debris and marks. It’s also a good idea to clean those surfaces with Resene Moss & Mould to prevent later growth of mildew or mould.
Remove any flaking paint using a scraper and fill all cracks with either sealant or plaster depending on the size of the cracks. Sand glossy surfaces to provide a grip for the paint finish.
From there apply a primer or sealer over the entire area to be painted and apply two coats of your chosen Resene topcoat colour.
Top tip: Consider asking your local Resene ColorShop staff to add Resene MoulDefender added to your Resene topcoat to further inhibit future moss and mould growth.


July 16, 2023
Resene Paint Experts can help you with specific advice with your project. Simply take photos into your local Resene ColorShop or use the free online Ask a Resene Paint Expert service.
Book a colour consult | Ask a Colour Expert | Ask a Paint Expert
Resene's decorating blog
Paint your home beautiful! Discover the latest decorating trends, tips and colour news.
![]()
Previous «
Small colour, big impact
![]()
Blog home
View the latest trends, tips and news
![]()
» Next
Why does my room look wrong?
![]() Get inspired ! Subscribe
Get inspired ! Subscribe ![]() Get saving ! Apply for a DIY card
Get saving ! Apply for a DIY card
![]()
Can't find what you're looking for? Ask us!
Company profile | Terms | Privacy policy | Quality and environmental policy | Health and safety policy
Colours shown on this website are a representation only. Please refer to the actual paint or product sample. Resene colour charts, testpots and samples are available for ordering online. See measurements/conversions for more details on how electronic colour values are achieved.
What's new | Specifiers | Painters | DIYers | Artists | Kids | Sitemap | Home | TOP ⇧