Resene Popular Paint Systems – painting interior walls: training notes
This web page is an edited version of the Resene Best System Selling training notes provided to Resene staff and is provided to enable you to gain a greater understanding of the substrates and paint systems you may encounter in your decorating project. It is impossible to cover all decorating scenarios in a single document, so if you are in doubt about any aspect of your project please contact Resene for assistance.
Select the wall surface you will be painting from the list below to view how to prepare and finish the surface.
Preparation flowcharts
Room flowcharts
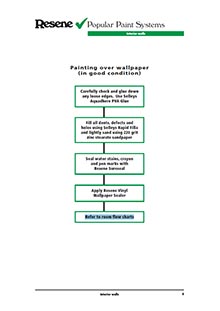
Note: Refer to the PDF flowchart for a visual of the steps below:
Carefully check and glue down any loose edges. Use Selleys Aquadhere PVA Glue
Fill all dents, defects and holes using Selleys Rapid Filla and lightly sand using 220 grit zinc stearate sandpaper
Seal water stains, crayon and pen marks with Resene Sureseal
Refer to room flow charts
Wallpaper in good condition is easy to paint but once painted, the wallpaper will be more difficult to remove.
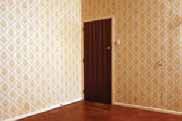
Some vinyl wallpapers will allow migration of plasticisers into the paint film and this will result in the paint remaining slightly sticky or tacky. Typically if a testpot is used during the colour selection process and it doesn’t get tacky then our other coatings will also be fine. However it can take upwards of three weeks for this tackiness to become apparent.
Use Resene Vinyl Wallpaper Sealer over solid and paperbacked vinyl wallpapers.
Very occasionally you may have an otherwise sound paper with a metallic printed pattern. This will need sealing with Resene Sureseal or Resene Enamel Undercoat prior to painting.
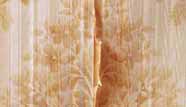
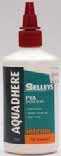
Some edges may need sticking down and this is best done with Selleys Aquadhere PVA glue applied to both faces, left for at least 20 minutes and firmly pressed or rolled flat.
Small bubbles, often only apparent after the first coat of paint, may be cross cut with a sharp blade and the edges glued down.
When stopping holes in wallpaper press in the surrounds with the handle of a putty knife prior to stopping the hole, otherwise you may be left with a lump on the surface.
You may find the junction of the skirting and wall difficult to cut in because papers usually slightly overlay the junction and a relatively ragged edge results. Often it is best to paint the skirting board and the wall the same colour for the most even finish.
 Get inspired ! Subscribe Get saving ! Apply for a DIY card

Can't find what you're looking for? Ask us!


Company profile | Terms | Privacy policy | Quality and environmental policy | Health and safety policy
Colours shown on this website are a representation only. Please refer to the actual paint or product sample. Resene colour charts, testpots and samples are available for ordering online. See measurements/conversions for more details on how electronic colour values are achieved.
What's new | Specifiers | Painters | DIYers | Artists | Kids | Sitemap | Home | TOP ⇧