From the Resene decorating blog
Wallpaper has had a huge revival in recent years, and with good reason.
It’s a simple, fast and effective way to add stylish colour and design to any room. Whether it’s a muralled feature wall, accent notes added to upcycled furniture or a fully papered room, a design from the Resene Wallpaper Collection can transform a space to meet any theme or design aesthetic you’re aspiring to.
If you’ve never wallpapered before and have been deterred by thinking it might be too tricky, technical or time-consuming, here is a step-by-step guide to wallpapering for beginners to get you started.
This is one of the most common questions home decorators have when it comes to wallpapering. To gauge how many rolls you will need measure the floor to ceiling height of the room adding about 5cm top and bottom for trimming. Then measure length right around the room, including doors and windows. Take these two measurements into your local Resene ColorShop where staff will be able to calculate how many rolls you need, or you can have a look at the online chart on the Resene website.
Some patterned papers may require more to allow you to match the design at the seams between drops and as a rule, we recommend getting an extra roll as a spare to allow for any errors, or larger wear and tear repairs.
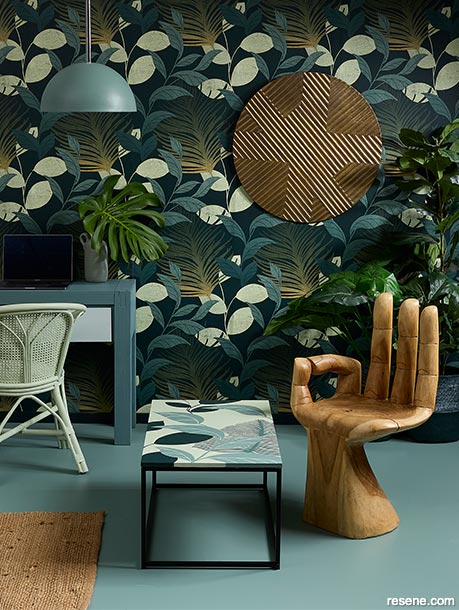
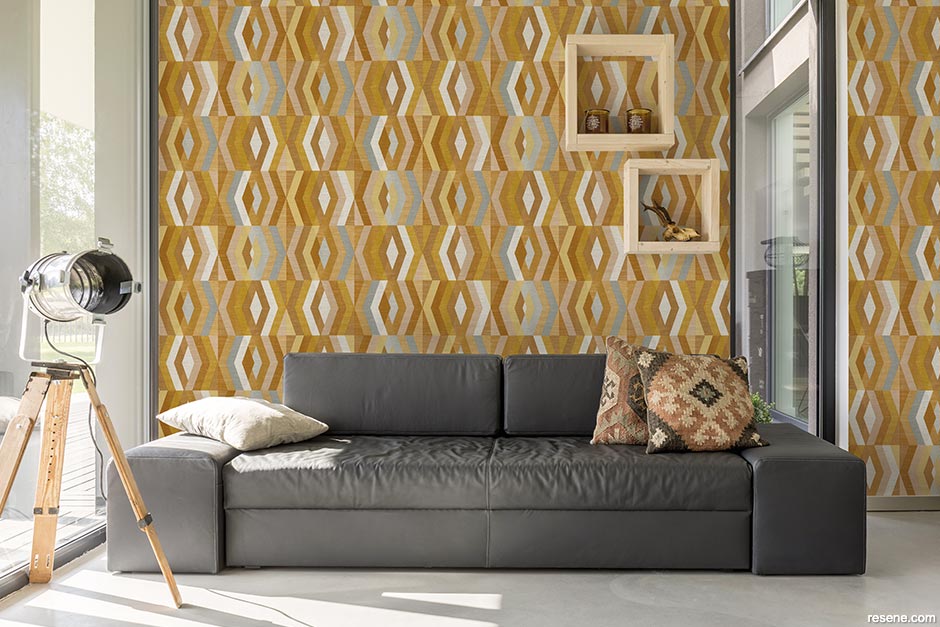
Clever use of accessories gives this wallpapered wall a dramatic 3D quality.
The wallpaper is Resene Wallpaper Collection 47404, paired with a floor painted in Resene Thor. The coffee table is painted in a reverse pattern to match the paper with a Resene Pale Leaf background with Resene Thor vine leaves, a Resene Swamp large simple leaf and a Resene Green Meets Blue palm leaf. The hand chair is stained in Resene Colorwood Driftwood and the pendant lamp is Resene Thor. Hand chair from Bali and Teak. Project by Megan Harrison-Turner, image by Bryce Carleton.
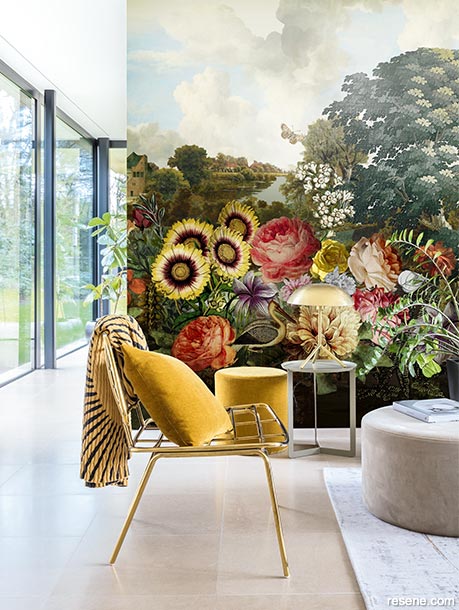
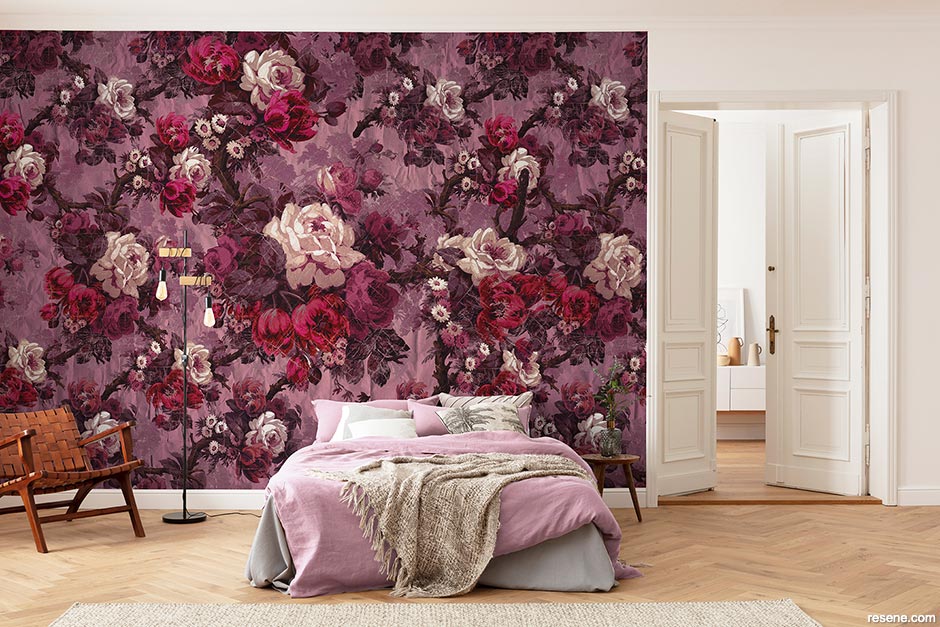
Modern wallpapers can be the eye-catching artwork you’ve been looking for in your home.
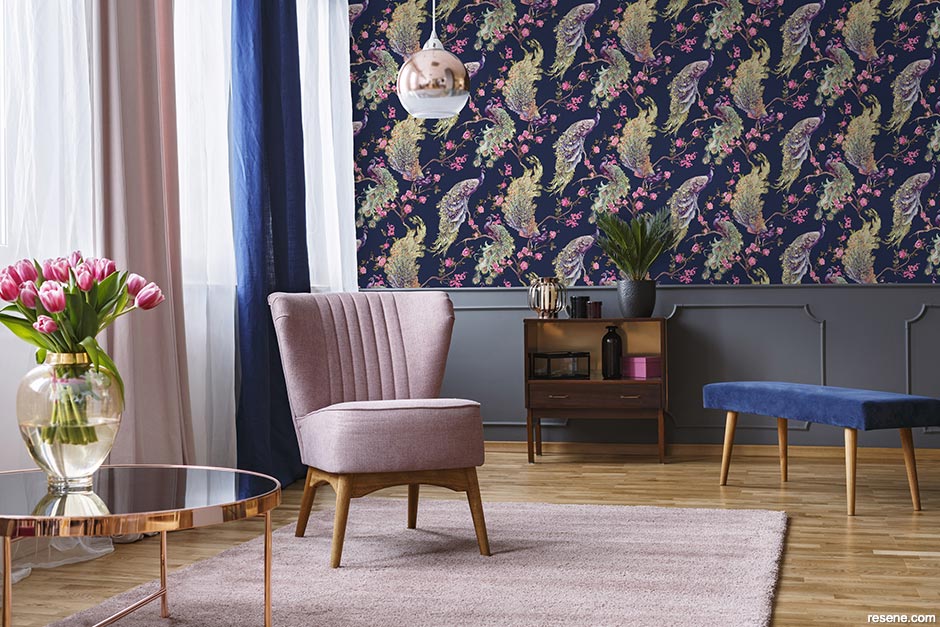
The bold and vibrant flowers in Resene Wallpaper Collection DGKEN202 evoke the English gardens once designed by British artist William Kent. Complement with a ceiling painted in Resene White and a floor finished in Resene Concrete Wax to let this feature wallpaper take centre stage.
Just as with painting, the quality of your wallpaper finish will depend on spending some time and effort preparing the surface.
If you’re covering painted surfaces, particularly enamel paint surfaces, wash the surface first and wipe clean. When dry, give the walls a light sand and wipe down again to remove dust.
If you’re papering over new plasterboard, just sand over any plastered areas then wipe down to remove the sanding dusts. Then seal the wall.
If you’re wallpapering over walls that have previously been wallpapered, your first step is to strip off all that old wallpaper. Wet the old paper with a wallpaper remover and leave to soak in. Then lift the old wallpaper, gently using a scraper where necessary. Leave the newly bare walls to dry then sand and dust down.
Before papering always check your walls for any dents or gaps that need filling, or areas of mould that need treating.
As a final step before wallpapering it’s also a good idea to coat your walls with size, which is a solution that acts as a buffer between the paper and walls. It can slow down the adhesion process so you have more time to get your placement just right, while also improving final adhesion. It can also help prevent moisture seeping into the paper.
Top tip: If you’re repainting skirtings and ceilings of your room, do that before you wallpaper so you don’t get paint splashes on your fancy new walls.
Measure your wall from skirting to ceiling adding 5cm at each end to allow for trimming and moving the paper to match patterns.
Before you hang your first strip you’ll need to mark the wall with a plumbline, which acts as a guide to ensure you hang the first piece straight. That first drop will then be the template from which you match and hang the rest of that wallpaper.
To mark the plumbline, measure the width of your wallpaper minus 15mm out from the corner in the direction you will be working. Mark the plumbline about every 300mm down the wall. When you hang your first drop of wallpaper ensure the edge sits exactly on that line. You can then allow a 15mm overlap around the corner.
When you move on to a new wall, repeat the process and mark a new vertical line.
Top tip: Start in a corner near the main source of light, such as a window and work away from that. If you are wallpapering a large mural, it’s often best to start in the middle of the wall to get the focal point of the mural positioned correctly.
Different brands and types of wallpaper will have different instructions for how they need to be soaked, pasted and hung. Some wallpapers are pre-pasted, others are unpasted or may require the wall to be pasted rather than the paper.
Both pre-pasted and unpasted wallpapers need to be soaked in lukewarm water in your wallpaper trough before hanging. This allows the paper fibres to relax and expand so the paste is most effective. Use the instructions on the wrapper for a guide to how long the paper should soak – and don’t be tempted to rush it!
Hang your paper from the top down, and smoothing it out gently but firmly as you go from the centre of the strip to the edges to push out air bubbles.
Work slowly, but steadily and if the paper creases or wrinkles, gently lift the paper past the crease and re-smooth it.
Top tip: If you’re matching patterns, hanging your strips consecutively as they come off the roll will make it easier to match, and should mean less waste.
When wallpapering around corners, use two pieces of wallpaper that overlap slightly for a tidy finish. Measure the distance between the edge of your previous strip and the corner, and add 15mm. Measure the full length drop of wallpaper to that width and cut. Paste that sheet to the wall, with a 15mm overlap around the corner.
Measure the trimmed piece of wallpaper that is left and mark out a plumbline on the new wall. Hang the second, trimmed piece from the plumbline, with the edge fitting into the corner, on top of the 15mm overlap.
To get around windows, and doors hang a full strip so it initially overlaps the feature you’ll need to cut out, and smooth it in place as much as you can. Trim the paper diagonally into the corners and remove any excess with a straight edge blade.
Top tip: Remember to remove power point and light switch covers before you start wallpapering, and keep safe by turning off the power at the mains before working around electrical fittings.
For light switches and power points hang the paper so it covers the unit. Mark the four corners and edges of the switch or socket cover then cut out the shape, from the centre outwards. Neatly smooth down the paper around the edges of the socket.
Trim excess wallpaper at the ceiling and skirting as you go, using a flat edge and a sharp blade, and wipe off any excess paste.
February 13, 2022
View the video on the Resene website, to help you get started. Get a taste of the new collections online and view the full collection at your local Resene ColorShop. Wallpapers are always best viewed in person with the physical wallpaper sample books to get a full appreciation of the design, colour and texture.
Book a colour consult | Ask a Colour Expert | Ask a Paint Expert
Resene's decorating blog
Paint your home beautiful! Discover the latest decorating trends, tips and colour news.
![]()
Previous «
Summer colours to revitalise your interior
![]()
Blog home
View the latest trends, tips and news
![]()
» Next
Be inspired by global influences
![]() Get inspired ! Subscribe
Get inspired ! Subscribe ![]() Get saving ! Apply for a DIY card
Get saving ! Apply for a DIY card
![]()
Can't find what you're looking for? Ask us!
Company profile | Terms | Privacy policy | Quality and environmental policy | Health and safety policy
Colours shown on this website are a representation only. Please refer to the actual paint or product sample. Resene colour charts, testpots and samples are available for ordering online. See measurements/conversions for more details on how electronic colour values are achieved.
What's new | Specifiers | Painters | DIYers | Artists | Kids | Sitemap | Home | TOP ⇧