Close Give Feedback
Resene Paints - home page
Facebook Pinterest Instagram YouTube

Green seed drawers

Mark Rayner shows you how to go green with this nifty seed storage unit constructed mostly from recycled materials.

You will need: An old wooden drawer (disassembled), offcuts of 12mm plywood, offcuts of 10mm x 10mm timber (we used an old garden stake), panel pins, drill and drill-bits, hammer, saw, sandpaper, set square, paintbrush, pencil, ruler, PVA glue. Resene Quick Dry and Resene Lustacryl tinted to Resene Howzat.

Top tip: There should be sufficient clearance to ensure drawers open and close smoothly but if they are a little stiff, sand the sides and rub candlewax along the runners and edges of the plywood unit.

Another idea: Create a small storage box for seeds using recycled wood and hinges from an old cupboard and finish off with Resene Colorwood Whitewash.
As seen in kiwigardener

Step 1 how to make a seed storage unit

Step 1
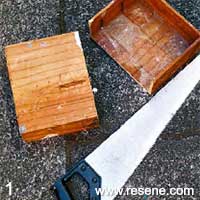
Measure, mark and cut the old wooden box in half, to make the insides of the two seed drawers.

Step 2 how to make a seed storage unit

Step 2
Place one seed drawer on top of the other (as they will fit inside the unit). Measure the width plus 4mm (measurement 'A'), the depth (measurement 'B') and the height plus 45mm (measurement 'C'). Cut two pieces of plywood measuring 'A' x 'B' and two pieces of plywood measuring 'B' x 'C'.

Step 3 how to make a seed storage unit

Step 3
Smooth any rough edges on the plywood and the sawn box with sandpaper.

Step 4 how to make a seed storage unit

Step 4
Assemble the four pieces of plywood, as shown, attaching along each length 'B'. Fix with PVA glue and panel pins (drill pilot holes first to prevent plywood from splitting). Use the set square to ensure corners are at right angles.

Step 5 how to make a seed storage unit

Step 5
Measure, mark and cut two drawer runners from the 10mm x 10mm timber. Place one of the drawers inside the plywood unit and draw a pencil line along each side. Using this pencil line as a guide, fix the runners in place with PVA glue. Allow glue to dry.
Step 6 how to make a seed storage unit

Step 6
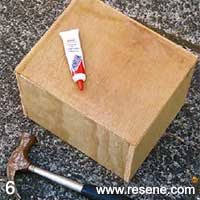
Using the base of the old wooden drawer, measure, mark and cut a piece to fit the back of the plywood box. Smooth rough edges with sandpaper and fix into position with PVA glue and panel pins, again, drill pilot holes first.
Step 7 how to make a seed storage unit

Step 7
Measure, mark and cut two thin pieces of plywood, or offcuts of 10mm x 10mm timber, to form the base supports of the seed box. Fix these with PVA and allow glue to dry.

Step 8 how to make a seed storage unit

Step 8
Slide drawers into position and then measure, mark and cut two drawer fronts from the front or sides of the old wooden drawer. Smooth rough edges with sandpaper and then glue drawers to drawer fronts with a generous amount of PVA, as shown. Allow glue to firm up.

Step 9 how to make a seed storage unit

Step 9
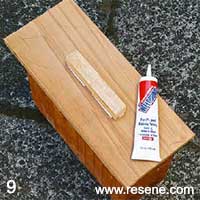
Cut two handles from offcuts of plywood or 10mm x 10mm timber and smooth rough edges with sandpaper. Carefully turn drawers up the other way and fix a handle to the front of each drawer with PVA. Allow glue to dry overnight.

Step 10 how to make a seed storage unit

Step 10
Paint the front and insides of each drawer and the outside and front edge of the plywood unit with one coat of Resene Quick Dry. Allow two hours to dry.

Step 11 how to make a seed storage unit

Step 11
Paint the outside and front edge of the plywood unit with two coats of Resene Howzat, allowing two hours for each coat to dry.

Step 12 how to make a seed storage unit

Step 12
Paint the inside and front of each drawer with two coats of Resene Howzat, allowing two hours for each coat to dry. Slide drawers into position.

View more projects


Order online now:
Testpots | Paints | Primers and Sealers | Stains | Clears | Accessories

Get inspired Get inspired ! Subscribe      Get saving Get saving ! Apply for a DIY card

Resene Paints Ltd

Can't find what you're looking for? Ask us!

Resene Paints Ltd   – www.resene.com

Follow us on Facebook Follow us on Pinterest Follow us on Instagram Follow us on YouTube
Videos on how to paint and stain your house
 

Welcome to our World of Colour!™
Colours shown on this website are a representation only. Please refer to the actual paint or product sample. Resene colour charts, testpots and samples are available for ordering online.   See measurements/conversions for more details on how electronic colour values are achieved.

What's new | Specifiers | Painters | DIYers | Artists | Kids | Sitemap | Home | TOP ⇧