Close Give Feedback
Resene Paints - home page
Facebook Pinterest Instagram YouTube

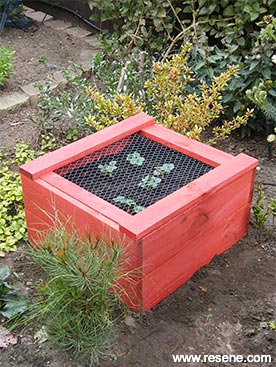
Strawberry planter

Keep the birds off with this protective strawberry planter – another nifty project from Resene.

Ways with wood with Mark Rayner – 45

Difficulty level: Challenging

You will need: six 1.2m treated fence palings, two stainless steel hinges and screws, 50mm galvanised nails, chicken wire, clamps, galvanised staples, hammer, paintbrush, paint stirrer, pencil, pva glue (exterior), sandpaper, saw, screwdriver, set square, tape measure and tin snips. Resene Waterborne Woodsman Penetrating Oil Stain tinted to Resene Totem Pole.

To get the look: Fill the planter with good quality potting mix and plant up with six or seven strawberry plants.

Other ideas: For a cool blue effect stain the planter with Resene Waterborne Woodsman tinted to Resene Pickled Bluewood.
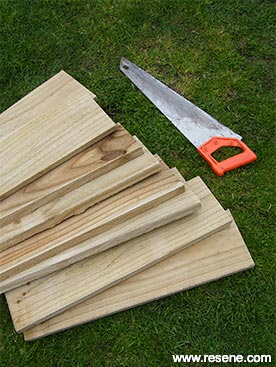
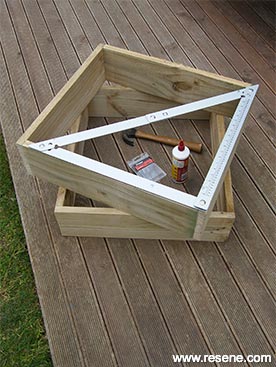
Step 1 how to build a strawberry planter
Step one
Measure, mark and cut four of the fence palings in half, as shown. Smooth any rough edges with sandpaper.
Step 2
Step two
On a flat surface, assemble to make two identical frames, as shown. Fix at each corner with galvanised nails and PVA glue. Ensure corners are at right angles using a set square. Allow glue to dry.
Step 3
Step three
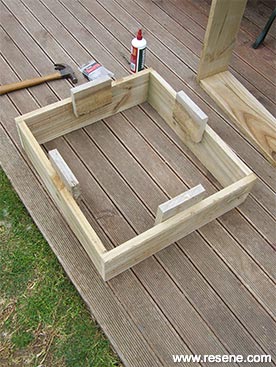
Measure and cut four 150mm lengths from one of the remaining fence palings and fix to one of the frames, as shown, using galvanised nails and PVA glue.
Step 4
Step four
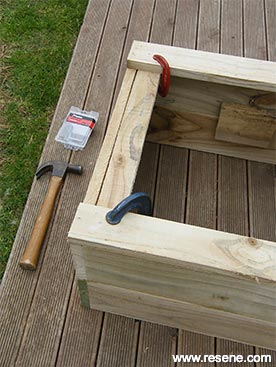
Stack one frame on top of the other. Cut two 70mm strips of fence paling to fit across the front and back of the box and two 50mm strips to fit along each side, smoothing any rough edges with sandpaper. Hold together with clamps, as shown, and fix together with nails and PVA to form the lid.
Step 5
Step five
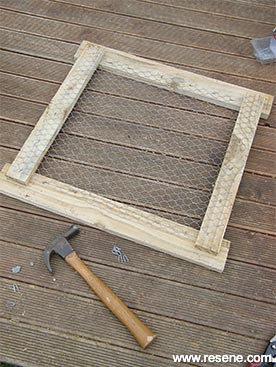
Measure and cut a piece of chicken wire to fit the lid. Fix to the underside with galvanised staples.
Step 6
Step six
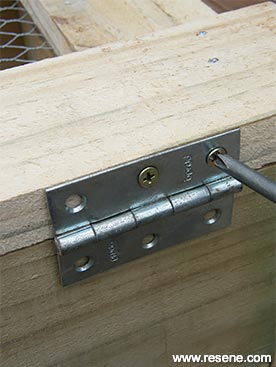
Place the lid back on top of the box and fix two hinges along the back edge using screws, as shown.
Step 7
Step seven
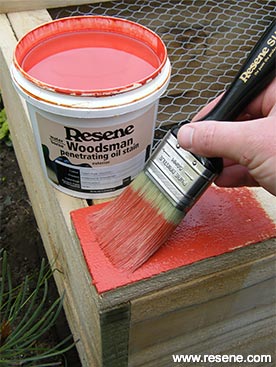
Apply two coats of Resene Totem Pole to the planter box, allowing two hours for each coat to dry.
Step 8
Step eight
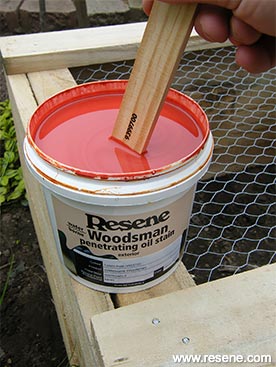
Step seven Stir the Resene Waterborne Woodsman thoroughly with a paint stirrer. Step eight

Other projects you might like to try

Plastic planter
Plastic planter

Weekend DIY
Paint a raised bed
Raised beds

Weekend DIY
Make a mini glasshouse from a window and fene palings
Mini glasshouse

Ways with wood
Make an outside coffee table
Coffee table

Ways with wood
Recycled plant shelf

Weekend Gardener
Paint a terracotta pot
Winter planter

Weekend Gardener

View more projects


Order online now:
Testpots | Paints | Primers and Sealers | Stains | Clears | Accessories

Get inspired Get inspired ! Subscribe      Get saving Get saving ! Apply for a DIY card

Resene Paints Ltd

Can't find what you're looking for? Ask us!

Resene Paints Ltd   – www.resene.com

Follow us on Facebook Follow us on Pinterest Follow us on Instagram Follow us on YouTube
Videos on how to paint and stain your house
 

Welcome to our World of Colour!™
Colours shown on this website are a representation only. Please refer to the actual paint or product sample. Resene colour charts, testpots and samples are available for ordering online.   See measurements/conversions for more details on how electronic colour values are achieved.

What's new | Specifiers | Painters | DIYers | Artists | Kids | Sitemap | Home | TOP ⇧