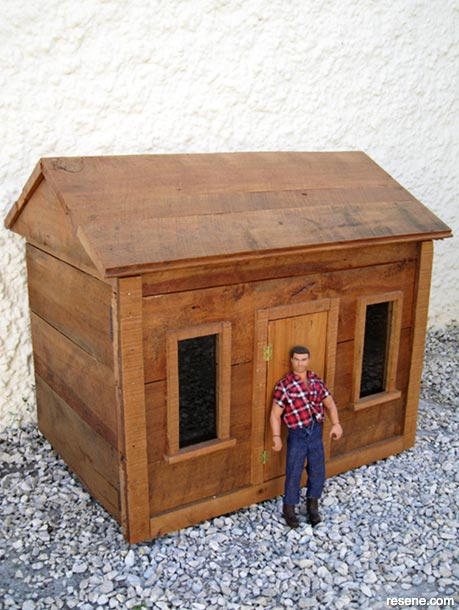
Use reclaimed wood and a bit of Resene know-how to create this fabulous toy cabin, perfect for indoor play or outdoors on a fine day.
Resene Toys and Games with Mark Rayner - Project 40
Difficulty level: Challenging
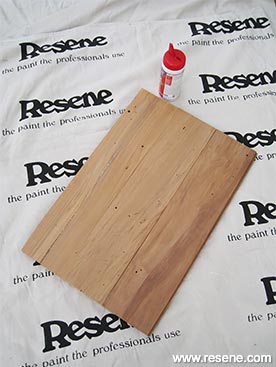
Timber: 130mm x 20mm reclaimed tongue and groove timber cut and assembled to the following sizes:
10mm reclaimed wood cut to the following dimensions:
Other materials:
Tools:
To get the look: Mark painted the background wall with Resene AquaShield tinted to Resene Pipi.
Other ideas: For a darker effect, stain the cabin with Resene Colorwood tinted to Resene Walnut before applying the Resene Aquaclear.
Top tip: Store the cabin indoors to keep it looking good for longer. If the toy cabin will only be used outdoors, use Resene Waterborne Woodsman in place of Resene Colorwood.
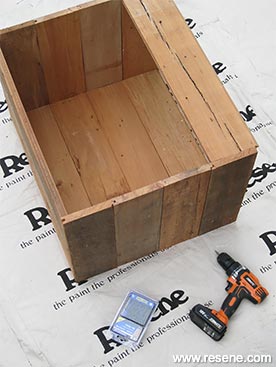
 Step one
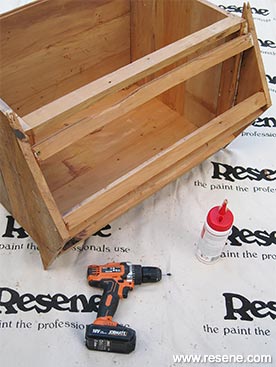
Measure, mark and cut the timber to the measurements listed above and then assemble and glue the four wall panels and floor. Allow the glue to dry and then sand any rough edges.
 Step two
Attach the two side walls and the back wall to the floor and fit the front roof support into position, as shown. Fix with wood glue and 45mm screws, drilling 3mm pilot holes first. Allow glue to dry.
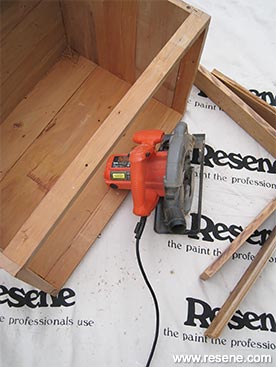 Step three
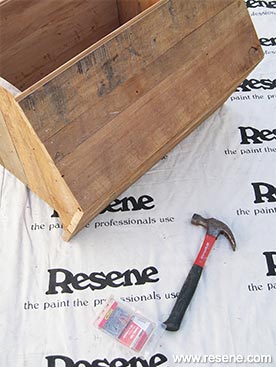
Measure, mark and cut approximately 80mm from the top edge of the structure, leaving the walls at 440mm high. Sand any rough edges.
 Step four
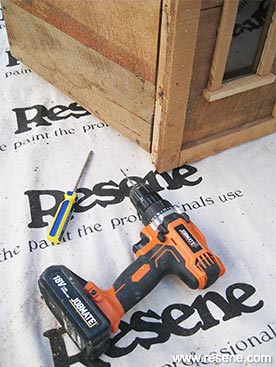
Attach the two roof eaves to the outside of the side walls (overlapping by approximately 20mm) and then attach the four roof supports, as shown. Fix all with wood glue and 35mm and 45mm screws, drilling 3mm pilot holes first. Allow wood to dry.
 Step five
Attach the roof into position, fixing with wood glue and panel pins, drilling 1.5mm pilot holes first. Attach the two base supports to the underside of the floor, fixing with wood glue and 35mm screws, drilling 3mm pilot holes first. Allow glue to dry.
 Step six
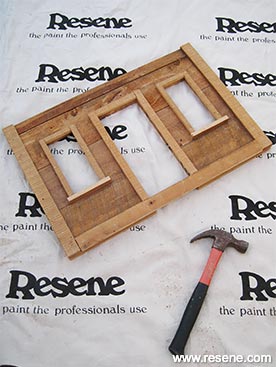
Using the jigsaw, cut a 133mm x 335mm opening for the door and two 95mm x 205mm holes for the windows (drill a 10mm hole get the jigsaw cut started). Sand rough edges and then fit all the trims listed above to the front wall, fixing with wood glue and panel pins, drilling 1.5mm pilot holes first.
 Step seven
Glue the door handle, inner doorstep and windowpanes into position and allow the glue to dry. Attach the door into position using 25mm hinges and fix the front wall onto the cabin using the 50mm hinges.
 Step eight
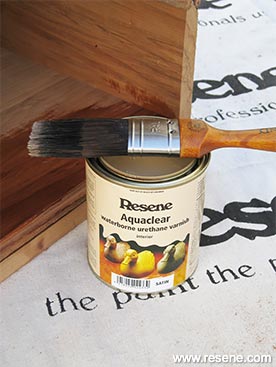
Apply three coats of Resene Aquaclear Satin to the toy cabin, allowing two hours for each coat to dry.
![]()
Birthday pot
Kids art projects
![]()
Stencil a card
Kids art projects
![]()
Crafty frog box
Kids art projects
![]()
Happy cat plant pot
Kids garden projects
![]()
Rain stick
Toys and games
![]()
Cube puzzle
Toys and games
![]() Get inspired ! Subscribe
Get inspired ! Subscribe ![]() Get saving ! Apply for a DIY card
Get saving ! Apply for a DIY card
![]()
Can't find what you're looking for? Ask us!
Company profile | Terms | Privacy policy | Quality and environmental policy | Health and safety policy
Colours shown on this website are a representation only. Please refer to the actual paint or product sample. Resene colour charts, testpots and samples are available for ordering online. See measurements/conversions for more details on how electronic colour values are achieved.
What's new | Specifiers | Painters | DIYers | Artists | Kids | Sitemap | Home | TOP ⇧

