DIY projects from Your Home and Garden
Walls looking a bit bare? Take a leaf out of Nikki Kettle’s colourful book and paint a show-stopping mural.
Our resident DIY expert, Nikki Kettle, will be sharing her latest projects and DIY tips with us from her Greytown home. But first, get to know this wonder mum.
Where does your background in building/DIY come from? When I left school, I didn’t want to go to university. I didn’t want to go somewhere similar to school and I didn’t want to be in debt, so I did a building apprenticeship. My mum was a race-car driver, so going into a male-heavy industry never worried my parents. The DIY side of things (not just building) came when I was 21 and bought my first home. Basically, it needed everything fixed, but because I was broke, I started doing what I could.
What’s the favourite project you’ve done so far? Rearranging the kitchen and adding a walk-in pantry to our home. I feel like we have made such an impact without having to spend a lot of money. You can see it online at Your home and garden.
What tools would you recommend to people who are starting their DIY journey? You will need basic hand tools like a pencil, measuring tape and hammer. Also a good drill and something to cut with, like a small skill saw.
Before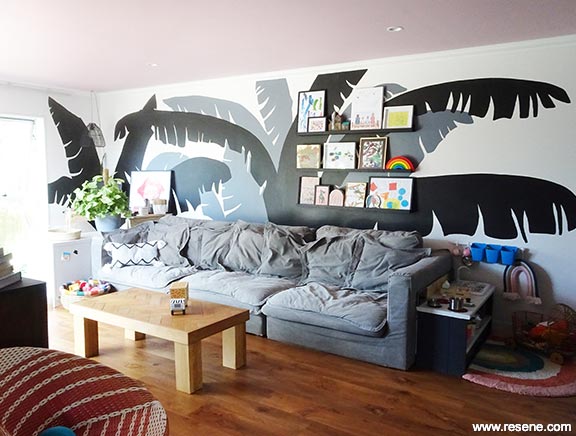
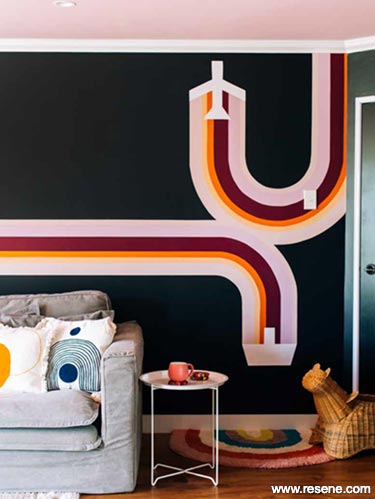
After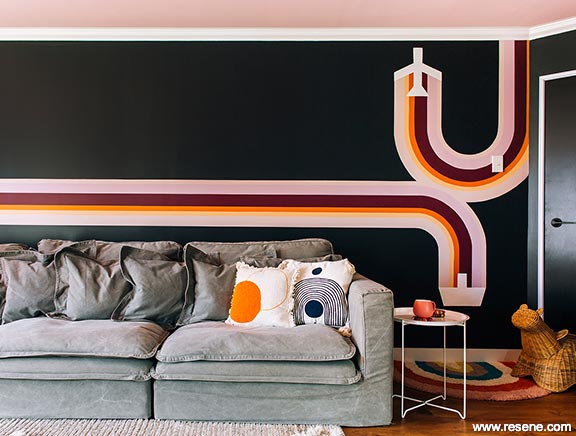
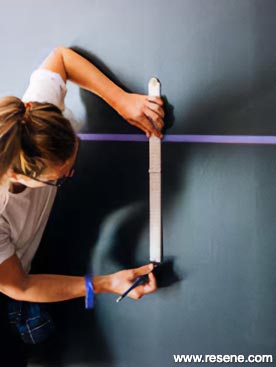
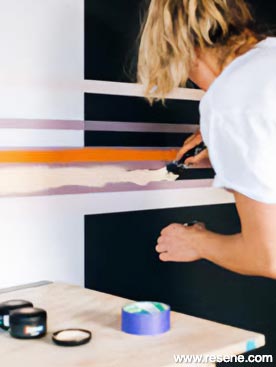
Start your mural by measuring and marking the straight lines on the wall. Measure down from the ceiling to get them as straight as you can. Or, use a level or laser. Mark the lines with a pencil.
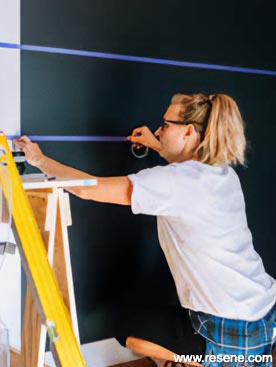
When you’re satisfied with your first line, run washi or low-tack tape along it. To achieve a really clean, straight line, make sure your surface is nice and dry, press down hard and check that there are no gaps or bubbles.
From your first line of tape, use a ruler to measure and mark the bottom line of your mural. When you’re sure it’s straight, mark this line with tape.
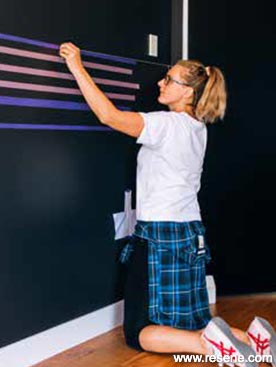
Repeat this process for the other stripes.
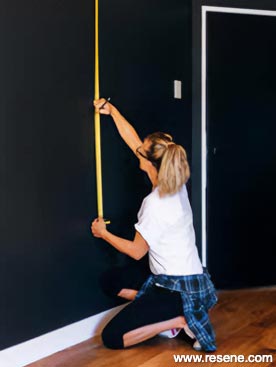
Step 1
Step 2
Step 3
Step 4
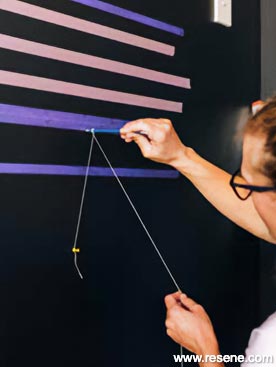
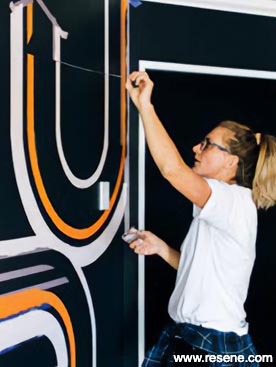
To the right-hand side of the mural, you’ll have two curves. To achieve a perfect curve, attach a piece of string to the wall with a pin roughly where the middle of your curve will be, then wrap the string around a pencil (keeping tension on the end). Start sweeping your string and pencil around the pin to form a curve. You may have to play around with the pin position and the length of your string. Once you’ve got your first curve marked out, simply adjust the position of the pencil within the string and repeat the process to form an outer or inner curve.
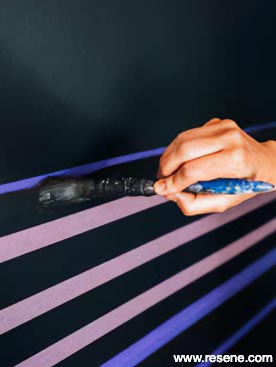
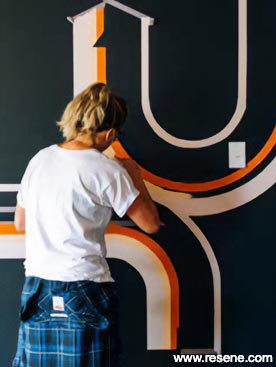
Before painting the mural, first paint along the tape edge with the background colour (I used Resene Double Foundry). This helps to seal the tape and will give a cleaner line.
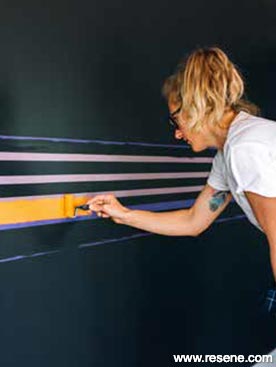
Use a mini roller to paint the first stripe of colour of the mural.
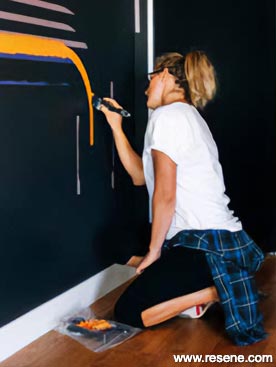
When it comes to painting the curve, switch to a paint brush and do it freehand. A good curve requires a reasonably thick brush, I used a 50mm. Have the brush well dampened with paint, but not dripping, then apply it to the wall with reasonable momentum. The slower you go, the harder it will be to keep a perfect arch.
Step 5
Step 6
Step 7
Step 8
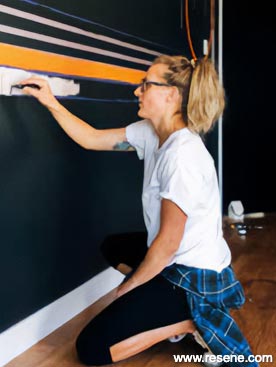
Allow to dry, then repeat this process for every second stripe.
Peel the tape off when the paint isn’t completely dry so it doesn’t flake everywhere. Allow the paint to dry completely.
When the paint is dry, tape over the painted stripes to allow you to paint the alternate lines.
Repeat this process with all the stripes in the mural until it is complete.
Step 9
Step 10
Step 11
Step 12
Start the mural with the lighter Resene colours. It is harder to paint over the dark colours if you accidentally paint over the lines.
Instead of a brush you could try a mini roller to make light work of the painting. Resene’s Testpot Roller Kit, $5, is the ideal size for its testpots. Resene recommends lightly dampening the roller sleeve before use.
Two coats of Resene paint will give a rich coverage.
For an extra effect you can use Resene FX Magnetic Magic under the mural to hang family photos and move them around without damaging the wall.
Clean paint brushes, rollers and trays in the garden or lawn, not the sink. When you are taking a break wrap your brush in cling wrap – it will save you washing up and keep the paint fresh so you can get straight back into painting.
Resene colour palette
Berry reds, soft pinks and tangy oranges pack a punch against a a statement black wall
Project: Nikki Kettle. Photography: Anna Briggs. June 2021.
▸ Download a PDF of this article
Projects from Your Home and Garden
Our resident DIY expert, Nikki Kettle, shares the latest tips and DIY projects.
![]() Get inspired ! Subscribe
Get inspired ! Subscribe ![]() Get saving ! Apply for a DIY card
Get saving ! Apply for a DIY card
![]()
Can't find what you're looking for? Ask us!
Company profile | Terms | Privacy policy | Quality and environmental policy | Health and safety policy
Colours shown on this website are a representation only. Please refer to the actual paint or product sample. Resene colour charts, testpots and samples are available for ordering online. See measurements/conversions for more details on how electronic colour values are achieved.
What's new | Specifiers | Painters | DIYers | Artists | Kids | Sitemap | Home | TOP ⇧