Craft with Resene, from the Australian Women's Weekly
From pine cones to tree-shaped centrepieces, have fun creating your own Christmas decor with Resene’s festive, on-trend colour combinations.

Pine cone wreath – what you'll need:
Plenty of pine cones in various sizes, vinegar (optional, for cleaning), Resene testpot paints – we used: Resene Fountain Blue, Resene Vista Blue, Resene Gelato, Resene Caper, Resene Clover, Resene Code Red, Resene Comfort Zone, Resene White, Resene testpot paintbrush (it’s handy to have two), faux berries, cardboard, for drying, florist wire - 22 gauge, craft pliers/cutters, metal wire wreath frame.
Tree cone – what you'll need:
Thin card, scissors, sticky tape, quick dry craft glue, Resene testpot paints – we used: Resene Gelato, Resene Fountain Blue, Resene Comfort Zone, Resene White (for details), Resene Bullion (Gold).
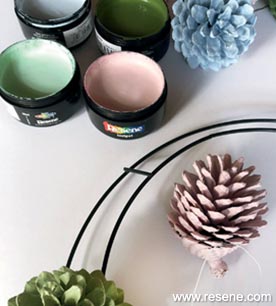
Remove any debris or pine needles stuck to the pine cones. If they need more than a brush and wipe clean, then you can soak them for approximately 20 minutes in one part water, one part vinegar to get rid of any insects or bacteria. The cones may close up when they’re wet, but will re-open as they dry. Set aside on old newspapers and allow to dry for a few days. It is important that your pine cones are completely dry before painting, so you may need to think ahead a few days before commencing this project.
Paint the faux berries using one of your chosen Resene colours. These are normally pre-wired so are easy to hold while painting. The wire ends can then be pressed into an old cardboard box so they stand upright to dry.
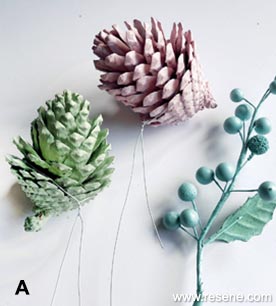
For each pine cone, take a piece of florist wire and wrap it around the scales closest to the base of the cone (pic A). It will sit in between the scales so you won’t see it. Twist the wire to secure it in place. If the cone is tightly closed, wrap the wire around the stem.
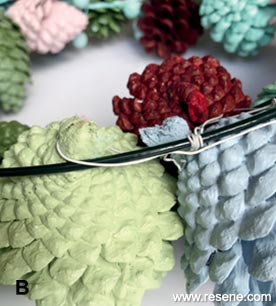
Thread cones into the wreath frame, wrapping the wire tightly around the frame to secure each cone in place. Try to get a good balance of sizes and colours. The back does look a little messy but you won’t see it once all the gaps are filled in (pic B).
When the wreath is covered with cones, look for any small gaps where the wire may be visible. Fill the gaps by threading in some painted berries, again securing the wire around the wreath frame. Use the frame to hang your wreath on a hook or, if you prefer, hang it with a beautifully tied ribbon.
These cones look fabulous in groups of varying colours and heights along the centre of your dining table or sideboard.
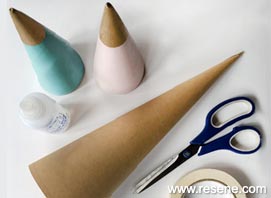
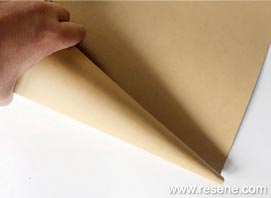
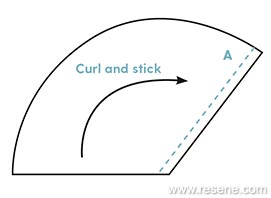
Start by making a cone from thin card. Cut out a shape similar to the template above. Roll it up in the direction indicated by the arrow. The tighter you roll, the skinnier the cone will be and vice versa. When you start rolling you might like to use a little tape on the inside of the cone to hold it in shape. When fully rolled, glue along edge A to secure.
Paint the entire cone with two coats of one Resene testpot colour. Once dry, paint the tip with Resene Bullion, then add flecks or dots of white to the rest of the cone for a more interesting, festive effect.
Project by Marsha Smith, Christmas 2018
Photography by Bauer Studio (NZ) and Marsh Smith.
Projects from the Australian Women's Weekly
View more project ideas from The Australian Women's Weekly magazine in the Resene weekend craft projects section.