Habitat bright ideas with Fleur Thorpe – DIY projects
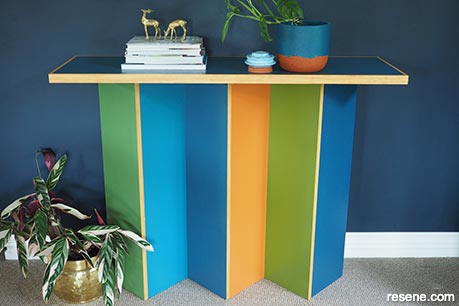
Brighten up your hallway with a colourful zig zag table. Vary the length to suit your space.
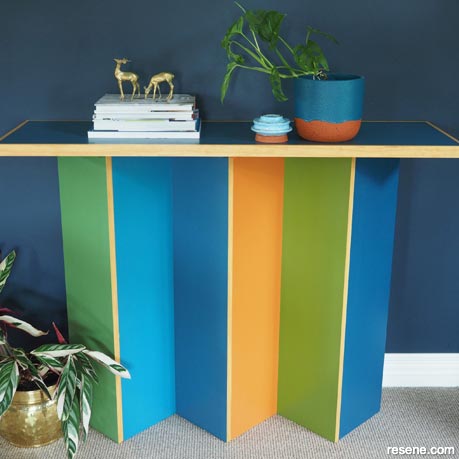
Wall painted in Resene Dark Knight, skirting in Resene Half Rice Cake and plant pot in Resene Teal Blue and Resene Fire
 Step 1
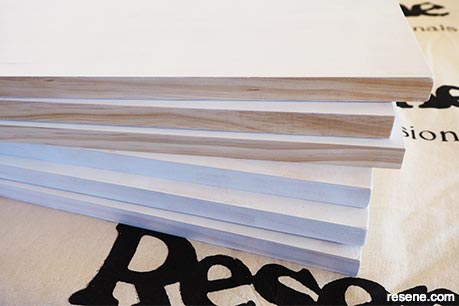
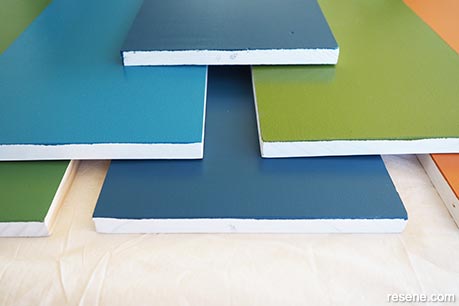
Start by priming the six leg panels. Fleur used untreated pine boards that were 23cm wide, 18mm thick and 90cm long. Use a small microfibre roller to apply one coat of Resene Quick Dry. On three of the boards, leave one of the long edges unpainted. Once the primer is dry, give it a light sand with a fine grit sandpaper.
 Step 2
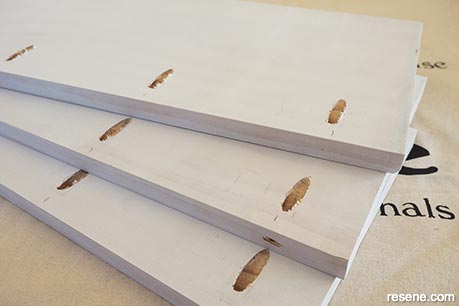
Use a pocket hole jig to make screw holes in the back of the boards along each of the long edges. If you don’t have a pocket hole jig, when you come to assemble the base, you will need to screw the boards together by screwing in through the front face, filling the holes, sanding them flat and then proceeding with primer and paint.
 Step 3
Paint the six leg boards with Resene Green House, Resene Boost, Resene Time Traveller, Resene Hawaiian Tan, Resene Untamed and Resene Blue Nile. Apply hardwearing Resene Lustacryl paint with a small microfibre roller. Apply the first coat, leave this to dry, and then apply the second coat.
 Step 4
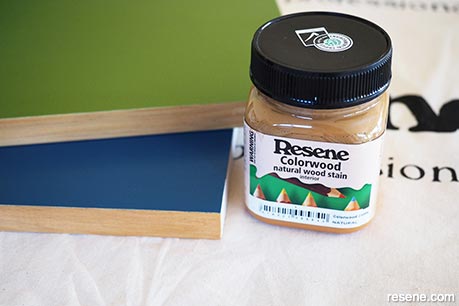
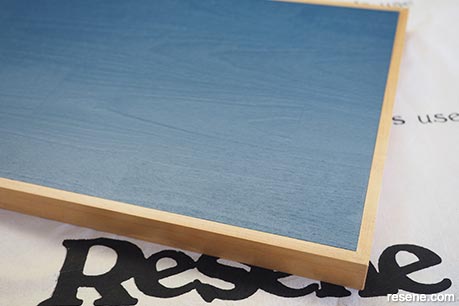
Once the paint is dry, carefully sand off any paint that may have gotten on the three unpainted edges. Try to get a nice crisp edge. Use a soft cloth/rag to apply two coats of Resene Colorwood wood stain in the colour Resene Natural to the unpainted edges.
 Step 5
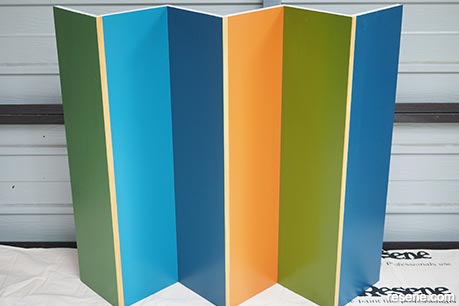
Construct the leg base. Make sure that the boards with the unpainted edge are aligned to all be facing in the same direction. Glue two boards together with wood glue and secure them with screws from the back through the pocket holes. Proceed by attaching the remaining boards until you form the zig zag base.
 Step 6
Cut, paint and screw on some blocking wood to the top of the legs. Fleur placed hers on the front and back two ends and in the middle.
 Step 7
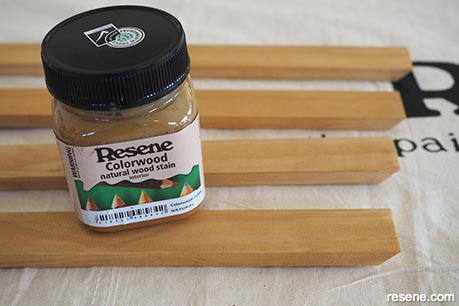
For the trim around the tabletop, cut it to length and then stain it with two coats of Resene Colorwood wood stain in the colour Resene Natural.
 Step 8
Cut the tabletop to size (mine is 35cm deep by 1.2m long) and prime this with Resene Quick Dry. Once this has dried, give it a light sand with a fine grit sandpaper. Paint the top with two coats of Resene Time Traveller, using a small microfibre roller. Use strong wood glue to attach the trim around the edge of the table top. Use painters tape to tape off the painted area and then apply two coats of Resene Aquaclear in a satin finish to the trim.
 Step 9
To finish, position the tabletop on top and attach it by screwing through the blocking from underneath.
Top tip: For a rustic look finish, use a range of Resene Colorwood wood stain hues for the zig zag panels.

Styling and images by Fleur Thorpe. Aug 2022.
Habitat bright ideas
Need to add colour, pattern or a little creativity to your place? Check out these easy step by step DIY project ideas created in collaboration with Fleur Thorpe. We hope you enjoy making and painting these bright ideas and bringing colour to your home inside or out.
![]() Get inspired ! Subscribe
Get inspired ! Subscribe ![]() Get saving ! Apply for a DIY card
Get saving ! Apply for a DIY card
![]()
Can't find what you're looking for? Ask us!
Company profile | Terms | Privacy policy | Quality and environmental policy | Health and safety policy
Colours shown on this website are a representation only. Please refer to the actual paint or product sample. Resene colour charts, testpots and samples are available for ordering online. See measurements/conversions for more details on how electronic colour values are achieved.
What's new | Specifiers | Painters | DIYers | Artists | Kids | Sitemap | Home | TOP ⇧