From habitat highlights - issue 40, bright ideas
Crafty DIYs to declutter and enhance your entryway.
As we embrace the indoors through the cooler months, it’s the perfect time to look at how we can downsize, reorganise and declutter.
Entryways are a really good, practical place to start. They’re small areas, with high foot traffic, often taken for granted, so you can get great results for less effort. They’re also usually the first impression visitors have of your home’s interior.
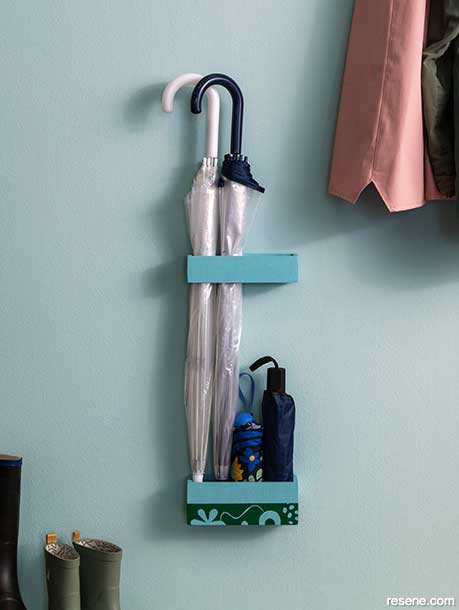
Umbrella holder
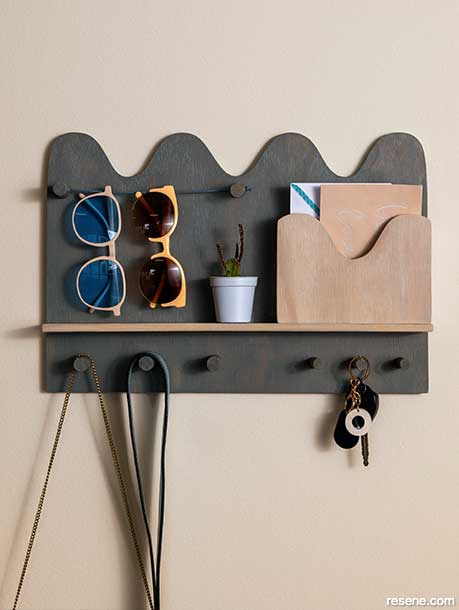
Entryway organiser
Think about what you can purge and what really needs to be in the space. If floor space is minimal, get creative with the walls. This DIY organiser is designed to store your essential entryway items and takes up little space. Or try your hand at the umbrella holder, which will keep your entryway looking neat, rain or shine.
Umbrella holder: Umbrella holder painted in Resene Kumutoto and Resene Kaitoke Green and wall painted in Resene Half Halcyon.
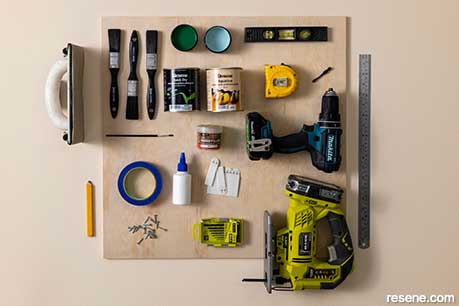
Step one
Use the jigsaw to cut the plywood into the different elements as in the cutting plan above. A1 + A2 = 50mm X 80mm B1 + B2 = 80mm x 210mm C = 50mm x 188mm D1 + D2 = 50mm x 210mm E1 + E2 = 50mm x 50mm.
Step two
Sand all the pieces wipe off sanding dust with a damp cloth.
Step three
Glue pieces together to create a box for the bottom (using pieces A1, A2, B1, B2 and C) and a smaller holder (using pieces D1, D2, E1 and E2) for the top.
Step four
Once dry, drill pilot holes and screw the pieces together to secure them properly.
Step five
Fill screw holes with Eezee Wood Patch Pine. Either with a putty knife or your fingers. Leave to dry.
Step six
Give the boxes a final sand and wipe with a damp cloth.
Step seven
Paint the boxes in two layers of Resene Quick Dry Primer, drying completely between layers. This will protect the plywood from getting warped from water on umbrellas.
Step eight
Paint the top and bottom holders in Resene Kumutoto.
Step nine
Once dry, use masking tape to create a straight line around the bottom box, 30mm up from the bottom. Apply 2 coats to the bottom half in Resene Kaitoke Green. Remove the tape and leave to dry. If you’re feeling arty, paint a pattern on the bottom in Resene Kumutoto as seen in the image (optional). Finish with a coat of Resene Aquaclear over whole holder.
Step ten
Once dry, apply the hanging picture strips and hang. Use a level to make sure they line up. We hung the umbrella holder 230mm from the floor and 680mm between the bottom and top holders.
Entry organiser: Organiser finished in Resene Colorwood Rising Tide and Resene Colorwood Breathe Easy from the Resene We Speak Beach collection, pot in Resene Breathless, envelope in Resene Cashmere and wall in Resene Quarter Akaroa.
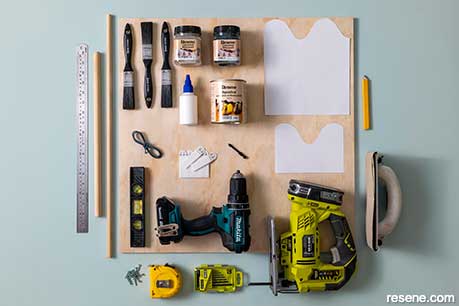
Cutting list
A=440mm Wide x 300mm High. B=440mm Long x 50mm Wide. C=175mm Wide x 125mm High. D1 + D2=125mm High x 30mm Wide.
Cut both your 16mm & 12mm dowel into pieces measuring 40mm.
Step one
Use the jigsaw to cut the plywood piece and dowels into the different elements needed to create the organiser. Refer to the cutting list above for all sizes and layout.
Step two
Sand all the pieces to remove any rough edges and wipe down with a damp cloth to clean any excess dust.
Step three
Stain the backboard and dowel pieces in Resene Colorwood Rising Tide. Apply 2 coats to the shelf and mail holder in Resene Colorwood Breathe Easy. Leave everything to dry completely before going to the next step.
Step four
Use a pencil and draw a straight line from edge to edge of the baseboard, 70mm from the bottom. Line your shelf along the line and drill pilot holes into the back that align with pilot holes in the baseboard. Now, screw the shelf in.
Step five
Glue the mail organiser pieces together. Once dry and secure, glue onto the baseboard, aligning it along the edge on the right hand side. Leave to dry completely.
Step six
Drill a pilot hole into the middle sides of 2x 16mm dowels. Drill a pilot hole into the back of each one. Screw the first one onto the top left corner of the baseboard. Place the second one at the same height as the first one, slightly to the left of the envelope holder. Screw in.
Step seven
At the back of each of the remaining dowels, drill a pilot hole. Place the dowels where you want them to sit and drill pilot holes into the backboard to place them. Now, screw each into the baseboard. We’ve placed ours as so – three 16mm dowels on the left hand side and three 12mm dowels on the right hand side, each side evenly spaced apart. They are all 35mm above from the bottom of the baseboard.
Step eight
String the leather through the 2x 16mm dowels (the ones with the extra pilot holes) and knot each side. Make sure it’s taut. Here, you can hang your sunglasses.
Step nine
Apply 2 coats of Resene Aquaclear to the whole surface of the organiser to keep it protected from general wear and tear. Leave to dry.
Step ten
On the back, place the picture hanging strips. Use a level along the bottom of the organiser to hang it onto the wall.
Colours mentioned in this article
Products mentioned in this article
projects: Leigh Stockton
images: Patrick Roberts
Search habitat magazine stories
Printed copies of habitat highlights are available from late March 2024 at Resene ColorShops and resellers, while stocks last. You can view back issues of habitat magazine online.
Specifiers:
If you have an idea, project or story that you think would suit habitat, we’d love to hear from you. Please drop us an email with your details and include photos if submitting a project.
Sign up for a DIY card and Save! Australia | New Zealand