From the Resene decorating blog
As your house emerges from winter, it’s a good time to spring clean the outside.

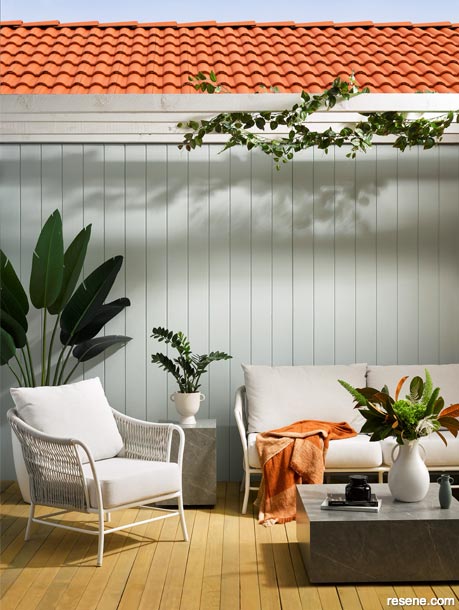
Give weatherboards a clean with Resene Paint Prep and House Wash before painting with Resene Lumbersider in your chosen colour. This Greek-inspired courtyard features fresh coastal colours such as Resene Nebula used on the weatherboards, Resene Sea Fog on the pergola and Resene Woodsman Uluru on the deck. Pair these fresh colours with classical furniture and accessories. Amphoras and pot plants in Resene Sea Fog, Resene Eighth Tea, Resene Cloud and Resene Yucca. Sofa and armchair from Poynters, coffee table and side table from King, throw from Città, fan palm from Freedom. Project by Laura Lynn Johnston, image by Bryce Carleton.
Exterior walls, window frames and sills, decks, footpaths and fences can all benefit from a check to address maintenance issues and a thorough clean to remove surface dirt, mould and stains with products such as Resene Paint Prep and Housewash or Resene Deep Clean. It will help to ensure paintwork remains in good condition or prepare tired paintwork for a successful recoat with Resene Lumbersider or Resene Woodsman stain.
When it’s done, your property will sparkle.
Before you start, make a plan: list the jobs, establish priorities and an order of work. If you’re planning to wash down an exterior wall and water blast a pathway, water blast first, so that you won’t be flicking dirt over your newly-washed walls. If painting a deck, consider trimming overhanging foliage beforehand so it won’t interfere with your paintwork.
Tidy your area of work. Put away garden tools that aren’t required and set up a work station for the tools you plan to use.
Most houses need at least a basic wash after winter, especially on the shady side of the house or near over-hanging trees. Remove any mould or growth within a few months of it first appearing before it stains or undermines paintwork. Resene Moss & Mould Killer is a hypochlorite-based wash designed to kill and bleach most common moulds and fungus within 48 hours. If left unchecked, mould can penetrate the existing paint film and become established to grow through subsequent paint coatings, impairing adhesion and permanently ruining the appearance of the paintwork.
Even on the sunny side of your home, it’s surprising how much dirt can accumulate on outside walls from pollen, dust, soot, birds and insects. Wash with Resene Paint Prep and Housewash, using a soft brush on large areas.
Resene Paint Prep and Housewash will also loosen the chalky surface on UV-damaged paint films and is excellent in preparation for painting. Generally it’s best not to waterblast timber as the high pressure can damage the timber.
An alternative cleaning option is Resene Bio-Cleaner, a quick and easy way to clean surfaces annually to refresh your home’s appearance or to prepare surfaces for painting. Resene Bio-Cleaner is Environmental Choice-approved and formulated with eugenol, the active ingredient in clove oil, which helps to inhibit mould and fungal regrowth.
If you want a lower scrub option, choose a spray and leave product like Resene Deep Clean. Resene Deep Clean is designed to clean areas such as paths, patios, decks and other exterior cementitious, timber and painted surfaces. Spray or brush on and leave Resene Deep Clean and nature to do the work – no scrubbing needed. Slow acting Resene Deep Clean destroys the growth and combines with U.V. light and rain to weather off the remains. It is available as a concentrate which you dilute with water or in a trigger pack for fast treatment of large areas.

Ready for a new look? Resene Lumbersider Low Sheen paint is easy to apply with minimum dry time and recoat time. A waterborne low sheen paint, it is based on a tough 100% acrylic resin to ensure maximum durability to protect weatherboard in all exposed conditions and presents a natural low sheen look that is fully washable.
Apply Resene Lumbersider over a primer such as Resene Wood Primer or, if the timber surface is showing signs of deterioration, apply Resene Lumbersider over Resene TimberLock. This is a multifunctional timber treatment designed to increase the water, fungal and U.V. resistance of the wood surface, improving the performance of subsequently applied finishes.
Avoid using insecticides and other pest control sprays for the first six months after painting as they may stain the paintwork.

Create the look of concrete or limestone by combining two Resene paint colours using Resene FX Paint Effects Medium.
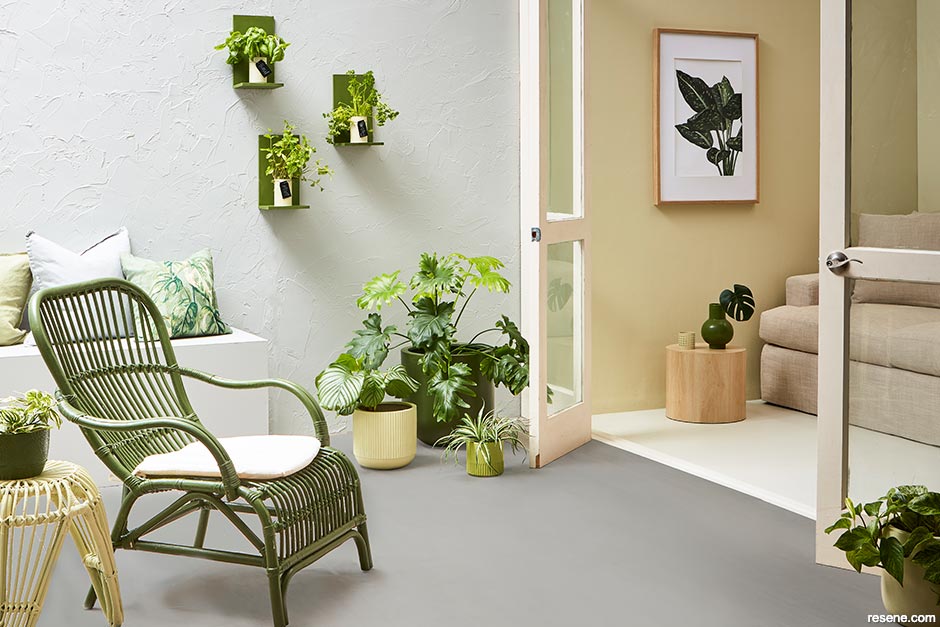
Start with your basecoat of Resene Lumbersider in a darker colour, before applying a second lighter colour mixed with Resene FX Paint Effects Medium. Wall painted in Resene Triple White Pointer with Resene FX Paint Effects Medium mixed with Resene Carrara to create a textured finish. Table in Resene Duck Egg Blue with tray in Resene Emerge and vase in Resene Rising Tide. Sofa, cushions and rug from Outside Space, carafe from H&M Home. Project by Vanessa Nouwens, image by Bryce Carleton.

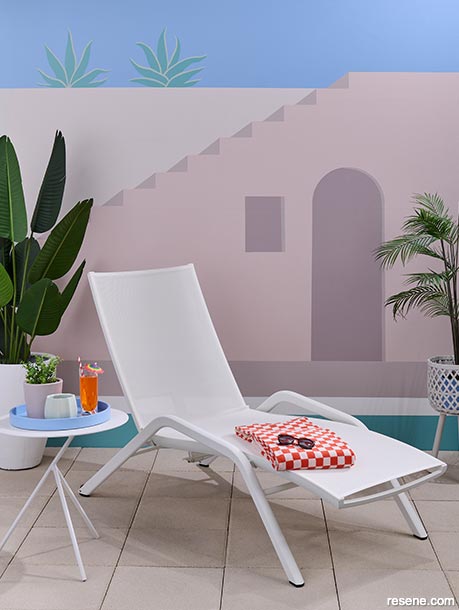
Transport your courtyard into a tropical location with a creative mural and clean up the look of concrete pavers by staining them in Resene Concrete Stain.
This mural is painted in Resene Polo Blue (sky), Resene Paradise (pool and agave), Resene Rainee (agave), Resene Soothe (main wall), Resene Swirl (left wall), Resene Martini (ground, step sides), Resene High Tide (door and window) and Resene Half Black White (pool edge). Patio pavers in Resene Concrete Stain Bleached Grey, large plant pot in Resene Half Black White, rattan plant stand in Resene Half Black White, tray in Resene Polo Blue and vases and pots in Resene Rainee and Resene Soothe. Sun lounger and side table from Poynters, towel from Tessuti, bird of paradise and palm plants from Nood, sunglasses from Le Specs. Project by Laura Lynn Johnston, image by Bryce Carleton.
With your home looking smart, the fence will need to lift its game. It’s often a good project to start with, especially if you’re new to DIY painting. Most fences can be cleaned, prepared and painted in a weekend and don’t require scaffolding. If you have a large fence, break the project into manageable sections that you can complete a piece at a time.
But first, do your ground work. Mow the lawn and collect the clippings so they don’t blow onto your fence as you apply Resene products. Remove any weeds and tie up loose plants that might brush against the surface of the fence. Cover plants with a drop sheet or tarp to protect them from paint or stain drips.
Give any areas of moss and mould a thorough clean using Resene Moss & Mould Killer. Dilute the concentrate with water, as per the instructions on the bottle. Scrub the solution into the fence with a stiff-bristled brush. Follow up by cleaning and scrubbing the whole fence with Resene Timber and Deck Wash before hosing down. Sand off any loose paint before applying Resene Lumbersider. If staining your fence, apply colours from the Resene Waterborne Woodsman range.
The deck is one area of a home that often gets forgotten once it is installed. Yet timber left bare will soon start to gather dirt and contaminants and grey. Regular application of a wood stain finish (or a paint if you prefer) will help protect the timber and extend the life of the deck.
Like your weatherboards, first treat moss and mould with Resene Moss & Mould Killer. Then clean the whole deck with Resene Timber and Deck Wash. When you’re staining any marks on the surface will show through the new stain, so make sure your deck is well prepared first. Stain your deck with Resene Woodsman Decking Oil Stain. For a natural look pick a colour as close as possible to the timber’s original colour or you can opt for something different.
Avoid using a clear finish on exterior timber as it allows all the sunlight through meaning your timber isn’t getting any protection from the damaging effects of the UV.
September 15, 2022
Visit your local Resene ColorShop for expert advice and all the products and accessories you need to make the most of your home.
Book a colour consult | Ask a Colour Expert | Ask a Paint Expert
Resene's decorating blog
Paint your home beautiful! Discover the latest decorating trends, tips and colour news.
![]()
Previous «
When to renovate what – your DIY calendar
![]()
Blog home
View the latest trends, tips and news
![]()
» Next
What to consider before painting your house exterior