From the Resene decorating blog
We love wood in our interiors. It’s pretty universal, whether you’ve gone full ‘log cabin’ or you have just a few touches in your furniture and fittings, most of our homes and interiors have wood somewhere.
It’s durable, and depending on how you use it, works with almost any design style. Sometimes, though, it needs a little facelift. Whether it’s faded in the sun and weathered, or maybe it has a few annoying coffee cup rings, some dents and scratches, or old varnish that’s become flaky or sticky, all wood surfaces eventually need a little care and attention.
One of the great things about wood surfaces is that it is usually easy and cost effective to completely transform them.
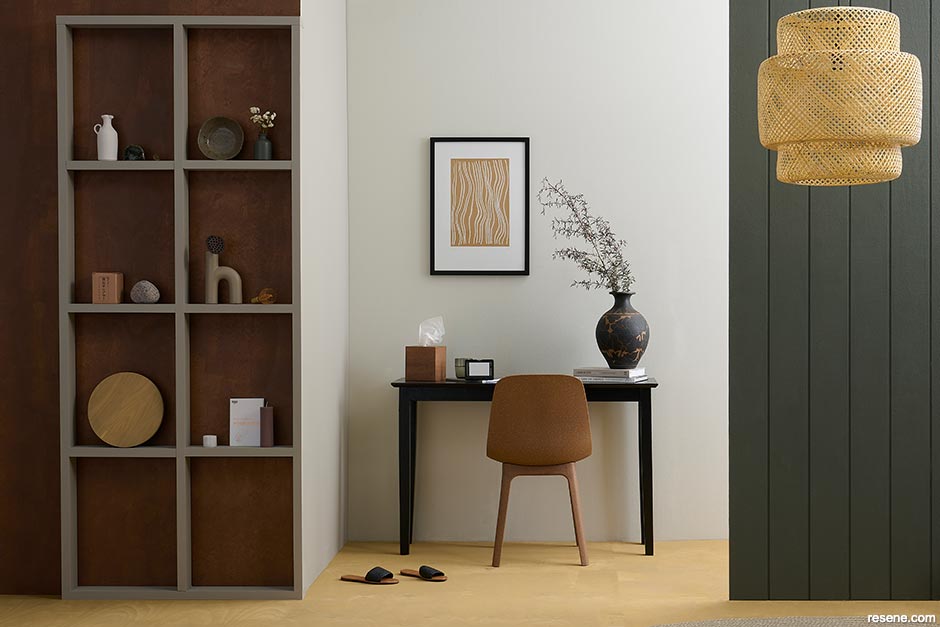
Whether your wood surface needs some care and protection, or you’re just wanting to update your interior (or exterior) look, you have a few different options so it’s worth doing a bit of research to make sure you choose a product that will get you the best results.
Staining a natural wood surface accents and enhances the wood grain. Wood stains are designed to penetrate the wood grain and it’s important to know what type of wood you’re staining as it will impact the final colour. Different types and the quality of wood will absorb the stain differently. So, for example, stains applied to light timber or composite boards such as plywood, will appear much stronger and brighter in colour than stains applied to dark wood.
If you want to simply enhance interior wood grain without adding colour opt for a clear stain such as Resene Colorwood Reducing Base.
As with paint it’s a good idea to test your colours on a piece of your timber first, and you’ll want to use the right stain for the right conditions such as Resene Colorwood for interiors and Resene Woodsman for exteriors.
Top tip: Stain colours can be intermixed or diluted. Resene Colorwood Reducing Base can also help soften a full strength stain colour. On composite boards you can also try spraying the surface lightly with water before stain application to help achieve a lighter finish.
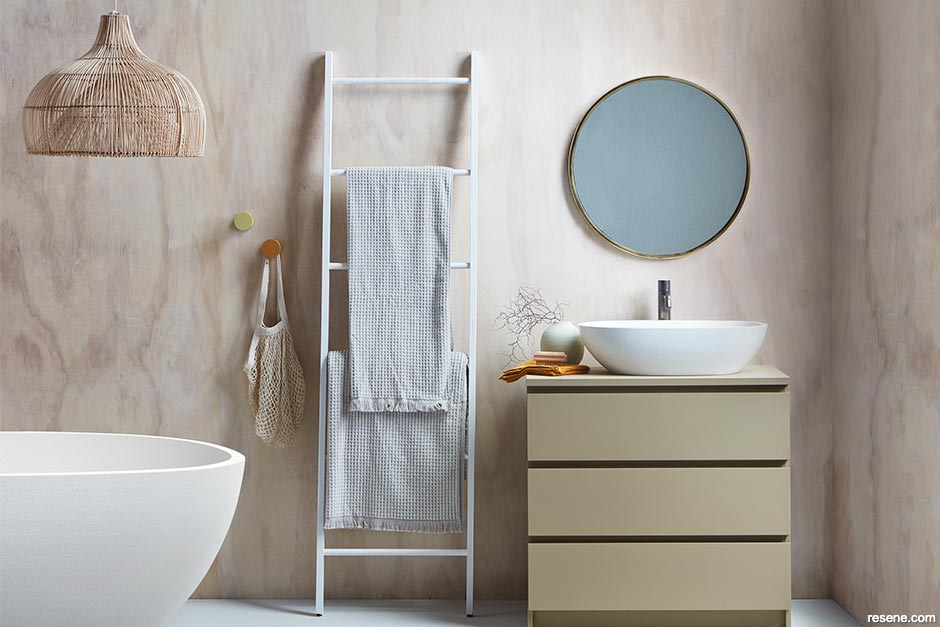
Colour washes sit on the surface of the timber, rather than penetrating like a stain. This means they give your wood surfaces an aged weathered look that still shows off the texture while protecting it.
Resene Colorwood Whitewash and Greywash have long been popular choices for bringing a softer look to interior timber particularly suited to beachy style interiors or the perennially popular Scandi style. But this weathered look isn’t limited to white or grey, the Resene Colorwood We Speak Beach series now has a range of different shades. Try Resene Shore Thing for a soft warm green finish, or Resene Shade for a darker charcoal.
As with stains the type and quality of timber will impact the final colour result.
Clear hard coats give your wood finish a harder shell of protection from wear and tear, particularly water and heat.
Polyurethane is like a liquid clear film and comes in a water-or-oil-based formula. It can also have a range of finishes from flat or satin to glossy. It can sometimes appear milky in colour when it is in the can, but is clear once it dries.
Clear finishes such as Resene Qristal Poly-Flat or Resene Aquaclear gloss can be used either stains as a final protective clear coat or directly on to clean, prepped wood. Using a clear overcoat to finish your stained surfaces will further protect the wood and maximise the life-span of your stain.
For high-use areas such as tables, worktops or bathroom vanities you might want to consider a heavier duty finish such as Resene Polythane for extra protection.
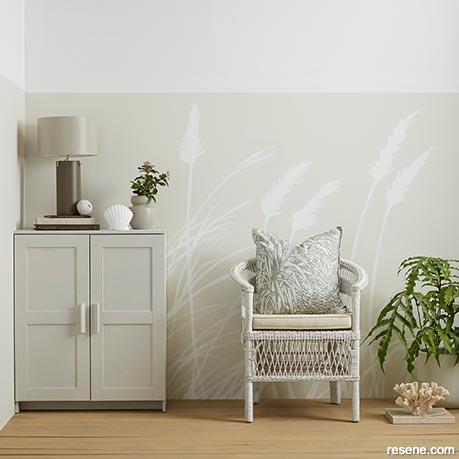
Natural or subtle wood stain tones anchor rooms where the colour palette is paler and neutral.
The wood floor of this conservatory is stained in Resene Uluru which keeps it feeling fresh. Lower wall painted in Resene Half Joanna, toetoe mural painted in Resene Quarter Alabaster to match the top half of the walls, cabinet in Resene Half Truffle, lamp base in Resene Mondo, lampshade in Resene Planter and vase in Resene Iko Iko. Project by Kate Alexander, image by Bryce Carleton.
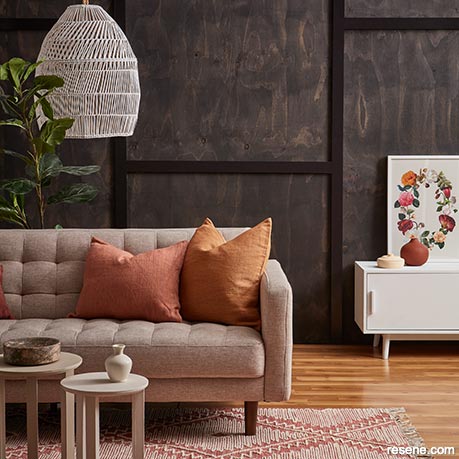
Wood stain can be used not just to enhance wood grain but to transform it.
Resene Colorwood Sheer Black elevates plywood to give this room a dramatic backdrop that also showcases the caramel tones of the Resene Colorwood Natural stained floorboards. The battens on the wall are painted in Resene All Black to add structure. Pendant light shade in Resene Black White, sideboard in Resene Snow Drift, nest tables in (left to right) Resene Bison Hide and Resene Quarter Drought, vases in Resene Quarter Drought and Resene Hairy Heath and lidded dish is Resene Tequila. Project by Laura Lynn Johnston, image by Wendy Fenwick.
Wood oils such as Resene Danska Teak Oil are designed to protect and enhance the grain of hard woods like teak, rimu and beech. Resene Danska Teak Oil can be applied with a brush and left natural or it can be overcoated with solventborne Resene Qristal polyurethanes.
Of course paint is another alternative if you want to paint over the wood grain and change the colour of your wood surface. When you’re opting to paint a wooden surface you need to think about what wear and tear your surface will be subject to and what kind of condition the wood is in before you choose between a matt, low sheen, semi-gloss or gloss finish.
Gloss enamel paints such as Resene Enamacryl are hard wearing, and easy to wipe down, but will show up imperfections such as dents or cracks in the wood. Lower sheen finishes will tend to hide surface imperfections.
Have a good chat with the Resene paint experts at your local Resene ColorShop about the type of wood, the type of furniture or fitting you’re wanting to revive and how much wear and tear it will face to make sure you choose the right surface material to suit.
While it’s common to paint wood surfaces on furniture and trims, you can also paint wooden flooring, which can be a great way to revive tired floorboards or add some sophistication to cheaper materials such as plywood floors.
The floor should be thoroughly washed and dried before you begin, then a primer product like Resene Quick Dry applied to ensure you get the best possible adhesion of paint.
Apply two coats of Resene Walk-on with a roller and allow to dry between coats. Finish with a topcoat of Resene Concrete Wax to give the floor extra protection.
However you decide to revive your wood surfaces, preparation is important. Stains in particular won’t penetrate through old clear finishes, waxes, oils and polishes so you need to spend the time to make sure they’re completely removed through sanding.
Once sanded, wipe the surface down thoroughly to move all dust before you start staining.
Top tip: Always sand with the grain of the timber.
Film forming colourwashes, like Resene Colorwood Whitewash, can be applied over flooring already finished in wood stain finishes, which can save you time on surface prep.
When you apply your stain or wash, apply the product liberally before you start ‘laying off’ or redistributing. Make sure you keep a wet edge at all times to avoid lapmarks. Work methodically, quickly and efficiently so the stain doesn’t dry before you have been able to finish redistributing it.
Apply your stain or wash with a brush or a rag, and wipe off any excess with a dry, lint-free cloth rubbing along the grain. This is important so the stain dries properly and evenly.
Don’t try to tackle too big an area at once – usually it is best to follow along the floorboard to keep the finish even.
Vary the timber stain colours you choose to make the most of the timber and style of your home. You might choose Resene Colorwood Whitewash for Scandi floor style and team it with furniture finished in Resene Colorwood Natural to enhance the natural timber colour.


July 07, 2022
Visit your local Resene ColorShop for expert advice and all the products and accessories you need to make the most of your home.
Book a colour consult | Ask a Colour Expert | Ask a Paint Expert
Resene's decorating blog
Paint your home beautiful! Discover the latest decorating trends, tips and colour news.
![]()
Previous «
Showcase your personal treasures
![]()
Blog home
View the latest trends, tips and news
![]()
» Next
Add shine to your interior design