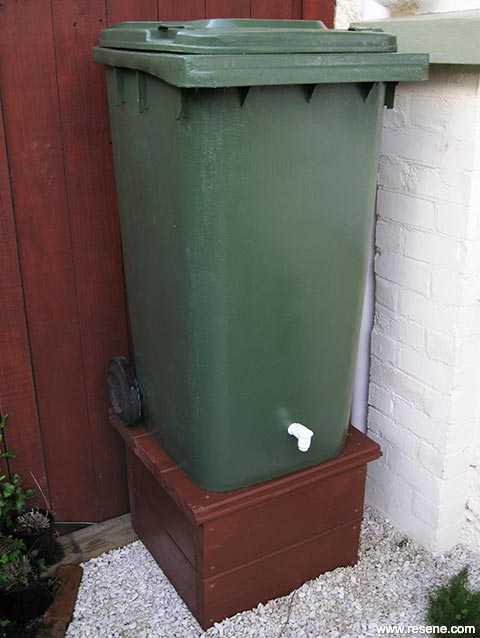
It’s easy to turn a humble wheelie bin into a liquid composter for green garden waste – including those pesky weeds.
![]()
Equipment:
Wood:
Plastic bin and pipes
Paints/stains:
To get the look: Mark stained the background fence with Resene Waterborne Woodsman tinted to Resene Warm Kwila.
Handy hint: When fitting the drum tap (step 8), it may be necessary to remove the thin rubber sealing ring (depending on the thickness of the wheelie bin wall) – just ensure the tap is fixed securely enough so that it’s watertight.
 Step one
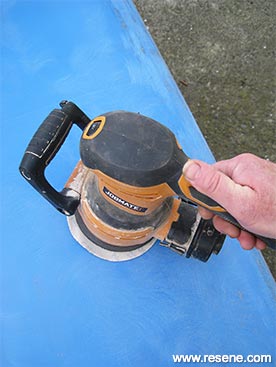
Lightly sand the exterior of the plastic wheelie bin to ‘key’ the surface.
 Step two
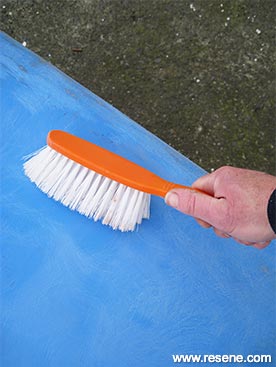
Remove any sanding residue with a hand brush.
 Step three
Apply one coat of Resene Smooth Surface Sealer to the exterior of the wheelie bin and allow to dry.
 Step four
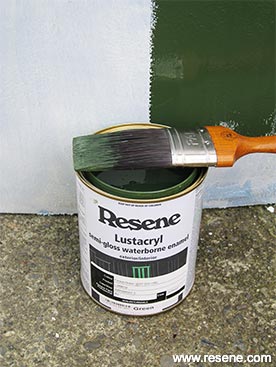
Apply two coats of Resene Lustacryl tinted to Resene Forest Green to the exterior of the wheelie bin, allowing two hours for each coat to dry.
 Step five
Drill a 25mm hole in the front of the wheelie bin approximately 150mm up from the base. Smooth the edges of this hole with sandpaper and remove any sanding residue.
 Step six
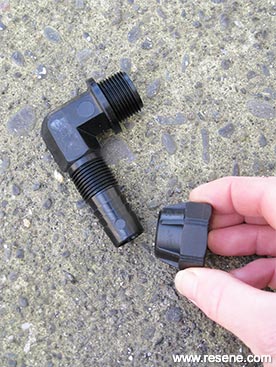
Remove the threaded nut from the 20mm angled plastic pipe.
 Step seven
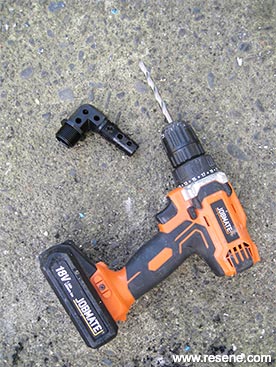
Drill a series of 7mm drainage holes along the sides of the 20mm angled plastic pipe, as shown – this will help to prevent green waste from clogging the tap. Screw the 20mm connector securely to the threaded end.
 Step eight
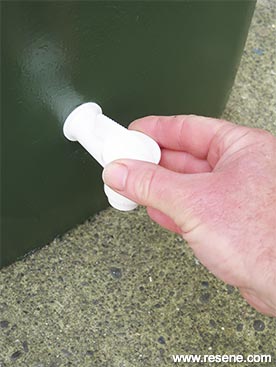
Push the 20mm drum tap through the 25mm hole in the wheelie bin and fix it from behind with the 20mm connector, tightening it until the drum tap is secure. Ensure that the angled plastic pipe (on the inside of the wheelie bin) is pointing down.
 Step nine
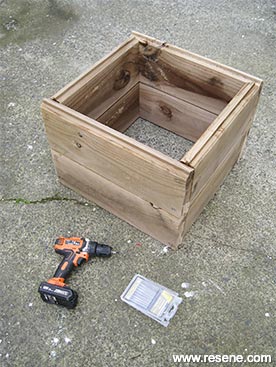
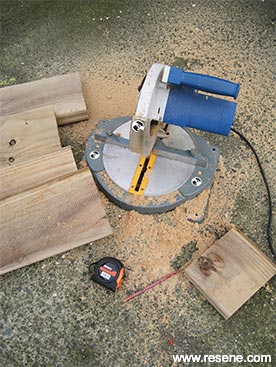
Measure, mark and cut the tongue and groove landscaping timber to the lengths listed and smooth any rough edges with sandpaper.
 Step ten
Assemble the 410mm and 500mm lengths of timber to form a square base frame, as shown, fixing at each corner with 100mm screws (drilling pilot holes first).
 Step eleven
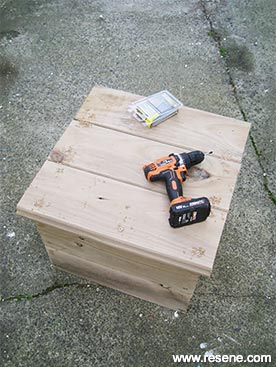
Fix the three remaining lengths of timber into position, as shown, to form a top on the square base frame. Again, use 100mm screws, drilling pilot holes first.
 Step twelve
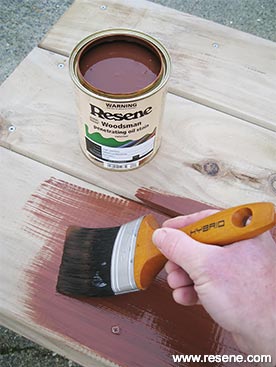
Apply two coats of Resene Waterborne Woodsman tinted to Resene Cedar to the wooden base, allowing two hours for each coat to dry. Place the base in position and ensure that it’s level, before standing the wheelie bin on top.
Words and photos by Mark Rayner
![]() Get inspired ! Subscribe
Get inspired ! Subscribe ![]() Get saving ! Apply for a DIY card
Get saving ! Apply for a DIY card
![]()
Can't find what you're looking for? Ask us!
Company profile | Terms | Privacy policy | Quality and environmental policy | Health and safety policy
Colours shown on this website are a representation only. Please refer to the actual paint or product sample. Resene colour charts, testpots and samples are available for ordering online. See measurements/conversions for more details on how electronic colour values are achieved.
What's new | Specifiers | Painters | DIYers | Artists | Kids | Sitemap | Home | TOP ⇧

