Barbecue unit with chopping board
Create a clever outdoor unit to complement your outdoor food-preparation area.
You will need:
- 6320mm of 70mm x45mm treated timber cut to the following lengths:
- 4 x 800mm – legs, 2 x 560mm, 2 x 650mm, 2 x 350mm.
- 12400mm of 100mm x25mm decking cut to the following lengths:
- 2 x 560mm, 2 x 700mm, 2 x 570mm, 2 x 660mm, 2 x 610mm, 8 x 610mm – shelf, 2 x 660mm.
Also required: 75mm galvanised nails, 40mm galvanised nails, 5 x small terracotta pots with saucers, hammer, mineral turpentine, paintbrushes, potted herbs, potting mix, PVA glue (exterior), Resene Terracotta Sealer, Resene Woodsman wood stain tinted to Resene Canopy, Saw, Set square, Wooden chopping board.
Top tip: For greatest accuracy, measure, mark and cut the wood as you complete each step as there may be slight variations along the way. If the dimensions of the chopping board vary, you’ll need to adjust the dimensions of the unit accordingly. To prevent weather damage, remove the chopping board and store under cover when not in use.
Here's another idea: To complete the look, revamp any surrounding wooden outdoor furniture using Resene Woodsman, also tinted to Resene Canopy.

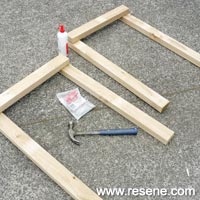 Step one
Fix the 800mm legs, as shown, to the two 560mm lengths of 70mm x 45mm timber. Use a set square to ensure they’re at right angles and fix with PVA glue and 75mm nails.
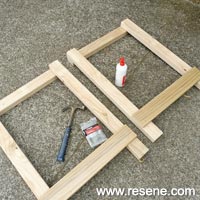 Step two
Turn legs over and fix two 560mm lengths of decking approximately 100mm up from the bottom of each leg, as shown. Fix with PVA and 40mm nails.
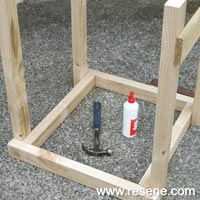 Step three
Turn leg sections upside down and fix with two 650mm lengths of 75mm x 40mm timber. Again, secure with PVA glue and 75mm nails, using a set square to ensure legs are at right angles.
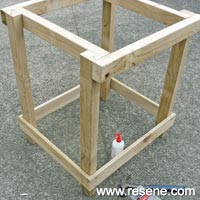 Step four
Attach two 700mm lengths of decking, as shown, to complete the lower bracing. Again, fix with PVA glue and 40mm nails.
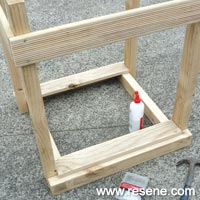 Step five
Turn upside down and fix two 570mm lengths of decking into position, as shown, fixing with PVA glue and 40mm nails.
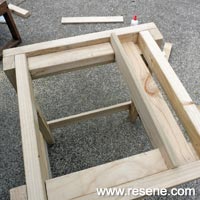 Step six
Turn right way up and fix two 350mm lengths of 70mm x 45mm timber into position, as shown, and two 570mm lengths of decking – one on edge, as shown.
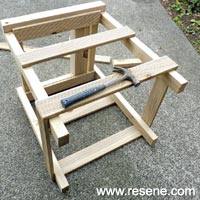 Step seven
Attach two 660mm lengths of decking to form shelf supports, as shown, approximately 500mm up from bottom of legs. Fix with PVA glue and 40mm nails.
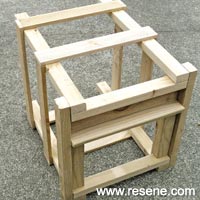 Step eight
Attach two 610mm lengths of decking to complete the shelf supports, as shown. Once again, fix with PVA glue and 40mm nails.
 Step nine
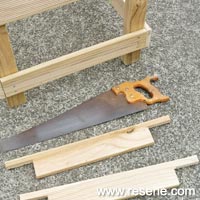
Take two of the remaining 610mm lengths of decking, and measure, mark and cut the profile, as shown, to ensure shelf fits around legs at front and back edge. Fix these front and back sections of shelf into position first.
 Step ten
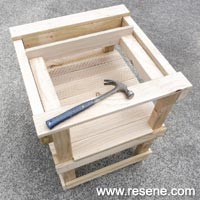
Beginning at the front, attach the remaining 610mm lengths of decking to form the shelf, trimming the final piece to fit. Attach two 660mm lengths of decking along the top front and top back edge, as shown.
 Step eleven
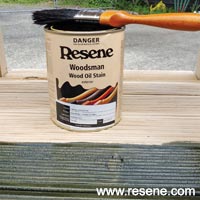
Apply two coats of
Resene Canopy to the entire unit, allowing 24 hours for each coat to dry. Clean brush in mineral turpentine.
 Step twelve
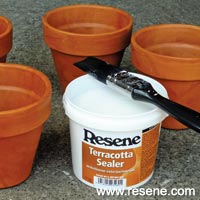
Apply one coat of
Resene Terracotta Sealer to the pots and saucers and allow to dry. Re-pot the herbs into the terracotta pots using potting mix.
 Step thirteen
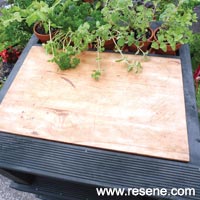
Place the chopping board and potted herbs into position, as shown.
 Step one
  Step two
  Step three
  Step four
 Step five
  Step six
  Step seven
  Step eight
  Step nine
 Step ten
 Step eleven
 Step twelve
 Step thirteen