Habitat bright ideas with Fleur Thorpe – DIY projects
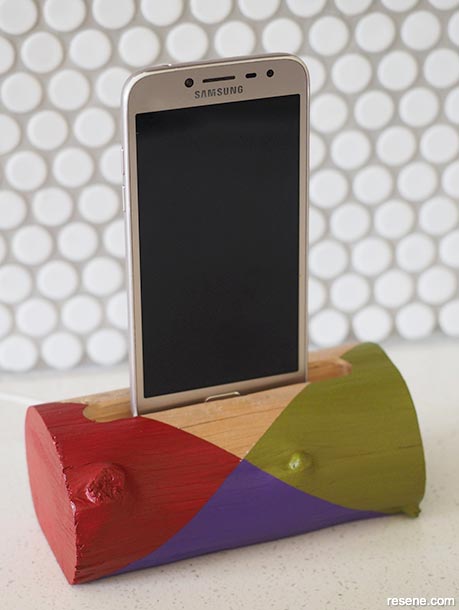
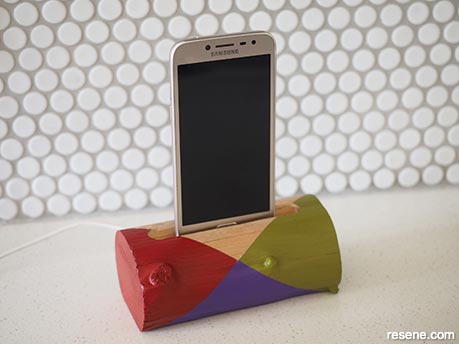
Create a charging station for your cellphone so you can easily view your phone while it is charging.
 Step 1
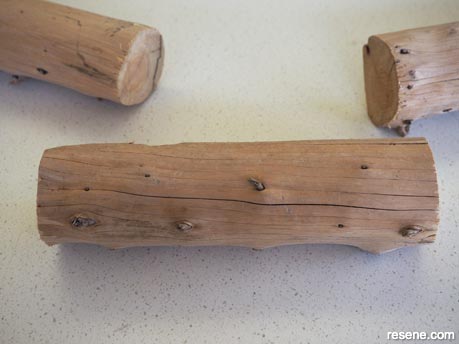
For this project you need a length of reasonably thick driftwood or tree branch. My piece of driftwood is 7.5cm in diameter. Start by cutting your piece of wood to about twice as long as you want the finished piece to be. It is easier to work with a longer piece of wood when using a router.
 Step 2
Decide which side is going to be the bottom and flatten this off. Fleur used a saw to cut the bottom off or you could use sandpaper. Wipe off any sanding dust.
 Step 3
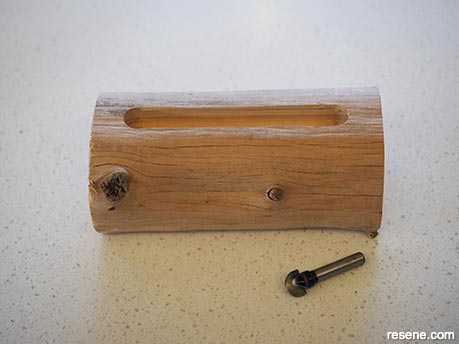
Clamp your piece of wood to a work bench and mount a straight edge next to it as a guide for the router to run along. Use the router and a rebating router bit to make a slot wide enough for your phone in the top of your wood about 10cm long and about 13-15mm deep. Trim down the length of wood to the desired finished length. Fleur’s is 14cm long. Use sandpaper to sand down any rough edges. Wipe off any sanding dust.
 Step 4
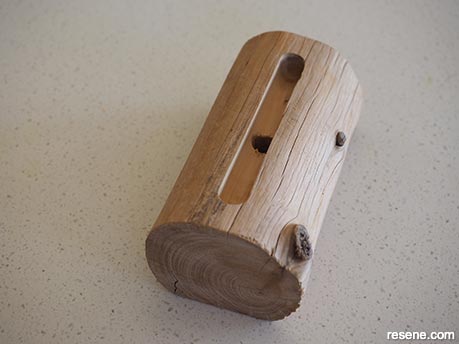
Drill a hole in the middle of this slot right through to the bottom of the wood. Make sure the hole is big enough to fit the plug of your phone charger cord. On the underside, cut a groove out from the hole so that your charger cord will fit in it and so that the piece of wood will still sit flat on a flat surface.
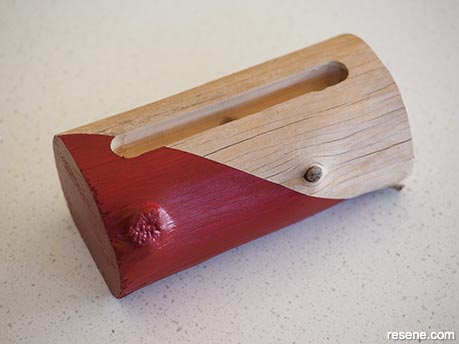
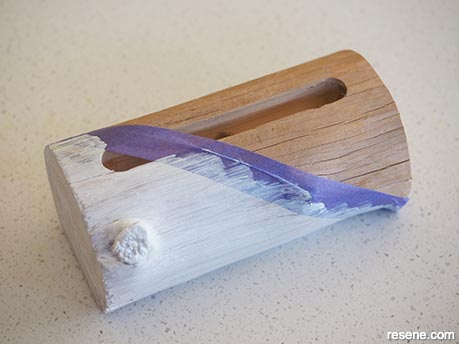 Step 5
For painting the wood, use a ruler and measure the halfway point along the front of the wood. Use purple painters tape and tape off one end of the wood. Paint on one coat of Resene Quick Dry, followed by two coats of Resene Salsa, allowing for each coat to dry before applying the next. Remove the tape while the topcoat is still wet.
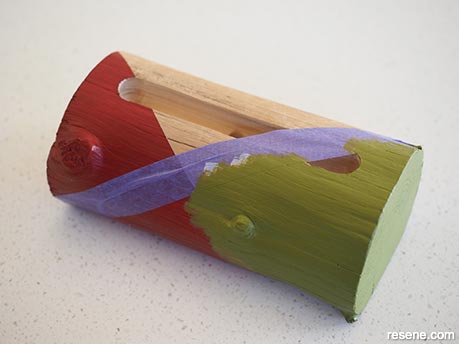
 Step 6
Once the Resene Salsa has dried, apply more painters tape, this time from the other end and make sure it intercepts the Resene Salsa paint at the midway mark that you made earlier. Paint over the raw wood with Resene Quick Dry, followed by two coats of Resene Planter, again allowing for each coat to dry.
 Step 7 (a)
Don’t remove the tape at this point, but instead add a shorter length to finish off the last triangle where the two paint colours intercept.
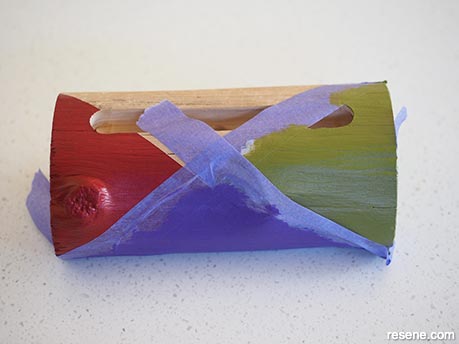 Step 7 (b)
Paint this triangle in two coats of Resene Blue Diamond. Remove all the painters tape.
 Step 9
You may want to consider using some epoxy to permanently glue the plug of the charger cable into the drilled hole. When the epoxy is setting, make sure you have your phone plugged into the cable so that the cable dries at the correct angle, but be careful not to glue your phone permanently to the piece of wood!
Top tip: For a softer beachwashed look, finish your charging station in Resene Colorwood Whitewash and beachwashed hues from the Resene Colorwood ‘We Speak Beach’ range.
Styling and images by Fleur Thorpe. Aug 2021.
Habitat bright ideas
Need to add colour, pattern or a little creativity to your place? Check out these easy step by step DIY project ideas created in collaboration with Fleur Thorpe. We hope you enjoy making and painting these bright ideas and bringing colour to your home inside or out.
![]() Get inspired ! Subscribe
Get inspired ! Subscribe ![]() Get saving ! Apply for a DIY card
Get saving ! Apply for a DIY card
![]()
Can't find what you're looking for? Ask us!
Company profile | Terms | Privacy policy | Quality and environmental policy | Health and safety policy
Colours shown on this website are a representation only. Please refer to the actual paint or product sample. Resene colour charts, testpots and samples are available for ordering online. See measurements/conversions for more details on how electronic colour values are achieved.
What's new | Specifiers | Painters | DIYers | Artists | Kids | Sitemap | Home | TOP ⇧


