Over the years DIYers have kindly sent in lots of tips and ideas to make decorating easier. A selection of these are below for your education, and in some cases, for your amusement. We hope you find these gems from fellow decorators useful.
Please note that these tips have not been tested by Resene and are included below as supplied to us.
If you have a handy tip of your own to share we'd love to hear from you - submit your handy tip.
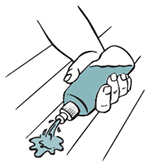
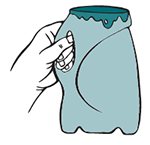
"Using a disposable glove to clear the paint from a roller by clenching it and running your hand down the roller. It is efficient for saving the paint for another day and saving time cleaning the roller at the end of the job." Thanks to Patsy.
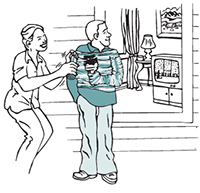
"If you have a muddled collection of paint tins and test pots, get a friend to put pen to paper or grab a device and type while you dictate to them the paint types and colours.
Then enter the list on a spreadsheet or keep in your note book so you know your paint inventory better and what shades go where. This may save buying a double up and no excuse not to do some painting!" Thanks to Joanne.
"I have made a lot of DIY signs (No Flyers, Please; Please Shut the Gate and so on) with bits of fence slats and left-over paint, also Resene testpots that I mostly already had. These colourful little signs outlast the plastic ones and look very cottagy. My favourite is 'Beware of the Dog' with a picture of my Maltese peering over a gate. I have also painted pictures of birds, hedgehogs and butterflies and put them around the garden.
The cost for my artwork was minimal and I have unique and highly visible signs. AND it was great fun to do." Thanks to Anna.
"I was painting the ceiling in a smaller bedroom and decided to use a fitted Queen sheet to cover the hanging curtains...one side to covered the rail and the elastic sides held the curtains away from the walls...Worked for me while I finished painting the ceiling." Thanks to Michelle.
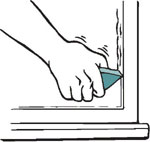
"$0 solution to protect the carpet whilst painting the skirting boards: I took a takeaway plastic container lid, cut it in half so I have two ‘longest' pieces, and join them with a piece of tape. You'll also need to cut the small edges so it is square on the sides. The long edge goes between the carpet and skirting, press it with one hand, apply your paint, take it out, wipe the small excess from the edge and repeat as you go through the board. Works brilliantly!" Thanks to Andres.
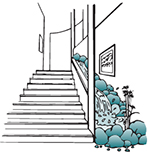
"We recently pulled up the carpet on our stairs and painted the treads in Resene Quarter Merino. The treads had tonnes of borer and old nail holes in them and I found that the best tool for the job of filling the holes with wood putty (before priming) was a disposable chopstick! Use the rounded end to get the wood putty out of the container and the angled edge at the top to force the putty into the hole and smooth it out. I also used a cheap cake batter spatula for the bigger holes. Worked a treat!" Thanks to Gabrielle.
“If you are struggling to lift the lid on a pot of paint, push both inwards and upwards under the paint lid rim with your lever. The inward pressure helps to better grip the lid so it will come free.” From Joanne.
We also recommend painting out of a separate paint pot, not the can itself. This helps minimise the amount of paint you get in the rim, plus when you paint with a brush any contaminants from the surface are brought back into the paint when you dip the brush in. By keeping the paint you are painting from separate to the main paint, you will be keeping your main paint in the best condition possible which will be helpful if you need to store it and use it later.
“If you know you will be painting over a short period, perhaps daily why not slip the roller or the brush into a ziplock bag overnight? It keeps the paint moist so it doesn’t harden. It also saves washing out the roller and or brush every single time. I noticed it cuts down on excess paint that has collected in the brush and roller too.” From Tracey.
This is also a handy idea if you are taking a short break during the day to save washing up.
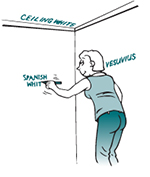
“We came home from work eager to see our newly painted lemon kitchen only to be confronted with in 'your face yellow'. I rang the painter immediately, this was not the colour we selected off the colour chart.
Sadly it was. He then gave us advice we wished he had volunteered earlier. When using lemon/yellow especially in a small area go one or two shades lighter as it reflects off the wall making it appear darker when on the wall.” From Chas.
Always try your colour out by painting a Resene testpot onto a large sheet of A2 card, leaving an unpainted border around the edge and move it around your room or exterior over a few days to check it’s the right colour for you.
“Use a soup ladle, to transfer the paint from a ten litre pail to a smaller paint tin or a roller tray. Helps to prevent messiness on the edge of the pail and used ladles are ‘cheap as’ from the local op shop.” From Wayne.
If you do end up with paint all over the label and you can’t read the instructions, remember you can view electronic copies of Resene labels on our website [www.resene.co.nz/labels]. This is also handy if you want to view a larger font version of the label.
When you’re out shopping it can be tricky to remember the exact colours on your home. Judy has this handy tip to make sure your find the right colours when you’re shopping…
“The paint-stirring paddle makes a perfect colour record when shopping for fabrics and accessories. By using both ends, and dipping the paddle in at different levels, you can see all the colours used in the room. Write the colours onto the strips and you have a permanent record.” From Judy.
“I just damaged one of my recessed light fittings when trying to clean them by taking off the top powder coating. I have just used Resene Silver Aluminium to paint them and they have come up looking better than new!” From Wendy.
“When I have multiple colours and paint tins I paint the colour on the lid of the tin. That way I can top up my paint tray by grabbing the right tin first time. Saves having to read the colour sticker on every tin or pail in a dark shed.” From Deanne.
“Once you have finished painting, whether it be with a roller or a brush, wash it in warm running water not cold, as it gets cleaner faster.” From Sam.
“Keep a dedicated painting/DIY shirt stored with your dropcloths so you know where it is when you get inspired to paint another room - or for wee touch ups. A slightly large top is best in case you want to put it on over other clothes for quick jobs.
If you don’t have a painting shirt already, hit up your local op shop. I throw mine through the washing machine at the end of each project - and putting it on, marked but crisp at the start of a new project really helps put me in that DIY frame of mind!” From Helen.
If you’re about to dispose of an old credit card, you might want to consider adding it to your paint tools instead…
“I find an out of date credit or library card is a great tool to have on hand when I am painting. You can use it to scrape off those tiny wayward dry dots of paint from glass or existing paintwork without damaging the underlying surface. It is also handy to protect small tight spots you don't want your paintbrush to touch.” From Alison.
I learnt from painting the interior of the house all different colours to leave the left over paint upside down in the room that was painted. Have been able to do touch ups and not get confused about the paints on hand. From Nicky.
If you have children in the house or limited storage so leaving paint cans in different rooms isn’t an option, an alternative is to take a photo of what paint container goes with which room and email it to yourself plus stick a photo onto the paint container.
Can’t remember what colour is in each paint container and where you used it? I always put a large blob of paint on top of the paint pot to identify the colour quickly and I also write with a black sharpie where it has been used. Hope this helps someone else - sounds common sense but I know lots of people who don’t do this and should! From Lyn.
Whenever we have a paint job we always line the paint tray with a plastic shopping bag, that way there’s no messy clean up and the paint tray stay like new. It’s also quick and easy to change colours. From Debbie.
Large Resene shopping bags are often used for this. You can use them multiple times by using each side and then turning the bag inside out also.
When painting up high, it can be hard holding a paint tin and tiring getting up and down, so… decant your paint into a small jug with a handle. The handle on the jug is much easier and more secure to hold! From Elizabeth.
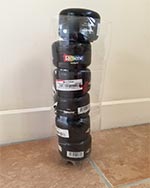 If you have a number of Resene testpots to store, cut the top off an empty soft drink bottle and vertically stack them inside. From Lyn.
When you are finished painting a room remove the cover of the light switch and write the name of the paint in pencil under it, then when you want to know the colour you have used in the room 8 years later, hey presto! There it is. From Carol.
When using a testpot sized painting tray, line it with tinfoil and then you don’t have to keep washing it out each time. From Vanessa.
Before painting, wrap masking tape around the brush hairs at the handle end so that the paint sits on top of the masking tape and less is absorbed into the head end.
When painting a large area with a large thick 4 inch brush in summer the paint tends to go hard where the brushes hairs meet the handle. This forms one large plastic lump that is very hard to wash out as at this point all the brush hairs are very tightly compacted into the handle compared to the brush tip where they are all open and loose.
When cleaning the brush remove the tape and most of the thick solid paint will be gone in an instant leaving the brush with more flex in it next time. From Paul.
Paint stored in cool dry conditions, can last well and be handy for future paint jobs.
With our paint, particularly Resene Sureseal, we cut a circle out of wax paper the size of the tin.
You can put the lid/tin on top of the wax paper to trace around it. You then place the wax paper on top of the paint surface (in the tin) when you are finished.
This stops the air getting to your paint and keeps it more useable for longer, in particular it stops the skin/crusty bit forming on top. From Kirsty.
If you are planning to store leftover paint, make sure you always paint out of a separate paint pot and not the original can. Use up all the paint in the separate paint pot – don’t pour it back into the original can. Every time your brush or roller touches the surface it transfers the contaminants from the surface back into the paint. If you paint out of a separate paint pot, this means your original can of paint is kept in the best condition possible.
Resene testpots are the perfect size to update old plant pots and let you work in with your interior décor. It’s cheaper than buying new pots too. Get creative and stencil or paint patterns. I also find them handy for painting glass bottles or jars as storage containers in my kitchen.
I’ve also used these same testpots to freshen up my garden gnomes.” From Jacqui.
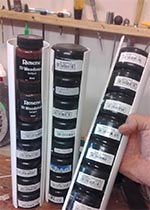
I’m doing a lot of touch ups in rentals and weekenders. I find testpots are a valuable resource and time saver. I’ve used 65mm PVC downpipe to make a testpot library. From Bruce.
Always look where you stand when painting, especially when using pigmented sealer. I learned this lesson after standing in the tray and my toes all stuck together, it took days to fully separate them! From Chloe
I learnt from painting the interior of the house all different colours to leave the left over paint upside down in the room that was painted. Have been able to do touch ups and not get confused the paints on hand. From Glen
If you have children in the house or limited storage so leaving paint cans in different rooms isn’t an option, an alternative is to take a photo of what paint container goes with which room and email it to yourself plus stick a photo onto the paint container.
I always put a large blob of paint on top of the paint pot to identify the colour quickly and I also write with a black sharpie where it has been used. Hope this helps someone else - sounds common sense but I know lots of people who don’t do this and should! From Lyn
Whenever we have a paint job we always line the paint tray with a plastic shopping bag, that way there’s no messy clean up and the paint tray stay like new. It’s also quick and easy to change colours. From Debbie
Large Resene shopping bags are often used for this. You can use them multiple times by using each side and then turning the bag inside out also.
Keep a clean, damp cloth close by and wipe up paint splatters as they happen. Dry the area with paper towel to remove any excess paint film. Tidying as you go will help reduce the clean-up job at the end. From Gemma.
We have recently been painting the whole inside and outside of our first home. Inside our bedroom is Resene Double Black White and the outside of our windows are Resene Half Black White. I came home one day to find my partner had spent the whole day painting and touching up windows with Resene Double Black White! It wasn't until the paint had dried you could see how different the paint was.
Always label your paint tins with the areas you are using them for! We won't be making that mistake again! From Sarah.
I always put paint tins (anything 4 litre or less, that is) into an empty bucket. It's easier to carry them, the brushes can go in too, so that they are always there, there are no more wet rings where the tin has stood, and a cloth can be hung from the handle at the side. I can't think why it took so long to think of this. From Anna.
To keep paint work on ceilings in top condition, use a ‘grabber tool’ to remove marks and fly dirt. Place a moistened cloth in the grabber claws, then work gently on paint work to clean marks. Saves getting up on a chair and the whole house is done in no time.” From Joanne.
If you like to be able to clean your ceiling, use a durable waterborne enamel, such as Resene SpaceCote Flat, rather than a standard ceiling acrylic. Resene SpaceCote Flat is designed to be cleaned without burnishing. Standard ceiling acrylics aren’t designed for cleaning.
An empty testpot makes an unobvious hiding place for a spare key. Put it with a few others for camouflage in the shed with the other things of this kind; who would think that it had anything in it but a bit of paint? From Anna
My tip comes from a table I sanded back, as one of the little knots in the wood came out during sanding. It was just a wee 3mm hole, but I mixed some PVA glue with the dust from the sanding and filled the wee hole and it matched the colour perfectly.
The next day after drying I sanded it down and stained the table. From Rob
You can also use old Venetian blind slats to push between the carpet and the skirting to stop paint getting on the carpet. From Heather
Use an old oven tray to push in between carpet and skirting when painting, this stops paint getting on carpet. From Rachel
If you have paint left over from a job, mark the level on the can all the way around and dab some colour on the lid for future reference. I also dab some colour on testpots. From Robyn
The new gladwrap® press n seal is fantastic for wrapping wet paintbrushes and trays to stop the paint drying out so you can use it later. It’s easy to use and there is no wrestling with the gladwrap® to get it stuck to the brush or roller! From Jacinta
We use meths to find out what paint is on the item we are going to repaint. Is it acrylic or enamel paint? Put straight methylated spirits on a dry cloth and rub the surface if the paint comes off, it was painted with acrylic paint, if it doesn't come off it is enamel paint. Once you know what the paint is your local Resene ColorShop or reseller staff can suggest the best Resene paint and prep for you. From Glenn
This summer I did a house exterior ‘touch up’. The topcoat colour is Resene Alabaster so my Resene Quick Dry white primer was going to be hard to see. As I applied primer, I marked an aligning spot on the concrete path or foundation wall with coloured chalk. This made it easier to see where to come back to apply the topcoat. From Joanne
Wrap a sheet of glad wrap around your tin before you start painting. Remove it after you finish and all the information on the tin is there for you to see - not covered with paint dribbles. Saves having to ask Resene staff later on if he/she can determine the colour of the leftover paint! From Liz
I use Mono baking paper to allow me to close freshly painted doors and windows and I NEVER have to worry about surfaces sticking. From Robyn
Got pesky flies coming in and ruining your paintwork? Grow basil... it keeps the flies away. From Charles
When choosing paint colours from testpots, paint a large square piece of cardboard rather than straight onto the wall. That way you can tape the square onto the wall (with removable tape of course) and you won't end up with a multi-coloured room if you can't decide. From Vanessa
Plastic on the floor means you don’t need to replace the carpet! From Rebecca
When painting door knobs a different colour to the cupboard, drawer or door you're fixing them to, screw loosely onto a piece of scrap wood. That way you can paint all around them easily without getting fingermarks on the knob from trying to hold it or paint on the furniture you’re fixing it to. From Sarah
Use empty baby milk powder tins to hold paint. Put two holes in the top, (1 on each side) clip a bungy cord on and hang it on the ladder - use the plastic lid to stop skin forming when you take a break. From Malcolm.
After thoroughly rinsing your brushes after painting, pop into a fold out dish drainer and brushes will maintain their shape while they dry - good for storage also. From Malcolm
You do not need to use turpentine to get paint off yourself. Try olive oil – it softens the paint and makes it easy to remove. It also moisturises your skin at the same time! From Meredith
A neat trick to reduce the mess when stripping paint and varnish from woodwork, trim etc. Clean up an empty tin and remove the paper label. Cut a slot in the side of the can. Ensure the slot is wider than the putty knife blade and a little deeper. Run the putty knife through the slot to remove the stripped waste. From Cameron
If you want the sharpest edges while painting put some masking tape on and just paint over it. From Ainslee
In a dark room where there is little natural light, always paint with light colours. It creates the illusion of more space and you can use a piece of furniture or wall as a feature. From Nikki
Bend a metal coat hanger into a hook shape and put in an electric drill to make a free/disposable paint stirrer. From Andrew
Always plan to paint a roof as early in the day as possible. By lunchtime, even on a winter's day, the roof may be too hot to apply the paint. From Andrew
If paint is fresh on your hands, rub butter or margarine into paint marks and it brings them off. From Johnny
I keep the kids amused by painting on the wallpaper before I rip it off... they get over it quickly and ending up playing outside because they are allowed to paint on it, too boring because it’s not naughty. From Serene
Dip your hands in lemon juice and honey to remove paint. From Paz
When painting skirting boards in a carpeted area use masking tape on carpet, force it down the edge of the carpet. Remove tape before the paint dries. From Craig
When you're wallpapering or painting a room, write down, above the door frame, how many rolls you used or litres. Next time you only need to look above the frame to see how much to purchase. From Vickie
Stick tape around the glass of your windows when painting the frames to avoid paint getting on the glass. From Mel
Dab a little paint from the coloured tin on the lid and on the side. When you need to find the right colour again, all you need to do is look for the dab rather than opening every tin. From Mike
When you are in a temporary budget dwelling with plain walls, spice it up a bit by cutting strips of wallpaper of the same pattern and size. Attach these parallel/horizontally one metre to the floor all the way around the room. Then go around the edges of this wallpaper strip with smaller width strips of different patterned wallpaper (preferably lines that will show up as parallel to the original strips), on both sides of the first wallpaper strip.
The end result should be a quick decorative room band to brighten any dreary place! From Bryan
When you have accidentally missed wetting the back of wallpaper and have ended up with bubbles in the paper, use a syringe to squirt water into the bubbles to allow it to stick. From Teresa
If you want the look of floor tiles but can’t afford them, and you have a concrete floor, use masking tape to tape the same sized squares and simply paint over the concrete. When dry, peel the tape up and voila! It’s a good idea to use an etching solution before painting. From Smegs
Pallets are a cheap way to build a fence/dog kennel and many, many other wonderful things for those on a low budget. Simply sand down, build with great imagination, seal and paint. I tell you what... No one would even know you used free pallets. The end result looks great, and friends and family will love it. From Jayson
Make sure that brushes soaking in water are well out of reach of children, or they may try and 'help' with the painting. My Dad found this out the hard way... From Trudy
When selecting paint colours for a wall, make sure that you surround the colour with a grey border (isolator) – this way the colour will be seen on a neutral background. From Gemma
Try and remember to stick some Sellotape® around the paint brush where the bristles meet the metal or wooden part of the paintbrush handle before starting to paint. This stops the paint from drying out in the brush too quickly and therefore it gives a far better finish when applying the topcoats. From David
Check out the mistint section at your Resene ColorShop if you are painting on a budget and not fussy on the colour. From Leah
When using an electric drill paint stirrer to 'whip up' paint in a 10 litre bucket cut a hole in a spare lid, fit the stirrer through the hole to the drill, put the lid firmly on the bucket of paint, then wrap a rag around the stirrer to cover the hole, and then 'whip up' the paint moving the stirrer around and up and down in the bucket. When finished disconnect stirrer from drill, then carefully remove the lid. Mess free! From Malcolm
When painting skirting boards pull the carpet edges up. Should you replace the carpet later, and there is a difference with the pile height, you will not have to paint again. From Jo
If you run out of paint don’t buy a cheaper one which looks 'close enough' to the original colour. It won’t be. From Sara
Always measure twice before cutting, the stress levels and wallet will thank you later. From Gavin
Having an important home function - like a wedding or anniversary is an excellent incentive for completing a papering/painting/building job. From Maggie
Men tend to work in set patterns, they break every so often for smoko, lunch etc. Women tend to keep on going till the job is done. Understanding this difference is really valuable and can avoid disagreements. From Maggie
As complete novice painters, we learnt the hard way about the implications of leaving masking tape on the windows! Our beautiful new French doors had masking tape residue on them for ages, until we finally managed to remove it with the help of a glass scraper and detergent. So our DIY tip? Only apply the masking tape right before painting – don’t do it one weekend, intending to paint the next! From Blair and Cherie
When you have finished painting, return the lid to the top of the can and press it down softly with your hand. Cover the lid with an old painting rag and then gently hammer around the edge of the lid, to fit it firmly into the rim. The can will be airtight and the old painting cloth will save you from getting splattered with any paint that may be in the rim, plus it will keep the bench clean. From Tony and Zambuc
When you’ve finished using a roller and brushes with acrylic paint, put them in the washing machine on cold wash and full cycle. You will be amazed. From Mal
(We haven’t tried out this tip ourselves so if you do decide to try it, you might want to try it on an old one first! Resene)
Generally we recommend pouring your paint into a paint pot before you start painting, which helps to keep the paint in the main can in fresh condition and free of all the dirt and bacteria that a brush introduces into the paint. However if you are already much of the way through the project and paint, you might decide painting direct from the can is easier, in which case you might just find this tip handy…
When doing a small paint job using the original paint tin, just drape a piece of glad wrap over the rim and down into the tin. This means you can tap your brush to remove excess paint on the rim of the tin without getting it getting into the rim. From Margaret
Before storing away part tins of paint: use a marker pen to write on the paint tin label specifying where the particular paint was used. It’s especially good if you have rental properties - e.g. "6 Regent St laundry." From Molly
Put a big rubber band around the paint can so it crosses over the opening, then you can rest your brush across it so all drips go back into the can, preventing mess and saving paint! From Tammy
If you have dry plaster or paint splashed onto a stained natural wood area, use a metal scraper with a cloth over it to lightly scrape the plaster/paint off without scratching the beautiful wood finish. From Sue
Baby wipes are great for wiping small marks or wipes. And when you need to take a break, just wrap brushes and rollers in clear cling wrap so they stay wet and you don't need to keep washing them. From Deanne
Before painting, check your prep work by turning off the lights and shining a torch-beam up the wall from floor-level. Any flaws will show up well - circle them lightly with pencil so you can find them once the lights are back on, and re-plaster as needed before painting. From Molly
I have been painting our new timber boundary fence with Resene Lumbersider. After each painting session my hands are a bit covered in paint. I've found I can quickly clean my hands with the 'Silver Lady' non-scratch cleaning pad for bathrooms. The pad is not too abrasive yet combined with soapy water takes the paint off my fingers and nails well. From Joanne
Make a little ‘testpot’ from the paint when you’re painting, so that if you need to do any touch-ups you can do them easily with your little testpot. From Lady Hermione
Put paint samples against a grey background to see what they’ll look like in ordinary light. From Lady Hermione
If your room feels too ‘hot’, cool it down with whites that have black or blue undertones. These sorts of colours go well with glass and metal for a modern look.
If your room is a bit chilly warm it up with creamy whites that have some yellow or ochre undertones. They’ll go great with other warm colours and any natural timber finishes that may be in the room and often tend to have a more traditional look. From Emma
I've written the paint colours I have used in my house on the wall in the back of a bottom cupboard. I'll always know where to look to find them if I forget, and future owners will have a reference if they want to do some touch-ups too. From Claire
 If you need to stop painting for either a few minutes or even overnight
but can't be bothered with the trouble of washing up your brush or roller,
just wrap it in gladwrap film or put it in a plastic bag
and force out the air. This will stop it going hard and drying out.
Keep it in a cool place out of the sun. From
Rosemary , Andrew, Allan, Jenny, Phil,
Vicky, Karen, Paula, Tracey, Gregg, Julia,
Donna, Sarndy, Kim, Barbara, Jo and
Grant
If you need to stop painting for either a few minutes or even overnight
but can't be bothered with the trouble of washing up your brush or roller,
just wrap it in gladwrap film or put it in a plastic bag
and force out the air. This will stop it going hard and drying out.
Keep it in a cool place out of the sun. From
Rosemary , Andrew, Allan, Jenny, Phil,
Vicky, Karen, Paula, Tracey, Gregg, Julia,
Donna, Sarndy, Kim, Barbara, Jo and
Grant
When trying to get a perfect finish with polyurethane, use a proper tack cloth after all sanding. Have a cuppa between the last sanding and then use the tack cloth. The smallest dust particles show up as really large after a couple of coats of polyurethane. Also, don't wear a woollen jumper when applying the product because even with you trying to be careful, hairs of the jumper will fall on the work piece. Spread the brush full outwards and lay it off as quick and as lightly as you can, firstly across the grain and then even more lightly, with the grain. Polyurethane has to be done quickly as its edges dry rapidly and that makes a soft skin which is difficult to manage with the next brush full. You can get finishes better than spraying with a lot of practice and it lasts better than sprayed surfaces. From Will
When staining a long/tall fence BUY A SPRAYER! The price of approx $160 for the sprayer I bought was saved on day one when I sprayed a 6 foot fence that was 50 metres long in two hours!!! I have since taken to buying secondhand furniture, adding some Resene colour to the sprayer, a $2 remnant from the fabric store and voila new chairs. Everyone loves them. From Sindy
Using an empty plastic pail, cut a hole in the lid large enough for the handle of the paint brush you are using, add a little water and the brushes will stay damp during breaks. From Mike
Never give up halfway or you will never finish (note the word never). From Dennis
If you are cutting in without using masking tape and still leave a trail of paint where you shouldn't, have a thin damp cloth (I like Chux) wrapped over the blade of a painting spatula and immediately run that along the offending spill. It neatly removes the paint. You can repeat the 'wipe' if it doesn't all come off in the first one. From Ellen
Before painting window frames rub a little cooking oil on the glass. The paint will not stick to it and is easily cleaned off with soap and water once paint has dried. From Viola.
Rock hard brushes can be resurrected by coating them lavishly with paint stripper and working at them gently after a few hours (always wear gloves for this). Store brushes, particularly good bristle ones, with the bristles damp with linseed oil or glycerine - and encase ends in rubber bands to keep the tips smooth. Write the paint formulas somewhere else other than only on the tin - keep the references inside an instruction manuals box. Have a box for instruction manuals only - keep in the laundry in a handy place. From Louise
If you end up with a tiny mark on fabric curtains, sheets, etc. instead of soaking the whole article try soaking a cotton bud in bleach (or other) and apply to the stain. From Mary
Wear a shower cap when you are sanding. From Mary
 When
painting ceilings, wear a plastic shower cap to stop paint dripping
on your head. From Lynda
When
painting ceilings, wear a plastic shower cap to stop paint dripping
on your head. From Lynda
When painting outside windows, place masking tape around the already painted areas and the windows to avoid unwanted paint splashes. Make sure you take the masking tape off before the paint dries. From Liz and Stu
When painting, empty the paint can so there is enough room for you to tap the sides of the paint can with the paintbrush. This helps to remove excess paint on your brush. Stir your paint thoroughly before putting your brush in. From William-John
When using a roller, use zigzag strokes, covering the surface in a 'w' shape. Keep the roller on the surface at all times, as if you let it spin, it will spray the paint around. Finish the rolling in one direction. From Stan
If you own rental properties keep a 'Lists' folder on your computer -
one for if you are planning garden maintenance, one for paint jobs, one
for if tenants move out. I also keep one for 'kayaking trips' and for
years had a many-page list for camping holidays, one for your toilet bag
contents and one for your overseas trips. Saves reinventing the wheel. From Mary
Ever wanted to know what order you should paint in? Work your way from the top to the bottom… paint the ceiling and complete that, undercoat walls, undercoat trim doors and windows, topcoat walls, topcoat trims, topcoat doors… then sit back and admire your handiwork!!
To get paint odour out of a room, cut a large onion in half, place in a bowl, close the doors for a couple of days, and the paint odour will be gone. Don't know how it works but it does and the room doesn't smell of onions. From Lyn
After lifting a carpet, I found that there was paper on the floor. To remove it, I used a steam iron (old one) and a spray bottle to soak and remove. Took about 10-15 minutes to remove approx half a metre. From Susan
To remove glue from a wooden floor use a wallpaper remover that gives off steam. We had tried everything else – even a spade to try to scrape it off. After holding the steamer onto the glue for a couple of minutes, we could scrape the glue off with just a paint scraper. It saved us hours of work. Make sure you use a mask. From Joanne
Plastic freezer containers from the supermarket or empty ice-cream containers make great paint trays for speed brushing. Clip the lid on between coats to save paint wastage. From Stephanie
 If you have a bit of spot priming to do on your roof use a pop
top drink bottle to hold the paint. Just squirt a drop on the spot you
wish to prime and brush the primer out. The bottle is easy to seal and
can be put into your pocket and the brush slipped into a plastic bag.
No need to cart a can around. From DG Mansell
If you have a bit of spot priming to do on your roof use a pop
top drink bottle to hold the paint. Just squirt a drop on the spot you
wish to prime and brush the primer out. The bottle is easy to seal and
can be put into your pocket and the brush slipped into a plastic bag.
No need to cart a can around. From DG Mansell
Move your cars to a safe place when you are painting the roof. A while ago we painted the roof on a warm day with a light breeze in the air - once we got down off the roof we discovered our cars had little spots of red paint all over them! True story - we learned an expensive lesson. From Karen
My husband and I had just finished stripping the wallpaper in the family room of the house that we were redecorating and were in the kitchen having dinner when we heard a whining noise from the family room. When we raced in to see what it was, we found our dog Betsy lying on the ground with wet wallpaper all matted in her fur! Tip: Close the door when decorating with animals/children in the house! From Roil
If you paint around windows but haven't masked them properly use the ceramic cooktop razor cleaner to remove the dried paint from the glass. It has a handle and is easy to use without scratching the glass. From Lyn
My best diy/decorating tip is to do one room at a time! From Shute
When painting above your head with a brush, paint tends to drip down the brush onto your hand. To avoid this, put a small hole in an ice-cream container lid and place the handle of the brush through the hole. You won't get any paint on your hand as it will go onto the lid. Once you have finished the job you can clean and reuse the lid. From Nicola
If you want something done, start on it yourself then leave it half finished. This way your husband/wife will hate looking at it and finish it off for you. This has been tried and tested by me. I wanted the garage painted so started one wall and never quite finished it. When my husband saw it, he couldn't bear to see it half done, so now I have my garage painted! From Veronica
Paint one wall of your house each year. Then the job seems a lot smaller. From Ron
If your husband says he is going to paint the house, rush out and pay someone that week to do it! Sorry to all DIY hubbys. From Adele
If you’re painting a door, always paint the edges first then the main face of the door.
 When taking out or walling up a door or window, use the gap
to create an in-built bookshelf. This is very effective if you have
an arched door you no longer want. From Andrea
When taking out or walling up a door or window, use the gap
to create an in-built bookshelf. This is very effective if you have
an arched door you no longer want. From Andrea
When putting up plasterboard on a ceiling and lacking people to hold it up while you screw it in, tack a temporary ledge onto the top of the walls that you can slot the edge of the plasterboard into while you screw the other side to the ceiling. From Shanny
We have had some odd shaped spaces in our home so decided to get creative with the paint colours. Here’s what we learned along the way… Paint the ceiling in a dark colour to lower it and make the room seem cosier. Or paint it in a light colour to make it seem higher and the room larger. If you have lots of shelves and you don’t want them to stand out, paint them the same colour as the walls and it will help to hide them. Or make a feature of them by painting them a contrasting colour and in a higher gloss. If you have an ornate ceiling paint it in a striking colour or to glam up a normal ceiling wallpaper it! From Catherine
Prepare the surface before you start painting and apply the paint as per the manufacturer's written instructions! From Samir
If you are a keen do it yourselfer and have a hands free phone, wrap the phone in gladwrap. It will be kept clean even if you answer it with your hands covered in paint. This is also a good idea if you have a mobile phone. The film does not affect the phone and it does not reduce the sound quality. From Bob
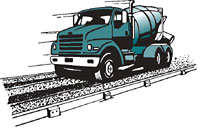 If
you hire a ready mix truck to do your driveway, make sure you work
from the top of the drive to the road. If you don't, you will be stuck
with a truck full of concrete that will set if you don't keep it running
(which might cost a bit) unless you want to drive it back over your
nice new flat drive that took ages to do! From Cassie
If
you hire a ready mix truck to do your driveway, make sure you work
from the top of the drive to the road. If you don't, you will be stuck
with a truck full of concrete that will set if you don't keep it running
(which might cost a bit) unless you want to drive it back over your
nice new flat drive that took ages to do! From Cassie
When painting a feature wall, use tape. Tape the sidewalls and the skirting boards to protect against paint splashes. When you are cutting into the ceiling, use a 'cutting in' brush. From Katrina
To make a tile-like paint effect cut a pot scrubber (i.e. sponge and pot scourer combined) into squares of whatever size you want, glue the scouring side onto a stiff backing leaving space between each square to represent grouting. Paint the squares in various colours or the same colour and apply around dados or doors to get a Greek tile effect. From Liz
When painting with a roller, cover your glasses' lenses with gladwrap. Then when you have finished painting, just peel off the gladwrap. From Noleen
My Dad put in a watertank at the farm to collect drinking water off the roof. He was up his aluminium extension ladder and had just finished connecting the final piece of spouting from the guttering to the watertank. He climbed down the ladder and as he was putting it away, discovered that he couldn't - he'd put the spouting through the rungs of the ladder. TIP: Always move your ladder before connecting the spouting! From Jim
Use old lampshades as funnels when pouring from one paint can to another. From Peter
It is obvious that the wife will have ideas on redecorating but will insist on your input, which will then be discarded as either inane, insane or just plain dumb. However it is no use saying 'just do as you like dear' as that will be regarded as not participating properly and will confirm her feelings that you are not really involved with this project. So it is best to listen to her half carefully (as apart from not at all) during proceeding weeks leading up to the decision, and then when the question comes you can suggest some ideas along the lines of those you know she has been thinking. It is even wise to browse a couple of mags she has left lying around (this is not by accident). This is really smart as it saves arguments, she will think you are brilliant to be thinking the same as her and what's more she will come to the idea you have a modicum of taste and may let you buy your own clothes in future. From Dave
New roller covers tend to leave unattractive fuzz behind on the painted surface, even the ones that say lint free. To avoid this, wrap masking tape several times around your hand sticky side up. Run the roller over the tape several times before painting. From L Hammond
Both my bathroom and toilet walls were painted a pale yellow. To liven the rooms up I painted orange from the top corner of each window down to the bottom corner of the door when entering. It now looks like a ray of orange sunlight coming through the windows even on the dreariest days. It is really effective without being overpowering. From Debi
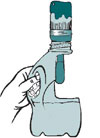 Use a 2L plastic milk carton for a paint and brush holder. Simply cut
away the side of the container (opposite side to the handle), starting
4-6 inches above the base up to just short of the neck. Pour in your paint
and use by holding the milk carton handle as normal and dip brush into
the paint via the cutaway side. Take the cap off so you have somewhere
for the handle of the brush. Once you have finished painting you can turn
the container upside down and drain through the cap hole. From Paul
Use a 2L plastic milk carton for a paint and brush holder. Simply cut
away the side of the container (opposite side to the handle), starting
4-6 inches above the base up to just short of the neck. Pour in your paint
and use by holding the milk carton handle as normal and dip brush into
the paint via the cutaway side. Take the cap off so you have somewhere
for the handle of the brush. Once you have finished painting you can turn
the container upside down and drain through the cap hole. From Paul
Everyone hates cleaning up after painting so here is a tip on how to make this job easier. After emptying the tins that our baby formula comes in I keep them for cleaning our paintbrushes. They have a plastic lid on top, which means you can cut holes in it if you have a larger than normal paintbrush handle and leave it sticking through. The lid also seals in the fumes from your cleaning solution. From Anon
To help keep your children's rooms tidy, paint old beer crates in bright colours and use them to store clothes and toys. From Jason and Suzanne
Using enamel (oil) based paint: Half fill a jam jar with mineral turps and dip your brush into it several times. Then rinse the brush clean using warm/hot water. Repeat 2 - 3 times until the brush is clean. My husband scoffed at me when I started using this method as he thought you shouldn't mix oil and water, however 5 years on and I am still using the same brush. Needless to say he now cleans his brush this way too.
Using waterbased paint: When cleaning your brush under the tap use wonder soap as well, especially when you have dry paint around the top of your brush head. From Jane
 I've recently painted my 3.5m stud Kauri ceiling with a brush, as the
roller didn't fit between the batons. Rather than walking up and down
the ladder with one brush full of paint, I found the best container
to carry the paint in was a cut down 2 litre milk container with the
handle intact. It held enough for one ladder's worth of painting and
had a large well balanced handle. From Gretchen and Pauline
I've recently painted my 3.5m stud Kauri ceiling with a brush, as the
roller didn't fit between the batons. Rather than walking up and down
the ladder with one brush full of paint, I found the best container
to carry the paint in was a cut down 2 litre milk container with the
handle intact. It held enough for one ladder's worth of painting and
had a large well balanced handle. From Gretchen and Pauline
If you want to create a neat texture, use springs off a spiral notebook, and swirl it all over the fresh paint. From Anon
Place your level on the floor. Mark the position of each corner with a pen/pencil then note the position of the bubble. Turn the level around and align it with the markings you made on the floor. Check the position of the bubble. Now do the same with the level upside down. If the readings of the bubbles match your level is level, otherwise use the screws to adjust the vials and repeat the checks until the readings match. From Matthew
My tip: Don't let your husband attempt to DIY otherwise you may end up like us:
Fixed leak in roof, but now we have a hole that is growing with every drop of rain and one day will collapse.
Paint job, yes we (or I should say professionals) will now have to eventually re-paint the roof as he thought he would include other areas not intended. Also thought the carpet needed painting.
Lining in pool - Hawke's Bay has had the best weather this summer and unfortunately, even though we have a pool, we have been unable to use this due to his patchwork and neighbours complaining that our pool is leaking in their gardens. It is now empty again.
From Melanie
To remove old wallpaper, wipe over the wallpaper with water and dishwashing liquid, leave about five minutes and it will just peel off. From Richard and Sandra
When stripping wallpaper, spray with fabric softener and a little water. The fabric softener breaks down the surface tension of the wallpaper and allows the water to soak in better. This will help the wallpaper come off easier. From Kathleen
You can make a paint tray by using an old box with shallow sides and covering it with two white plastic shopping bags. When you stop between coats or colours, just take the bags off and change them. From Glenn
Apply petroleum jelly over door handles and hinges before painting to stop the paint sticking to them. Alternatively, foil wrap door handles and other hardware before painting to keep them splatter free. From R Brooks
Hate stripping wallpaper before you paint? You don't have to! With this tip, you'll create walls of interest. Use a large porous sponge and ready-made plaster. Dip the sponge into the plaster and 'hit' the wall, making sure you make 'peaks' on the wall with the plaster. Let the plaster semi-dry, but before it dries completely, trowel the plaster, using consistent strokes (whatever stroke you chose). Once the plaster dries completely, you can paint the newly textured wall in a variety of exciting colours by Resene. To make the wall even more interesting you can use a basecoat on the wall and then use a Chux cloth (or any other material with an interesting texture) dipped in a contrasting colour and 'hit the wall' with the Chux cloth. In the process of creating a unique design, you'll also cover blemishes. From Karin
From Michelle
To cover an old lounge suite and two chairs buy 1 x double fitted sheet and 2 x single fitted sheets and some small velcro dots. Place sheets over lounge suite and tuck in where needed, then use the velcro dots to fasten down. With velcro dots you can just take off the covers and throw them into the wash. From Belinda
To create a weathered Mexican wall look, plaster outside concrete brick walls with cement and plaster by hand to get an authentic look (great way to get the kids involved as perfection is not required!). Paint the wall in your chosen colour (terracotta looks great). Drop small blobs of white paint into the roller tray, roll the roller through it and then haphazardly paint over the original wall colour. This should result in blurred streaks of white throughout the terracotta second coat. Do not roll in a particular direction, just all over the wall. When dry, the wall will look like weathered terracotta. From Natasha
Make sure you don't pay for the complete job up front. I bought a house in the north about 3 years ago and the guy that was moving my furniture told me along the way that he was a builder, so I agreed he could help me with my DIY plans. My very big mistake was trusting the jerk. He quoted me about $6000, which like a fool I paid there and then. All he had to do was to put in a wall as three already existed and put in a wall divider. To cut the story short, I fired him after 4 days, as the wall he put in to enclose the room didn't touch the ground! He had charged up tools on my account, ripped me off on materials and not paid some local suppliers. I waited for a few days and then thought I had better get stuck in and finish the job. Two family members joined in and helped and a fortnight later all was finished - YAY!!! From Roseanne
Two pairs of hands really do make light work. If you can rustle up someone to help, then get them to cut in around the edges with a brush while you follow with the roller. Make sure whoever is charge of the roller rolls as close to the edge as possible to get a good finish. And if you can rustle up two helpers you can get them to do the work while you sit back and offer helpful suggestions! From Meg
For those painters out there who get paint all over their hands when painting, a tip when using waterbased paints. Before you start painting wash your hands with soap. Make sure there's plenty of lather on your hands and then let them dry naturally - i.e. with the soap on. Then when you get paint on your hands, you only need to wash them and the paint will come off nice and easily. From Barry
 Don't
let your husband choose any decorating products unsupervised! My
hubby, love him as I do, has a wonderful habit of bringing home all
sorts of titbits that are really not needed for the task at hand. He
is a true boy and loves his toys. I don't have the heart to nag him
about it, so I simply go with him and steer him away from the little
treasures he drools over at the paint and hardware stores. From
Sharon
Don't
let your husband choose any decorating products unsupervised! My
hubby, love him as I do, has a wonderful habit of bringing home all
sorts of titbits that are really not needed for the task at hand. He
is a true boy and loves his toys. I don't have the heart to nag him
about it, so I simply go with him and steer him away from the little
treasures he drools over at the paint and hardware stores. From
Sharon
To make cleaning any paint off hands and forearms easy, apply some baby oil or olive oil to hands and forearms prior to painting. You will find that washing up at the end is a breeze. From Paul
Always do a sample and let it dry - don't think that the colour will look the same dry as it does when it is wet. From Tina
In older style homes where the walls might not be perfectly flat, put up a dado around the walls to create a false impression of perfection. Paint different colours top and bottom (like Resene Sisal on the top and Resene Aubergine on the bottom). It will look fantastic and you'll never know that the walls are not 100% flat. From Hayley
My house is in desperate need of a repaint both inside and out. My husband began the repainting job 2 years ago and then 20 months ago left me, the family and the house with a mortgage and worst of all a white house with grey undercoat spots all over it. He fervently promised he would come over the summer and paint over the grey bits at least. Two summers have now passed and he has not returned to the paint job but has gone overseas instead. As I have been so busy working and trying to make ends meet the painting has gone unattended!! My tip? Make sure your husband paints the house before he leaves you! From Diana
Use clear goggles when painting the ceiling, it stops the paint stinging your eyes! From Dave and Carl
It can be quite tricky to repaint skirting boards while the room is carpeted without getting any paint on the carpet. I have found it to be really easy if a long wide straight edge is placed between the skirting board and the carpet (I use the metal straight edge also used to trim wallpaper) and then the excess paint just goes onto the straight edge. The straight edge can be moved along the wall without needing to wait until the paint dries, and can be easily cleaned when the job is finished. From Ruth
To avoid paint drying up in the can, lay a piece of plastic wrap over
the paint can before replacing the lid. From L Hammond
Liven up boring plain stained wooden doors with a small pot of teak stain and a paintbrush. Paint on knots and lines (like you find in trees) to give the doors a rich wood finish. Give them a rub down with a good liquid wood polish and a cloth afterwards to get that lovely wood smell. From Margaret
My son has a lot of soft toys and we had nowhere to put them. We bought one of the large boat shelves, painted it Resene Havelock Blue, turned it horizontally, suspended it from the ceiling on chains and put all the teddy bears inside. He loves it because it looks like the bears are rowing the boat and we love it because there are no longer soft toys all over the house. From H Darwen
Stainless steel wool scourers (without soap) and turpentine are a great way to finish off a paint stripping job on wooden furniture. It's easier to get into the nooks and crannies with a scourer. Paint also comes off wet wood easier than dry wood. From Katy
To get your favourite picture on your child's wall to paint, photocopy the picture onto a transparency and use an overhead projector to transfer it on to the wall. If you can't get an overhead projector and are drawing challenged, trace pictures on with carbon paper. Brightly coloured testpots are ideal to paint in the picture. Use the leftover paint to decorate shelves and drawers. From Jo
When storing paint for a long period of time, put the lid on firmly and store upside-down, this will prevent a film forming on the top of the paint. It also makes it easier to stir the paint when you re-open the can. From Sam, Julie, Chris and Belinda
If you want to decorate a room and can't afford a lot of extras, get your children to paint pictures then frame them. They will look wonderful in any room. From Suzanne
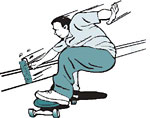 When
painting skirting boards or other low areas, use a skateboard to
roll along while painting. From Sue
When
painting skirting boards or other low areas, use a skateboard to
roll along while painting. From Sue
Keep the insects at bay when you are working outside. Mix together 50% Baby Oil and 50% Savlon Liquid, then apply to your skin. It works as well as any antiseptic cream and will save you some money that you can put towards re-decorating your home. Every little bit counts. From Donna
The finished surface of paperfaced plasterboard interiors is less critical when you are planning to use wallpaper, tiles or a textured finish, as they will cover up most minor surface irregularities that exist. Use a sealer prior to wallpapering to help prevent the suction of the wallpaper to the surface - this will make it easier to remove the wallpaper if you decide to redecorate later. From Anon
To get rid of oil from concrete, sprinkle it liberally with lime. Sweep it up the next day and you'll find the lime will have absorbed the oil. From Brian
When painting drawer handles, take off the handles then put the screws back in. Paint them holding the screws and hang to dry. This ensures a nice even paint job and will save you time waiting for coats to dry. From Kirstie
If you have to paint the house - turn it into a big party - invite your relatives, friends, etc and provide food, beer and music. Make sure you invite a lot of people so you can tell them they only have to come for half an hour or so. They will undoubtedly stay longer, you'll have company and the project will get painted pronto. From Helen
When painting ceilings or even walls, take an old/new tennis ball and cut in half. Make a hole on the round side of the ball and insert your paintbrush through the hole. This will stop any drips etc ending up on you while you are painting - unless you are really bad at painting and then no amount of tennis balls will help. From Sandra
My advice is when it comes to repainting your home's interior and exterior, get expert help from your local Resene store. The amount of trips and phone calls we've made have been numerous but worthwhile as we have haven't wasted any paint. We never would have chosen the colours we did without the advice of a local staff member who said 'trust me'. We did and our home is looking really lovely. We have 'almost' completed the interior but have gone to the exterior because of the good weather we're having and yet again we've called on the help of the Resene staff. So my advice is ask, ask, ask and don't be afraid of thinking outside of the square! From Kerri
From Len and Brian
For those of us that are DIY challenged, its a great idea to get together with a few friends that are also in need of a bit of doing up about their houses. Meet once a month at each other's homes to form a working bee. Between everyone there is usually a bit of know-how and those that are particularly DIY challenged can do the manual labour, keep the crew supplied with cold drinks and fire up the barbecue. From C. Ross
We had our front concrete wall covered in graffiti, so went down to Resene to get something to cover it. We covered it with an enamel undercoat to stop it from bleeding. We then chose the colour Tuscany in a waterbased paint to give our wall a new look of terracotta! Bad start but a great finish!!! From Roy
 I definitely found that it is in your best interest to put a
wedge in the (only) door to the house when changing the door handles...
it makes for entertaining viewing for the neighbours watching you climb
in and out of the bathroom window (lucky that was open) trying desperately
to get the door to open!!! From Rachel
I definitely found that it is in your best interest to put a
wedge in the (only) door to the house when changing the door handles...
it makes for entertaining viewing for the neighbours watching you climb
in and out of the bathroom window (lucky that was open) trying desperately
to get the door to open!!! From Rachel
Reducing the amount of turps you use in cleaning up brushes is easy. Pour a small amount of turps into a jar for the initial clean. Tip this into a soak hole then put some warm water in the jar with Amway LOC. This really loosens up residual paint. Tip the suds into the soak hole and repeat once more. By now your brush will be clean. Spin it out by rolling the handle back and forth between your palms. Wet your palms and make the bristles lie flat and then leave in the sun to dry. From Shane
We bought our house 2 years ago and it needed a lot of work. The hot water cylinder was in the kitchen. We had enough room under the house, so we moved the cylinder under the house and rebuilt our old hot water cupboard into a corner pantry with homemade rimu tongue and groove paneling pantry doors. It looks lovely and we are very happy with the outcome of our complete new kitchen. From Taurua Family
When you want a painting to hang on the wall use the testpots of your colour scheme to create a masterpiece that goes with your decor. Original artwork at a great price! From Wendy
My best tip would be to talk to the experts at Resene! During the Christmas break I decided I would paint the kitchen cupboards from the Buttermilk colour they were to a more vibrant colour. I initially went for green, decided after a day of painting the cupboards that the colour was too bright and went with nothing, so it was back to Resene for a different shade of green. Having finished painting with that shade I was mortified to find that it too looked horrible and didn't blend in with the dining room in our little open plan house. My family agreed (boy, did they agree) so it was back the following day to Resene to get the gold metallic which I was sure would look nice - it didn't! In desperation and after the complaints from the family they were painted back to the original buttermilk colour again. On a good note, having visited Resene Rotorua 4 times in one week I feel I know them well and yes I have been back again - twice - but not for the paint for the kitchen cupboards - this time for paint for the lounge and hall - much to my husband's horror. He thinks I should abandon the idea of painting and stick to gardening. P.S. These rooms only needed doing just the once - with 1/2 Spanish Cream - I really couldn't go wrong!!! Could I? From Sonia
 I have been there, done it all! My best tips are:
Be WELL prepared before you start, with everything purchased in advance, even everything you need for the clean up.
Put your wet brush into a plastic bag/breadbag while you rescue your child, get a cuppa, etc.
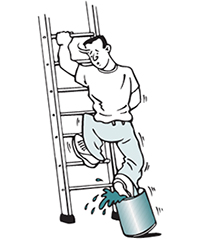
I have to admit, I have TWICE put my foot into a paint bucket while coming down off a ladder. Make sure you have a nail/hook three quarters of the way up the ladder, near the top. Pour the paint you are working with into a smaller pot and hang it onto the ladder's hook.
Have a long rag available tucked into your pocket (so when you wipe your face, or make a mess somewhere, it can be quickly and easily wiped away with no evidence!
From Caroline
Our fridge was old, ugly and had severely yellowed and stained. It looked totally out of place in our nice kitchen. We gave it a new look by first painting it with a forest green house paint, then sponging over it with copper craft paint. Now the fridge looks fabulous and is noticed by everyone who comes into our house! A very cheap and easy way of turning your old fridge into something creative that you can be proud of -it even has a resale value now! Total cost for materials was about $20. From Stella
Get to know your neighbours while cleaning up the neighbourhood by renting a large skip between several houses for a weekend. It saves money and gets everyone motivated to clear up at the same time. Finish off with a street barbecue if you want to get to know them even better. From C. Sullivan
As our family was stripping down the old wallpaper, with one part of vinegar and ten parts of water, my partner decided to wipe the fly marks off the ceiling. It came up so white, that we wiped the whole ceiling. Now it looks as good as new! From Satherley Family
My three best DIY tips:
The plastic scoops that you get in boxes of laundry powder make ideal scoops for transferring paint from big pots to little pots. Plus drill a hole in the scoop handle and suspend it over the pot so that the paint can drain off.
Old thermal drape curtains make ideal dropcloths. The curtain's rubber backing stops paint from seeping through onto protected surfaces.
Old venetian blind strips are good carpet protectors when painting skirting boards.
From Pam
When you spill paint on glass, wait until the paint dries then peel it off. However if you spill it onto aluminium window joinery make sure you clean it off while it is still wet.
Always make sure to buy testpots first, before buying the actual paint. What looks good in a book or on the colour charts may not look right in the room and you can save yourself a lot of wasted expense and paint by using testpots to check your colour first. I myself have learnt this lesson - I decided to paint a toilet area and saw a great colour combination with a feature wall in a picture of a lounge. As the colours went on they were in such a small room that they screamed at each other -there was not the open space like the lounge picture I had seen. I needed to then go and buy more paint... now I have 2 spare tins sitting in the garage and am quite a few dollars poorer by not testing the colour scheme on the area first. From Nicola
 When
painting, wear rubber gloves. Fold the bottom up to create a lip
that will catch any stray drops and prevent paint running down your
arm. From Matt
When
painting, wear rubber gloves. Fold the bottom up to create a lip
that will catch any stray drops and prevent paint running down your
arm. From Matt
When cleaning up the windows for painting the outside of your house (and if necessary for washing down after sanding) use a garden sprayer to wash down and rinse those annoying dirty bits on the inside edges of the windows. It is easy to control so you don't end up spraying water all over the inside of the room. From Marian
When using testpots paint onto polystyrene cut from boxes obtainable from the fish department of your local supermarket. The tops and bottoms are a good size to show the colour. From Marie
 I have 3 DIY hints to help home decorators:
When using oil based paints, eliminate the smell in the house by leaving a saucer of vinegar in the room that is being painted. It really helps to neutralise the smell.
Rather than trying to carry heavy tins of paint around, adapt the larger size milk containers by cutting away part of the top half but leave the handle area intact with the whole of the bottom half. This makes a really handy paint container that is much lighter to carry up a ladder and can be discarded at the end of the job.
I have found that a new brush works much better if left to soak in clean water overnight prior to use. Aside from these more well known hints, let me just say that if you are married it really pays to consider whether your relationship is strong enough to handle the wonderful (?) experience of home decorating. It can be very trying on couples!
From L Wensor
To get rid of lumps in paint that has been stored, strain old paint through pantyhose - simply put a knot in the hose and pour paint down the leg and squeeze through. From Glen
If you're like me and indecisive with paint colours, you can use your collection of testpots to get really creative painting terracotta pots. They make good presents. From Charlie
Fold or roll drapes or curtains into clean rubbish bags and tie at the top. This will keep the drapes clean without taking them down. From Jo
 I always write with permanent marker pen the colour and colour
code of my paint as it lasts much longer than the sticker that is put
on the tin at time of purchasing. From Jacqui
I always write with permanent marker pen the colour and colour
code of my paint as it lasts much longer than the sticker that is put
on the tin at time of purchasing. From Jacqui
When painting skirting boards, place a thin aluminium baking tray beneath the area to be painted. This prevents any paint staining the carpet, gives a nice clean line and is easily moved and cleaned. From Cherry
Cover door handles with gladwrap while painting to save a lot of hard work cleaning. From John
For paintbrushes that have gone hard and are no longer pliable, soak in neat Jayes fluid for a day or two and then rinse in cool water. From Helen
When renovating old houses you often find layers of very old paper and paint. I have found the best way to strip off the old paper is as follows:
Use a tool to scour the paper
Purchase a wall stripper product and mix up with warm water. (You can also mix hot water with 2 tsp of vinegar, although this is not quite as good).
Paint this over the paper, working on one strip at a time. Make sure you wet the paper really well. Leave this for 5 minutes and repeat. Leave this for another five minutes and scrape off with a scraper. You will need to repeat this on each layer if it is very old paper as the chances are it was not prepared properly before being papered. With this method you can get the walls completely free of all old paper with minimal damage. Plaster, sand and seal and it will be prepared to a paint finish standard. To remove old paint we found that it was easy with the right tool. We purchased a scraper that holds a metal blade. Just pull it back across the painted surface firmly and it removes paint easily. We have managed to remove all traces of several layers of paint, right back to the wooden boards. Then give a light sand and seal with Satin Polyurethane. It looks stunning.
From Kerry
When painting corrugated iron, use a fine bristled broom instead of a roller. It saves a lot of time and does the job just as well. From Freddie
 My
Dad had been planning for the last 10 years to build onto a room
at our house by knocking out a wall. My sister and I got impatient and
took to the wall with a sledgehammer. At first he was angry but it has
been temporarily mended now and he plans to start the extension next
week! From Stubbie
My
Dad had been planning for the last 10 years to build onto a room
at our house by knocking out a wall. My sister and I got impatient and
took to the wall with a sledgehammer. At first he was angry but it has
been temporarily mended now and he plans to start the extension next
week! From Stubbie
My tip is to not have too much paint on the brush/roller if you are painting the ceiling!! From Lynda
The best way to clean rollers is to soak them in a bucket of cold water for a minimum of 2 hours so that the majority of paint is diluted out of the roller. You can even leave the sleeves in the bucket overnight. It is then a simple case of putting your sleeve on an extension pole and turning the garden hose on it for approximately 10 min to get the rest of the paint from it. The centrifugal force of the hose water also aids in drying the sleeve quicker. From Marlene
I have two great DIY tips:
We moved into our newly built house in June. As we needed headboards for the spare room and my daughter's room I headed to the local Refuse Recycling Centre. I picked up a worn queen sized headboard for 50 cents and a lovely headboard for my daughter for $2. A quick trip to the Resene ColorShop and I got some paint to match our doors, jambs and skirting. I painted the headboards and they came up like new.
I also painted the computer desk in the same colour. In fact, I have had so many comments about how fabulous they look and how clever I was to get everything to match.
From Diane
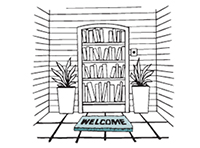
 Recreate the inviting feel of a garden by bringing in some of your outdoor
elements, such as a bench or potted plants. The entry also can be the
perfect setting to focus on a water-filled birdbath holding beautiful
stones - on special occasions, add the glow of candlelight by floating
votives in the water. From Debra
Recreate the inviting feel of a garden by bringing in some of your outdoor
elements, such as a bench or potted plants. The entry also can be the
perfect setting to focus on a water-filled birdbath holding beautiful
stones - on special occasions, add the glow of candlelight by floating
votives in the water. From Debra
Don’t be fooled into buying cheap paint. A cheap paint will generally contain less volume solids and use poorer tinters than a quality product, so not only will you generally need to apply more coats to get the colour to cover well, but the paint will also not wear as well. The biggest part of any paint job is the labour, so whether you are doing it yourself or hiring someone to do the work for you, it makes sense to choose a paint that covers well so you can save time applying it.
The best way to remove old (60 year old) wallpaper, is to invest in a garden weed sprayer, fill it with hot tap water, and spray a light coat of water over the wall. Leave to soak for 5 minutes, respray and then scrape off using a standard scraper. Using the weed sprayer saves having to refill smaller spray bottles every 2 minutes... This is the best method for people who, like me, react badly to chemical strippers etc. From Samantha
Always carry lipstick in your toolbox. Whenever you need to drill a hole in a sheet - e.g. where a pipe is going to stick through - you simply put the lipstick on the end of the protruding object (e.g. the pipe), then put the sheet in its place so that the pipe 'kisses' the sheet's backside. Voila! Your sheet is marked with the place to drill the hole for the pipe. From Duncan and Hilary
When stencilling a wall, it is handy to lightly spray the back of the stencil with spray adhesive so the stencil becomes self adhesive and you have your hands free to do a perfect job. From Hanne and Matthijs
While painting there is always paint drying on the paintbrush at the level you dip your brush in the paint. To clean, rinse with cold water and soft soap. Comb the paintbrush with an ordinary plastic haircomb to get rid of the dried paint-residue and dry the brush in the shade. The paintbrush will look like new and will last longer. From Angela
When DIY'ing don't get mad or irritated. Take things nice and slow - don't rush. Enjoy what you are doing and have fun because the worst thing you can do is get mad and wreck things. Don't be too shy to ask for help. From Jesse
 For
easier stirring and better mixing of paint, drill a few holes -
say 6mm holes - in your stirring paddle (wooden spoon). From Ruth
For
easier stirring and better mixing of paint, drill a few holes -
say 6mm holes - in your stirring paddle (wooden spoon). From Ruth
Resene Paint Effects medium is a brilliant alternative to wallpapering and gets noticed by your visitors. I have found that along with using a sponge, you can use a variety of applicators. A good one for a teenager's room is to use an old pair of ripped up denim jeans. The effect of the diagonal weave plus the ribbed seams pressed over the paint effect medium, creates a really unique style. You must be careful to press the fabric lightly and quickly, and not to rub the surface. It's best to use smaller pieces - 30 cm square at the most. A dark blue, with a metallic paint over looks great, as does black and white. Other items to use are; scrunched up plastic bags, bubble wrap, corrugated cardboard, dried leaves, interesting footwear with designs on the soles, terry towelling, candlewick... the list is endless, especially if you use more than two colours ! I am also an artist and make very good use of Resene testpots - far better than the other specialist art paints. From Ursula
To keep your brushes in tip top condition and stop them from being water logged and getting bent tips, drill a hole in the brush handle approximately 2-3 cm up from the end of the brush. Use a small metal rod long enough to fit across the top of the paint tin and put the rod through the hole in the brush. This will keep the brush in just the right amount of water and will stop the hairs from going in all directions and touching the bottom of the tin. You should be able to get at least 5 brushes on in one go (depending on their size) in the same pot. Instead of the brushes lying on their tips they are supported and will last longer. From Nicola
Make sure that you check your batch numbers when ordering large quantities of wallpaper or you may end up with different shades of the same wallpaper on your newly decorated walls. From Nicky
 I recently painted the inside of a shower stall in my home that
was quite dark making it difficult to see whether the paint had gone
on consistently or evenly. I removed the lampshade off an old lamp stand
and placed that inside with a 100 watt bulb in it. I soon saw all my
'flaws' and where I needed to pay more attention. Tip: Make sure you
have enough light when painting so you can see what you are doing -
otherwise you may end up doing it twice. From Leisa
I recently painted the inside of a shower stall in my home that
was quite dark making it difficult to see whether the paint had gone
on consistently or evenly. I removed the lampshade off an old lamp stand
and placed that inside with a 100 watt bulb in it. I soon saw all my
'flaws' and where I needed to pay more attention. Tip: Make sure you
have enough light when painting so you can see what you are doing -
otherwise you may end up doing it twice. From Leisa
My tip is to let the wife choose the paint colours - saves on arguments and she'll be keener to apply the paint herself. From Steve
If you have been a DIYer in the past but now all your paintbrushes are hard and crusty, soften hard paintbrushes by putting them in an old tin with vinegar and a little soap powder. Bring to the boil, then rinse thoroughly in warm water. Your paintbrushes will be ready to use again. From Belinda
My tip is to invest in a colour consultant. In our case one that was very familiar with Resene paints. They are well worth the cost and can save you lots by not choosing wrong colours. They also choose colours that you would not necessarily have thought of, which is great. From Lee
Here's my tips for all those with spouses who are unwilling to join in the colour decisions: 1) Sacrifice the colour scheme of your toilet for the greater good. 2) Paint one metre square samples at eye level, and name them with a felt tip. 3) Faint in amazement as within a week he'll be telling you he prefers Resene Fuego for the kitchen and would rather see Resene China Ivory in the hallway. From Rachel
You can revitalise old concrete or clay flower pots and planters. Clean them up and get a testpot of Tuscany. You'll end up with lovely new terracotta coloured pots and planters. They look a treat, with very little effort. From Roy
With vast experience in this, I can honestly say never never never do it yourself, always get a trained professional. If you are going to paint a room that is wallpapered, always strip the wallpaper first. You never know what cracks will appear from under the wallpaper after you have painted it and no matter how much plaster you use after the fact nothing works. From Nicola
When redecorating your house, or purchasing/building a new home, keep paint samples, interior and exterior, on hand at all times. Fold an old cardboard box into a fan and paint a wide strip of each paint colour on a single fold. Write on the card what the colour is, and whereabouts you have used it - i.e. interior/kitchen cupboards/ gold, exterior/brick terracotta red. This will give you a decent size sample to take with you when making other purchases for your house i.e. curtains, plant pots, tiles, outdoor paving/bricks, paint, wallpaper, frames, furniture fabric, rugs etc. Make sure you allow each paint sample to dry properly before folding. Fold it, store it away from the sun, and it takes up virtually no space, an instance reference for you to use when making those 'much later' additions to your home! From A Cootes
 When attempting 'painting for the non-painter', it is a good idea to
put suntan lotion on your hands before starting. It makes it a lot easier
when you have finished (or given up!) to wash any excess paint off your
hands. From Lesley and Neville
When attempting 'painting for the non-painter', it is a good idea to
put suntan lotion on your hands before starting. It makes it a lot easier
when you have finished (or given up!) to wash any excess paint off your
hands. From Lesley and Neville
To avoid headaches while painting indoors, have a resealable water bottle on hand - it helps prevent the dehydration caused by the chemicals and you can drink while you're painting. From Glyn
When painting a steel garage door with lots of grooves and smooth sections, put an old fridge magnet the row above where you are painting so you don't lose your place. From Gaynor
My tip for painting outside is to get your spray painting equipment ready to go, find your best overalls and a pair of gloves, then get your wife on the job!!! Hey works every time, she loves it. From G Giles
We have a 'New Denim Blue' coloured iron fence around our BBQ area. I could only purchase green coloured hanging baskets to hang on the iron fence, so I purchased some New Denim Blue paint from the local Resene ColorShop and painted the hanging baskets to match the fence. They look awesome and it was very, very easy with a small brush. In fact, when I took them back to the garden shop to get plants for the baskets, the shop suggested I could paint some for sale in the shop as so many people ask for different coloured hanging baskets. From Diane
 Don't forget the good old shower cap when two painters (i.e.
Poppa and grandson) are painting. The one working at the lower level
can wear the cap thus stopping the paint getting in their hair. From
JE Morgan
Don't forget the good old shower cap when two painters (i.e.
Poppa and grandson) are painting. The one working at the lower level
can wear the cap thus stopping the paint getting in their hair. From
JE Morgan
If repainting a previously painted surface, use a common kitchen scourer to both clean and roughen the surface. In many situations it will save you needing to sand before painting, and quite a bit of elbow grease. From Perry
While you may be tempted to put it off, the ideal time to repaint is when the current paintwork is chalky looking but still sound. Wait too long and you’ll have to spend ages removing the paint altogether before you can repaint. From Stephanie
Always cover everything in the room you are working in. Never think when sanding that because the TV and video are on the other side of room that you don't need to cover them, as the dust will find its way to them and may ruin them. From Adele
Leave unopened tins of enamel out in the sun for a short while prior to use. This will warm the paint and make it easier to apply. From Richardson
After hours struggling with screws in tight spots I learnt a simple but effective method to make the job less energy intensive. Simply rub the thread of the screw on ordinary soap. This lubricates it allowing it to screw in easier, easing both frustration and ebbing enthusiasm. From Liam
When revarnishing wooden window frames, DO NOT JUST SAND DOWN AND APPLY VARNISH. You will be sorely disappointed, as we were, when after sanding and varnishing from 10am until 6pm, eating dinner and falling asleep, we awoke to find the varnish had turned into huge white bubbles and lumps. Always apply a special wood undercoat first to stop sap seeping through and ruining a weekend's work. Yes, we applied it again and the same thing happened until, third time lucky, we asked for advice! Actually, that can be my second tip... when in doubt, always ask for advice from a professional!! From Amanda and Scott
My Dad once told me 'If all else fails, read the instructions.' From Z Kilford
 For bigger jobs use a planning sheet to plan the project. Label each major
job with a priority number and list the smaller jobs related to each major job.
This will help you break large projects into manageable chunks of work. From
Alan
For bigger jobs use a planning sheet to plan the project. Label each major
job with a priority number and list the smaller jobs related to each major job.
This will help you break large projects into manageable chunks of work. From
Alan
We have 'done up' a few older houses with hard to remove wallpaper and we are now in the process of doing up our own home, which was initially wallpapered in the 1950's and has had subsequent layers added. To remove the wallpaper we use a pump action weed sprayer filled with warm water. Spray a large area top to bottom (having laid down newspapers to catch the drips) until the paper is very wet, wait 10 minutes and using a fish slice peel off the wallpaper. Works great. From Garry
The small plastic pails (which were bought at Christmas filled with cookies) make ideal paint containers and are easier to carry up and down ladders with small amounts of paint than full cans of paint. From Pam
After having browsed for ages and trying out numerous paint chips and testpots, I decided I wanted faster results. I scanned a few photos of our house into our computer, printed them out on white thick paper and got a stanley knife to cut out all the white walls around the windows. We took the three sheets to our local Kapiti Resene ColorShop and overlaid the photos over the different paint samples in the books. You could instantly see what the effect was. Within 15 minutes we had the perfect colour, and it looks awesome on our house! From Jenny
 When painting an iron roof, test the temperature with the back of your
hand. If you can't place your hand on the roof then it is too hot for
painting. From Sara
When painting an iron roof, test the temperature with the back of your
hand. If you can't place your hand on the roof then it is too hot for
painting. From Sara
Check your windowsills very carefully when buying a new home. When I had to replace some windows shortly after shifting in, it was discovered that the previous owners had restored the outside windowsills by scooping out the inside and filling it full of medium sized flat stones and plastic bags. This caused quite a laugh among the builders who were preparing my windows. I did find it funny... later! From Rona
To avoid paint dripping down your arm when painting a ceiling cut a slit in a large sponge and push the brush through. The sponge will catch the drips.
Place newspaper under the door and behind pipes when painting to avoid getting paint in the wrong place.
Place the paint container or paint pot onto a paper plate to catch any drips.
Ever wondered what was the difference between a primer, sealer and topcoat? A primer is designed to be the first coat. They’re very important because if they don’t stick anything else you apply afterwards won’t stick either. They also help seal and protect the surface. Sealers do very similar jobs but tend to be used when binding or sealing the surface, when you need to block stains or when you are painting over a smooth surface that normal paints would find it hard to stick to. Topcoats are basically the last layers, often coloured, which help to protect all the coats underneath them against the weather.
Touch up very small areas of paint using a cotton bud.
When painting stairs paint every second step and allow to dry completely before painting the remaining steps. This will allow you to keep using the stairs while you are decorating.
 Problems in drying weather with paint build up on the top of your paint bristles? Wind 50mm of carton tape around the brush so it comes down approx 20-25mm over the top of bristles. This helps retain moisture at the top of the brush, makes cleaning the brush easy and helps to keep rough bristles in place. It only takes a few seconds to put on and remove and works well. From Rob
When applying paint over silicon causing sissing, wipe the silicon areas with vinegar to allow the paint to adhere - this will stop sissing. From Andrew
If using mid to dark base paints always use a tinter sealer or primer/undercoat as this will increase the life of the paintwork by years. Always tint to a slightly lighter colour to make it easier when applying topcoats. From Stephen.
Add a cap of Umber, Sienna and Ochre tinters (MPS stainers) to 4L polyurethane when varnishing Rimu – it brings back the colour and brightens up the wood. From Russell If using acrylic paint, drips, minor spills and blemishes can be cleaned off other surfaces using meths instead of water when still fresh. From Norm
To keep your hands clean delegate the work to someone else!
In hot weather and high humidity thin your acrylic paint with Resene Hot Weather Additive – you’ll find it will flow better and leave fewer brush marks. From Stephen
Apply a layer of varnish over old marks (i.e. pencil, pen, pen marker, paint) on wood, then while it is wet sand it off and you’ll find the marks come off too. From Emere
When you visit a Chinese restaurant never refuse the chopsticks. They make excellent stirrers for small cans of paint. From Anon
 To avoid neck strain when painting ceilings fit 2 small mirrors at 45° to perpendicular into a pair of glasses (safety or sunglasses) using masking tape. You can then paint the ceiling without bending your neck. From Dave
When painting on a hot day and you stop for lunch. Leave a damp rag over the top of your paint tin with the brush in it – will save it skinning up. From Stephen
When you have cleaned out acrylic rollers and put them in a 10L bucket put in 1/4 cup of Janola with the water – it stops the water going rotten. From Robert
Spray spraygun with CRC before spraying and when finished, wash with the hose and all paint falls off. From Dave
If wallpapering, get a Resene testpot in the same colour, or as close as possible to the wallpaper background colour and paint each possible joint on the wall before papering, and let dry. Size wall as usual, then hang paper. If the seams split, as can sometimes happen, the fault will be almost invisible as it reveals the same colour behind the gap in the paper... You can also paint that background colour around tricky obstacles, such as profiled windowframes, old powerpoints, dodgy skirtings etc, and if the subsequent cuts in the wallpaper are not 100% accurate, small gaps, misses or faulty cutting will almost be unnoticeable. From Hart
 I had clients that had great trouble with cluster flies landing on their roof at dusk. As the night came the flies would come into the ceiling cavity and come down through the downlights of the house. The problem had been going on since the house was built 5 years ago. They had a pest control firm spray different chemicals to try to stop the flies - without any success. Sitting down in front of their computer my clients found out that cluster flies liked the coolness of light coloured roofs. We came in and sprayed two coats of Hi-Glo house and roof paint in Resene High Tide and had immediate success. As soon as the roof was painted the darker colour the flies disappeared, So if you have a problem with cluster flies, check the colour of your roof before spending time on pest control. From Ian
When painting with a roller, paint the edges first with a paintbursh then roller over the edges of that to get a better finish. Thanks to Jenny.
If your paint tray is empty but you need one more roller full, rather than messing up the tray again, load the roller using your paint brush. Thanks to Judy.
So, you have painted your whole room and now it looks too ‘in your face' or not quite right. Instead of going to the expense of a full repaint, get a small pot of a lighter/brighter/contrasting colour or two, and have fun trying out some paint effects. You can moderate the offending colour and produce a really original finish. Thanks to Judy.
Put small size paint tins into bread bags to make them easier to carry. The brushes can go in, too. When the lid is put back on, the bag stops the paint splattering when it's knocked with a mallet. Thanks to Anna.
As paint tins inevitably end up with runs that obscure the writing, I put a large U (undercoat), W (waterbased), E (enamel) or T (for turps clean up) on the lid and/or base with duct tape. Thanks to Anna.
If you wear prescription glasses when painting the ceiling, cover each lens with a tight piece of gladwrap plastic film to stop specks of paint landing on your glasses. When you have finished simply peel it off and discard. Thanks to Jocelyn.
I have tried all means to keep my paint tray clean or covered to keep dreaded contamination out of the paint. Washing and drying, lining with plastic bags, painfully thin and unmanageable plastic liners, all unsatisfactory. Then, I was sealing a bowl of leftovers and the light bulb went on. I could use this sticky plastic wrap (Glad Press n Seal) to line the paint tray moments before I was going to use it, it sticks into the corners and if you have enough patience, it lays flat without wrinkles. Yippee, my new best paint friend! Thanks to Lisa.
I find that putty and filler are much less likely to dry out if I pack the pot tightly with plastic bags. Thanks to Anna.
$0 solution to protect the carpet whilst painting the skirting boards: I took a takeaway plastic container lid, cut it in half so I have two ‘longest' pieces, and joined them with a piece of tape. You'll also need to cut the small edges so they are square on the sides. The long edge goes between the carpet and skirting, press it with one hand, apply your paint, take it out, wipe the small excess from the edge and repeat as you go through the board. Works brilliantly! Thanks to Andres.
Before starting, paint Vaseline over any tiny areas you don't want painted, like screws or hinges. Lay it on thick and proceed as normal. After the paint has dried, go over the area with a small cloth or paper towel and the paint will wipe right off! This is also really handy for spray-painting! Thanks to Hayley.
When you have finished a bottle of nail polish DONT throw the brush away, as this is absolutely wonderful for all those small tricky touch-up jobs that even a small paintbrush is too big for. This is especially good for doing around window frames where there are rubber seals. Thanks to Sam.
I use an old-fashioned bread and butter knife with a wide blade to scrape off paint spots. If I go over the glass when I paint a window, a boxcutter is useful to cut through the paint right at the edge to make the rest easy to scrape off without removing any from the wood. An old man told me that turps will also remove paint from glass. Thanks to Anna.
Masking tape is rated by how many days the tape can be left on a masked surface without leaving a residue. Purchase according to the surface you're applying it to. When removing tape pull away at a 45 degree angle. This reduces the chances of it splitting/tearing. There's nothing worse than having to retouch paint ruined by inferior tape – so go for quality. Thanks to Beth.
Occasionally I've been caught out popping in to see how my daughter is going on a house reno or two and found myself with a paintbrush in hand. Just do a quick strip and turn your clothes inside out... perhaps not though if you're in your finest silks. Thanks to Linda.
After you finish painting a room paint a small swatch on the top of the tin the leftover paint is in and label it with the room the paint was used in with a black marker. Especially important if you use similar neutral shades. Then to save what's left, place a decent sized piece of gladwrap into the tin/bucket and onto the top surface of the paint. This stops any skins from forming over time so touch-ups are easier and cleaner. For ease of accessorising later on, carry labelled swatches in your glovebox or bag so you can match the colours more successfully under different lighting conditions. Thanks to Polli.
When I finish a painting job with paint still left in the tin, before I shut the lid down tight I draw a horizontal line on the outside of the tin to show how much is left. I also write on it which room or wall the paint was used in and the date used. We sold our house recently and I was able to save hundreds of dollars using my paint remnants to touch up walls and doors preparing our house for sale and saved the hassle of getting the right colour paints. Thanks to Carol. And also thanks to Victor.
When my Resene paint brushes are no longer suitable for painting with, especially the smaller brushes, I don't discard them. I clean them up and keep them to dust dirt off plants that I have repotted and to spread the earth around the plants. Nice and delicate to use. Thanks to Wayne.
Never skimp on wallpaper no matter how cheap and tempting it may be in a sale. Always ensure you won't run out We were caught once and it was a disaster zone and proved a very expensive mistake. Thanks to Rae.
In the interests of a cleaner environment before I wash out a roller after painting I can get 90% of the paint out of it and into the paint bucket to reuse by firmly running the back edge of an ordinary kitchen knife lengthwise down the roller. Hold it over the paint pot and it will collect in there for reuse. The roller will be almost dry after a few ‘scrapes' and the remainder can easily be washed out as normal. Saves the bulk of it going down the drain and the roller can be used again. Thanks to Janene.
A low ceiling will look higher if the scotia is painted white as well as the ceiling. Thanks to Anna.
Use a shower cap over your hair - especially if using a roller on the ceiling. Thanks to Brigid.
When you're pouring paint from a can/pail always pour the paint over the side with the name of the paint, not the side with the instructions. That way, when you (inevitably!) spill paint down the side of it you can easily re-write the name of the paint (if required) and still clearly read the prep, dry-time and clean-up instructions. Thanks to Antonia and also to Melanie.
I always carry 4 litre paint tins in a bucket. That way, I can have the brushes and paint stirrer on hand, down beside the tin and the damp rag hanging on the side of the bucket. No more losing these essential items and no mess if paint runs down the side of the tin. Thanks to Anna.
We have recently been painting the whole inside and outside of our first home. Inside our bedroom is Double Black White and the outside of our windows are Half Black White. I came home one day to find my partner had spent the whole day painting and touching up windows with interior Double Black White! It wasn't until the paint had dried you could see how different the paint was. Always label your paint tins with the areas you are using them for! We won't be making that mistake again! Thanks to Sarah.
When we moved into this house, there was an old plastic chair in the shed that had obviously been used for standing paint on; why did I never think of this? I have been very glad of the 'paint chair' which means much less bending down. Thanks to Anna.
Buy a reasonably fine sieve and pour your paint through it into your painting container. It is surprising how much the sieve catches and it also helps to get a better smoother finish Thanks to Adrian.
Before replacing the lid float a cork in the remaining paint. This can be used as a 'handle' next time to remove the skin.Thanks to Charles.
With our paint we cut a circle out of wax paper the size of the tin. You can put the lid/tin on top of the wax paper to trace around it. You then place the wax paper on top of the paint surface (in the tin) when you are finished. This stops the air getting to your paint and keeps it more useable for longer, in particular it stops the skin/crusty bit forming on top. Thanks to Kirsty.
If you are painting in sunlight and getting glare in your eyes, use sunglasses. This will stop glare and you can see better. Thanks to Suraj.
My old house has brass window fittings, now darkened which had been painted and later had the paint removed, not entirely successfully. It's a terrible job. I had the idea of simply painting over the bits of paint that seemed impossible to remove. Resene Monkey did it, and even I can't see where it is. Thanks to Anna.
The first part of this tip is: do not leave your paint in the back of the car because it will get shifted to put in the groceries and it might just tip on its side and roll out the back door and create a vast white puddle in the carpark. You would not believe how far a big tin of Resene paint can spread (well perhaps you can if you have already painted walls with it). I don't know what was worse the embarrassment or the fact that I could not afford to buy another one.
The absolutely lovely gentleman from the store could sense that this was the case -"I'll get you another tin," he offered kindly. Brought up to be an honest soul I confessed that I had bought the paint at another store the day before. "You stay right there. I can help," he said. Now this is where the advice comes in.
Did you know that you can rescue most of a tin of spilt paint with a plastic dustpan? Just scoop it up and pour it back into the tin! Which is just what the man did for me. (No doubt they have the occasional idiot like me who drops tins of paint in the store so he was all set up to help). When he finished scooping up my paint I shook his hand and thanked him profusely. About 80% of the paint got back into the tin and the handy trick of straining it through some old stocking tights meant that it went onto the wall just like new. Which only goes to show how tough Resene paint really is. Thanks to Colleen.
A quick way whether to check it is a good time to paint is to brush out a thin layer of water and see if the water has evaporated within 15 minutes. Thanks to Jeff.
Paint a popsicle stick, or two, with your interior colours then when it's time to match fabric and furnishing it's a breeze. Thanks to Pauline.
If you're mixing up paint for a job like the house exterior, or a fence… mix the paint on the back lawn .NOT the driveway. You'll thank me for this tip one day. Roof paint and glaze is particularly difficult to remove from freshly laid coloured concrete driveways. Grass grows back fast, but concrete doesn't shed paint as easy. Thanks to Roger.
Use inexpensive, disposable, latex-style gloves for painting. At the end of the job, they peel off, inside-out, leaving hands without a trace of paint. Thanks to Ralph.
For best results, use quality paint brushes. Cheap brushes have their uses, but frequently shed bristles and can leave a streaky finish. Look after your quality brushes and they will look after you. If you plan to use the brushes again shortly after use (even if you're using oil-based paint), it's fine to place them in clean water, to just below the top of the bristles. Use a lint-free cloth, such as an old piece of sheet, to dry the brush off before reuse. If the brushes are left in water or turps for a longer period – say several days – before reuse, drill a 5-7mm hole near the base of the wooden (or similar) handle. Push a piece of wire, skinny chopstick or similar, through the hole and rest on either side of the container holding the water or turps. (A ‘V' shape cut on both sides at the top of the container will keep the wire/chopstick in place.) You'll need to experiment, but what you are trying to achieve here is to suspend the brush in the liquid, so the bristles don't curl over at the bottom of the container. Brushes with curled bristles are difficult to use.Thanks to Ralph.
Sometimes very old exterior weather boards have firmly adhering paint, but it's in ‘islands' within the prepped wood. When repainted these ‘islands', with their raised base of old paint, can look unsightly. To counter this, take some soft oil-based putty (made extra soft with additional linseed oil) and add to an oil-based primer or primer-undercoat paint. Experiment with consistency but what you are trying to achieve is a thicker base paint to blur the conspicuous edges of the old paint. It's often easier to apply a thin paint/putty mix with a flexible blade. When it's dry you may need to use a light sandpaper to gently smooth it off.Thanks to Ralph.
To get a better flow with an oil-based paint, place the tin into a container of hot water. Make sure the water is not too near the top of the paint tin – you don't want water splashing in. Gently stir the paint and as it warms you'll find it flows more easily onto the surface being painted. And importantly, you haven't thinned the paint consistency as would happen if you added turps. You will need to renew the hot water from time to time.Thanks to Ralph.
If you're planning to paint outside from a ladder, screw a sturdy (preferably hot-dipped galvanised or stainless steel) screw-eye into the barge board or similar. Firmly rope the centre of the step closest to the screw-eye to the screw-eye, satisfying yourself it's a strong connection. Most people who have a disaster with a ladder, do so as the ladder either falls backwards or sideways. This hint may ‘save your bacon'. And leave the useful screw-eye in place for next time. Thanks to Ralph.
Use a rubber band around the paint tin to wipe the brush on. Saves paint running down the side of the tin and all the drops go back into it. Thanks to Julie.
If you have a handy tip of your own to share we'd love to hear from you - submit your handy tip.
![]() Get inspired ! Subscribe
Get inspired ! Subscribe ![]() Get saving ! Apply for a DIY card
Get saving ! Apply for a DIY card
![]()
Can't find what you're looking for? Ask us!
Company profile | Terms | Privacy policy | Quality and environmental policy | Health and safety policy
Colours shown on this website are a representation only. Please refer to the actual paint or product sample. Resene colour charts, testpots and samples are available for ordering online. See measurements/conversions for more details on how electronic colour values are achieved.
What's new | Specifiers | Painters | DIYers | Artists | Kids | Sitemap | Home | TOP ⇧

