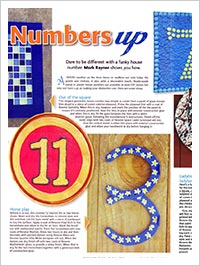
Dare to be different with a funky house number. Mark Rayner shows you how.
A house number on the front fence or mailbox not only helps the postie and visitors, it also adds a decorative touch. Ready-made metal or plastic house numbers are available at most DIY stores but why not have a go at making your distinctive one. Here are some ideas.
Once you've made your house number, you'll need to fix it into position.
The most secure method is to drill a small hole through the house number and fix it directly to a wooden fence or mailbox with a flat head galvanised nail or stainless steel screw. The head can easily be touched up with paint. If you're fixing it to concrete blocks use a masonry nail or a screw with a plastic rawl-plug. Numbers can also be fixed with exterior glue or hung from galvanised wire or chain.
![]()
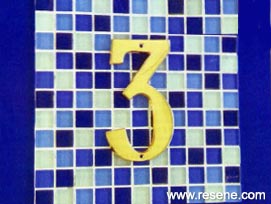
3 – Out of the square
This elegant geometric house number was simple to create from a panel of glass mosaic tiles glued to a piece of 22mm exterior plywood. Prime the plywood first with a coat of Resene Quick Dry. When this is dry, measure and mark the position of the tile panel to ensure it's centrally positioned. Glue the tiles in place with exterior construction glue and when this is dry, fill the gaps between the tiles with a white exterior grout, following the manufacturer's instructions. Finish off the outer edge with two coats of Resene Space Cadet (a testpot will do). Glue the central metal number into place with exterior construction glue and allow your handiwork to dry before hanging it.
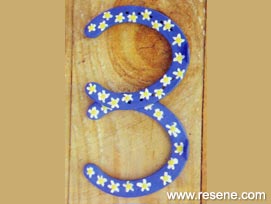
3 – Horse shoe
Believe it or not, this number '3' started life as two horse shoes. Wash and dry the horseshoes to remove dust and dirt and then rub the bare metal with a piece of sandpaper to key the surface. Apply a coat of Resene Vinyl Etch to the horseshoes and allow to dry for an hour. Wash the brush out with methylated spirits. Paint the horseshoes with two coats of Resene Mariner. Allow two hours to dry and then decorate with painted daisies using Resene Manz and Resene Quarter Villa White (testpots will do). When the daisies are dry, finish off with two coats of Resene Concrete Clear, to provide a shiny finish. When that is dry, fix the two horseshoes together with a generous blob of construction glue.

11 – Round in circles
This circular house number '11' started life as a paint pot lid. First, wash or peel excess
paint off it. When the lid is dry, lightly sand it to provide a key. Apply a coat of Resene Smooth Surface Sealer, to help paint adhere to it. When that is dry, paint the lid with two
coats of Resene Pohutukawa. Next, paint the numbers and edge of the lid with two coats
of Resene Solid Gold. Allow two hours drying time before edging the numbers with Resene Nero. When that is dry, for added protection, apply two coats of Resene Concrete Clear.
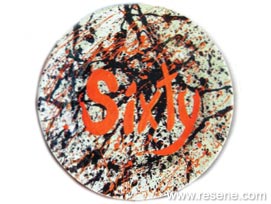
60 – Splatter platter
This funky splatter design was created from a large glazed ceramic platter. Sand the platter first to provide a key and Resene Smooth Surface Sealer. When that is dry, apply two coats of Resene Surrender and then splatter the surface with Resene Jaguar. When that paint is dry, paint on the house number (in words) using Resene California, allowing a little of this colour to also dribble over the platter. Allow your plaque to dry thoroughly before applying two coats of Resene Concrete Clear.
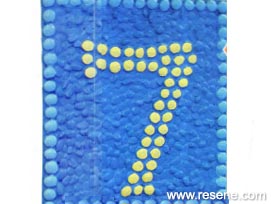
7 – Stone the crows
Glue small stones and smooth pebbles to a sturdy plywood base with a generous amount of exterior PVA glue to make this colourful house number panel When the glue is dry, prime the front back and sides of the panel with Resene Quick Dry, and allow to dry. Then apply two coats of Resene Lumbersider tinted to Resene Optimist and allow it two hours to dry. Next, highlight the central number with Resene Bardot and the edge with Resene Endorphin. For added protection, apply two coats of Resene Concrete Clear, allowing two hours for each coat to dry.
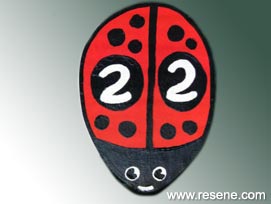
22 – Ladybird, ladybird
Here's a fun project for the kids. Using a jigsaw, cut a ladybird shape out of 22mm treated plywood and let the children help you decorate it. First the plywood will first need to be primed with a coat of Resene Quick Dry. Once that paint is dry, get the kids to apply two coats of Resene Bright Red, giving each coat two hours to dry. Paint on the spots, eyes and wings with Resene Nero and Resene Alabaster. Again, Resene testpots are perfect for this project.
![]() Get inspired ! Subscribe
Get inspired ! Subscribe ![]() Get saving ! Apply for a DIY card
Get saving ! Apply for a DIY card
![]()
Can't find what you're looking for? Ask us!
Company profile | Terms | Privacy policy | Quality and environmental policy | Health and safety policy
Colours shown on this website are a representation only. Please refer to the actual paint or product sample. Resene colour charts, testpots and samples are available for ordering online. See measurements/conversions for more details on how electronic colour values are achieved.
What's new | Specifiers | Painters | DIYers | Artists | Kids | Sitemap | Home | TOP ⇧