Projects from Your Weekend magazine
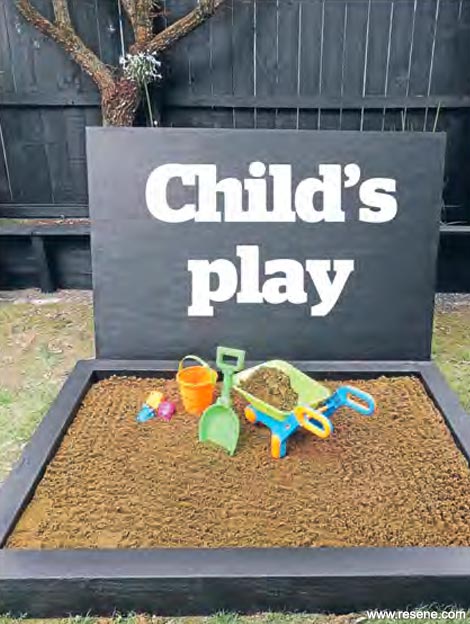
Break out the buckets and spades - a sand pit is an easy way to guarantee stay-at-home fun. Sarah Withell shows us how to build one.

Building a home-made sandpit is a rite of passage for many Kiwi parents, and in our home year it's no different.
Over the holidays my husband and I tackled building one for our 2 year-old son, with the aim of keeping it complementary to the rest of our outdoor areas.
I found that by choosing a stylish paint colour that we could also apply to our surrounding fencing, and keeping the design sleek and simple, we were able to create a practical sandpit that ties in with the rest of our garden. And the toddler loves it too. Everybody wins!
For this project you will need

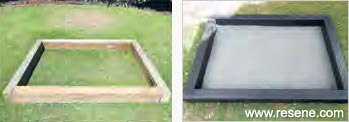
Left: Put the timber framing together (using H5 1500x100 pine in this case). Right: Add a concrete base to keep the weeds out, if the sandpit is to be a permanent fixture.
Step 1:
Cut all your timber to the correct lengths for your chosen sandpit size. Our sandpit measured 1200mm wide by 1500mm long.
total size. This is the size to cut your plywood sheet.
Step 2:
Use a hand drill to screw the lengths together to form your frame. We drilled 8mm pilot holes for the coach screws to go into.
To avoid having the heads of the bolt protruding out from the frame (possible hazard for kids!) we used a 35mm spade drill bit to create a recess for each bolt head.
Step 3:
Paint the frame and the lid in Resene Lumbersider exterior paint. We decided that Bokara Grey was the perfect colour to paint both our fences and the sandpit. A great feature of this paint is that it's self-priming, so there is no need to apply a separate primer first. Apply a good three coats of Lumbersider in your chosen colour.
Step 4:
Choose where you want your sandpit to go and place the frame in your chosen spot. Using some general purpose
concrete, mix up the amount you need according to the directions on the packet.
We used about three bags, which was enough to get an even coverage lining the bottom of our sandpit. Obviously if you are after a less-permanent solution to weed prevention, you could line with weed mat or plastic of some sort instead.
Step 5:
The fun part! Once your concrete base has set, or your chosen alternative method of lining is ready, pour in the sand. Hardware stores sell bagged sandpit sand, which is nice and safe for kids. For the size of our sandpit, we needed about eight bags. Don't forget the buckets and spades, and keep the lid on when it's not in use - neighbourhood cats will quickly make it their own otherwise.
Photos: Sarah Withell.
▸ Download a PDF of this article
Projects from Your Weekend magazine
View more project ideas from Your Weekend magazine in the Resene weekend DIY projects section.