Craft with Resene, from the Australian Women's Weekly
Choose pretty patterned paper to make découpage eggs, then wrap them in bunny ear napkins to create a gorgeous table setting.
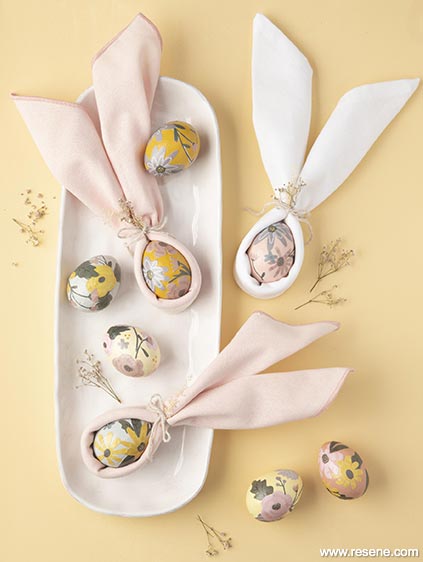
Papier mâché eggs are available from craft stores. If you can’t find any, you can use fresh eggs with the yolk and white blown out and the shells washed thoroughly, although they are a little more fragile to decorate. Alternatively, you can use polystyrene foam eggs and glue a couple of layers of torn tissue paper over them to create a smooth surface to work with. Polystyrene eggs have dimples that affect the final look, so it’s a good idea to cover them for a more professional finish.
First pierce the bottom of the papier mâché egg with a pin and then push the tip of a skewer into the pin hole. This gives you an anchor to hold the egg while you paint it. It also allows you to easily paint all the way around the egg without having to handle it, so you don’t create messy fingerprints. Repeat for all the eggs you plan to paint.
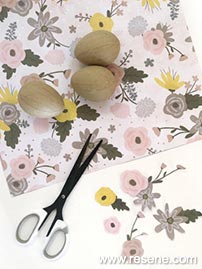
Pic A
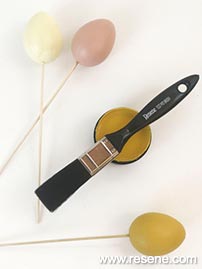
Pic B
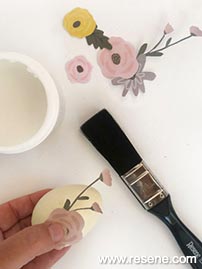
Pic C
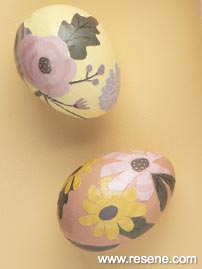
Finished eggs
Paint each egg in one of the five Resene colours suggested, or choose your favourite Resene shades to match your patterned paper. Each egg will need two coats of paint. Allow them to dry between coats. Rest the skewers in a glass or jar, keeping the eggs separate, so they dry without sticking to each other.
While they are drying, cut out lots of small flowers, leaves and shapes from patterned paper. This is a little time-consuming, but it’s worth taking extra care. Make sure the paper you use isn’t too thick as it’s harder to mould around the egg without getting wrinkles. If the shapes are too big this will also cause them to wrinkle when curved, so take this into consideration when choosing the patterns.
Once the painted eggs are completely dry, start to glue on the cut-out paper pieces using découpage glue or Mod Podge, which is designed for paper crafts. Glue little cut- outs all the way around, leaving spaces and areas of the painted colour to clearly show. Again, rest the eggs in the glass or jar to dry.
Once dry, coat each egg with a layer of Resene Art Action clear glaze. This acts as a clear sealant and gives a nice smooth finish. Remove the wooden skewer. If you want to hide the little hole at the base you can glue a small flower cut-out or similar over it as a final step.
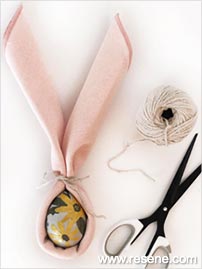
Display your eggs in a bowl or platter, or wrap them with a napkin (see instructions below) to place on a dinner plate when entertaining this Easter. Or you could give them as gifts to your guests.
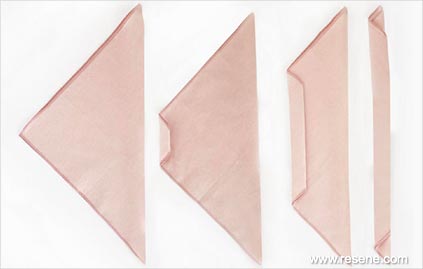
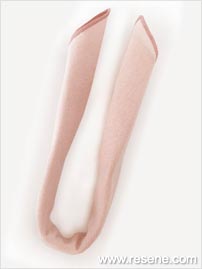
Fold a napkin into a triangle. Starting at the peak of the triangle fold over towards the long edge. These folds are about 3cm wide. Keep folding until you get to the long edge, so you have one long piece. Bend in half into a “U” shape. Place an egg inside the “U” with the blunt end of the egg at the bottom. Use twine or ribbon to tie the napkin snugly around the top of the egg. Splay out the two napkin ends to make the ears. Use a sprig of baby’s breath or similar as a finishing touch.
Project by Marsha Smith, April 2020
Projects from the Australian Women's Weekly
View more project ideas from The Australian Women's Weekly magazine in the Resene weekend craft projects section.