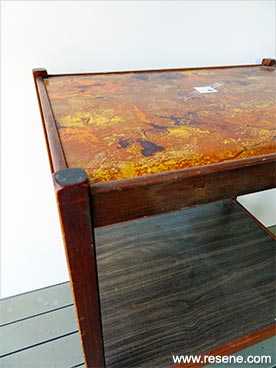
Update a retro butler’s table with a simple and classic makeover.
Resene upcycling for good with Sarah Herring - Project 54
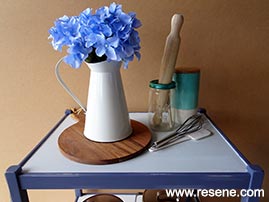
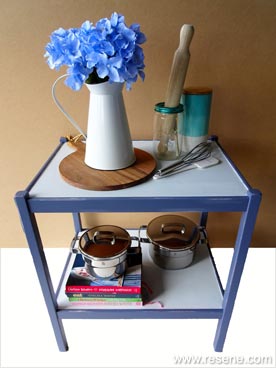
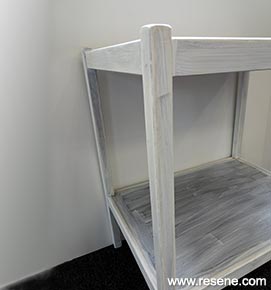
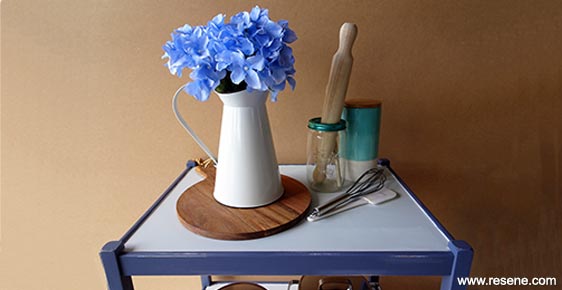
Finished project
You will need: Old wooden butler’s table, testpot brushes, Resene Testpot Roller Kit, painter’s masking tape, sandpaper, Resene Quick Dry waterborne primer undercoat, Resene Waterborne Smooth Surface Sealer, Resene Hot Weather Additive (optional), Resene testpots in your choice of colours - Sarah chose Resene Hammerhead and Resene Zumthor.
Top tip: Painting in hot summer temperatures can be tricky as paint can dry too fast to get a smooth finish. If you are painting when it is hot, add Resene Hot Weather Additive to your paint to help keep the paint flowing while you work.

 Step one
 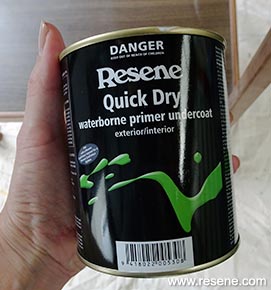 Step one contd.
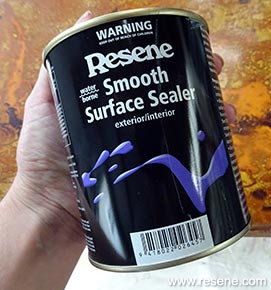 Step two
 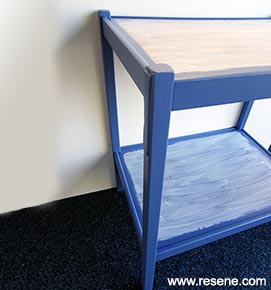 Step three
 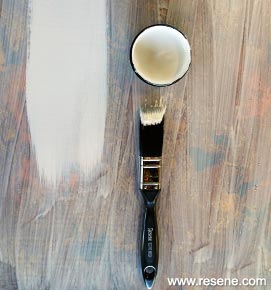 Step four
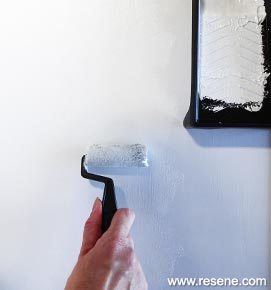 Step four contd.
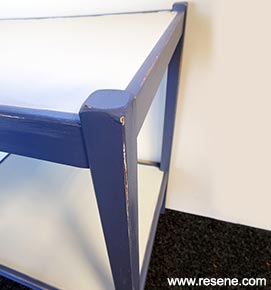
Upcycling for Good
You can find a huge range of treasures, from ornaments and picture frames, to furniture and toys at your local Salvation Army store that you can easily upcycle with a little Resene paint and some imagination.
"Our Family Stores are full of treasures generously donated by members of the public. We value these donations and try our hardest to re-purpose and sell as much as possible. We’re all about re-using and recycling, so teaming up with Resene on Upcycling for Good was a perfect match. Resene’s products and tips are a natural fit with our pre-loved furniture and accessories, which are usually great quality but could sometimes do with a lick of paint to ensure they fly off the shelves.
Each year, nationally, our stores save 16,000 tonnes from landfill. This initiative increases the value of the donated product, improves the range of goods for our customers, and furthers The Salvation Army’s mission and Resene’s community activity.” Gareth Marshall, The Salvation Army's National Family Store Manager.
![]() Get inspired ! Subscribe
Get inspired ! Subscribe ![]() Get saving ! Apply for a DIY card
Get saving ! Apply for a DIY card
![]()
Can't find what you're looking for? Ask us!
Company profile | Terms | Privacy policy | Quality and environmental policy | Health and safety policy
Colours shown on this website are a representation only. Please refer to the actual paint or product sample. Resene colour charts, testpots and samples are available for ordering online. See measurements/conversions for more details on how electronic colour values are achieved.
What's new | Specifiers | Painters | DIYers | Artists | Kids | Sitemap | Home | TOP ⇧

