Resene DIY project #8
How to paint like a professional - training videos and project sheets
Painting a panel door using Resene Lustacryl or Resene Enamacryl waterborne enamels
| View video |
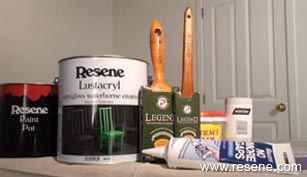
Lightly sand using 220 grit zinc sterate sandpaper. If repainting wash the door using Resene Interior Paintwork Cleaner to remove dirt, fingermarks etc. Ensure any flaking paint and filled areas are sanded smooth with the old paint feathered back.
If unpainted, prime with Resene Quick Dry primer (see Data Sheet D45) or Resene Enamel Undercoat (see Data Sheet D44). Fill any nail holes and cracks with a suitable filler such as the PAL Contract Filler. Spot prime bare timber and filled areas.
Ensure the surface is clean and dust free. Use a tack rag to remove residual dust after sanding.
Use a good quality brush – we recommend the use of a PAL Legend brush.
If warm and dry, add Resene Hot Weather Additive to improve the brushability of the paint.
After removing the lid from the paint, stir thoroughly with a flat bladed stirrer. Carefully decant half to three quarters of a litre of the paint into a paint pot.
Wipe excess paint from the stirrer and replace the lid on the paint can.
We recommend the addition of Resene Hot Additive if warm and dry as it helps maintain a wet edge when brushing and rolling. Resene Hot Weather Additive is added to the decanted paint. Stir thoroughly.
When painting a door, particularly a panel door as shown, it is important to plan your approach.
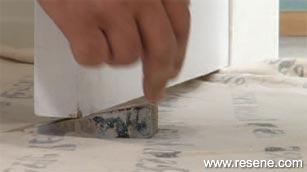 Wedge the door and use a drop sheet to protect the flooring.
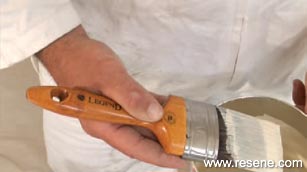 Load the brush with paint – the painter is using a 50mm Legend brush, ideal for use with Resene waterborne enamels.
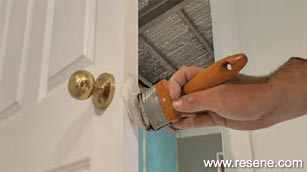 Begin by painting the door jam, working from the top to the base of the door.
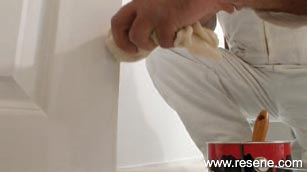 Using a clean cloth, wipe excess paint from the edges. This helps achieve a professional finish.
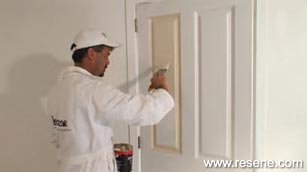 Now paint the internal panels beginning with the rebated edges.
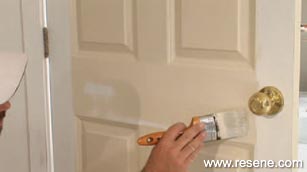 Work from the top to the bottom, removing excess paint from the edges.
Now paint the internal panel, again lay the paint off carefully to minimise brushmarks.
Once the four panels are complete, paint the inside sections of the door using the natural joins as logical start and finish points.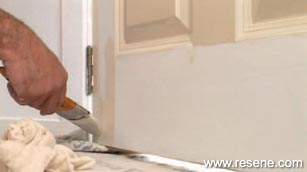 Now complete the outside sections of the door, starting at the base closest to the door hinges and work around the door.
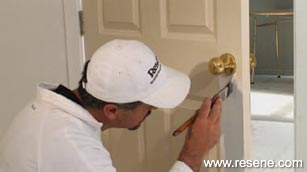 The top and bottom of exterior doors should be painted to prevent moisture ingress.
 Once complete, allow two to four hours to dry and apply a second coat.
The addition of Resene Hot Weather Additive, using the recommended brush and the techniques shown here will ensure you achieve a professional finish.
The availability of Resene Lustacryl (see Data Sheet D310) and Resene Enamacryl (see Data Sheet D309) waterborne enamels has fundamentally changed the way we paint, particularly for doors and joinery.
A quality Legend brush. We recommend the 50 or 63mm Legend or the 50mm Legend cutting-in brush.
Resene Hot Weather Additive. This is useful not only in warm, dry conditions but to improve the open time of waterborne enamels making brushing easier.
220 grit zinc sterate sandpaper. You will need to sand between coats and before commencing painting if refurbishing a door. Heavier grades of sandpaper (100 or 120 grit) may also be needed when repainted older doors.
A paint pot. These are incredibly useful and much easier to paint from than direct from the can.
If you are painting a new door or if the door has exposed timber (or MDF), you will also need to prime or spot prime with Resene Quick Dry primer (a solventborne primer such as Resene Wood Primer (see Data Sheet D40) or Resene Enamel Undercoat (see Data Sheet D44) should be used to seal timbers such as cedar that stain through waterborne primers).
You may need a filler for any dents or holes. We recommend Resene EzyFill or PAL Contract Series filler for this purpose.
A decent drop sheet(s), especially if other painting projects are planned (on the horizon).
Resene Interior Paintwork Cleaner if repainting an older door.
A putty knife or similar for applying any filler.
Scrapers and coarser sandpaper if an older door needs to be partially stripped (contact Resene if the door needs to be completely stripped).
Painter’s gloves – they are relatively inexpensive and save a lot of cleaning. They are also very useful for wiping any drips or along the sharp edge of the door.
Tack cloths to remove any sanding dust.
› Download this project sheet as a PDF
Training Videos and Project Sheets
Learn how to prepare surfaces and apply paint to get the best from your paint finish with these handy videos and project sheets.