Resene paint effects projects, project 10
A distressed paint finish is a quick way to fake age and add character to a piece and is especially suitable for rustic looking items and furniture.
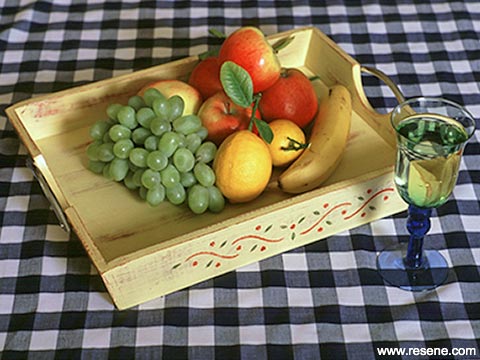
In this project only part of the stencil has been used and then flipped over so that the design is more balanced and fits into the side of the tray nicely. Single elements from a stencil may be used to create your own design or you may add in elements such as an extra leaf at each end and a motif in the centre to fill gaps as required. Try various combinations on paper and when you are pleased with the result, start on your tray.
If you are confident of the design you wish to achieve you can paint it freehand onto the tray rather than stencilling.
Step 1
Step 2

Step 3
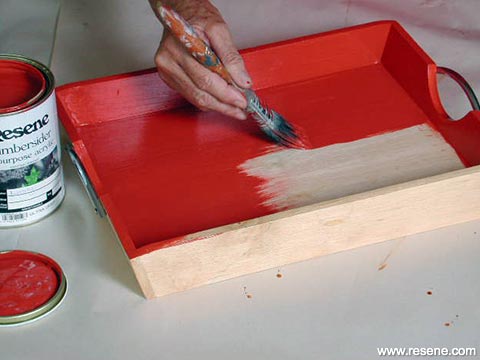
Step 1: Sand the tray lightly, remove dust and paint with one or two coats of Resene Lusty. Leave to thoroughly dry.
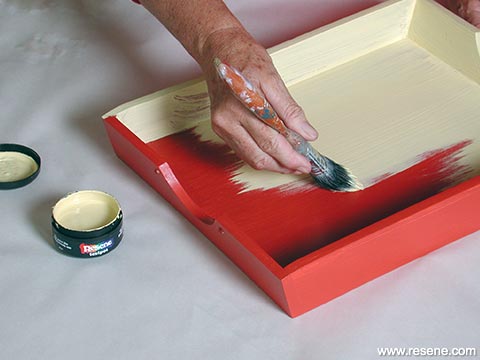
Step 2: Apply one coat of Resene Chenin topcoat.
Step 3: When the topcoat has lost its shine but before the paint hardens, start rubbing gently over the paintwork with the wire wool in the same direction as the brushstrokes. Rub until the basecoat starts to show through and you have achieved the desired distressed effect. Pay particular attention to the edges and corners where paint would have been worn off over time.
Step 4
Step 5
Step 6
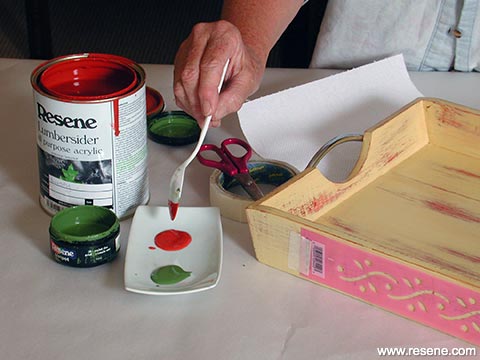
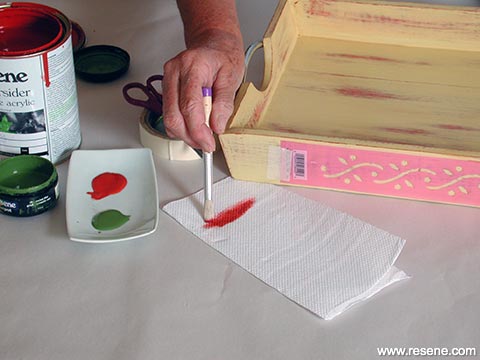
Step 4: Put a small amount of each of the Resene Lusty and Resene Dell on a saucer.
Step 5: Place the stencil into position and tape securely. Using the stencil brush, pick up a small amount of the Resene Lusty and pounce on the saucer to distribute the paint through the bristles. Remove the excess on a paper towel. The brush should be virtually dry.
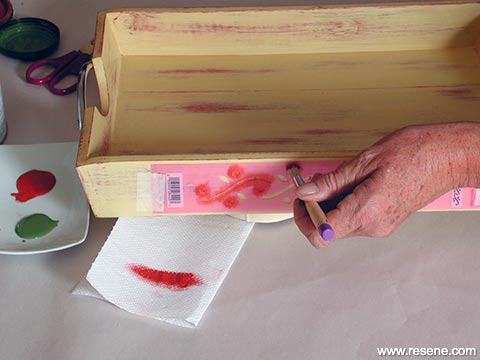
Step 6: In a pouncing action, apply the paint to the stencil. Do all the red areas first. Wipe the stencil clean and clean the brush by rubbing the paint off on a paper towel. Washing the brush leaves excess water in the bristles and thins the paint down causing it to bleed under the stencil. Apply the Resene Dell in the same way.
Step 7
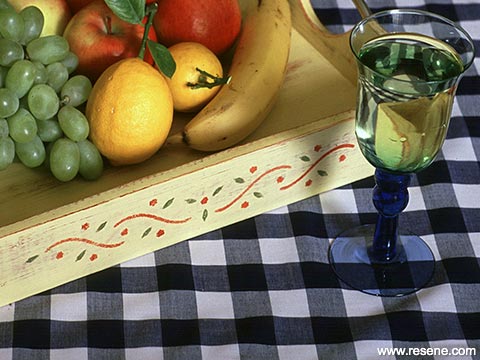
Finished project
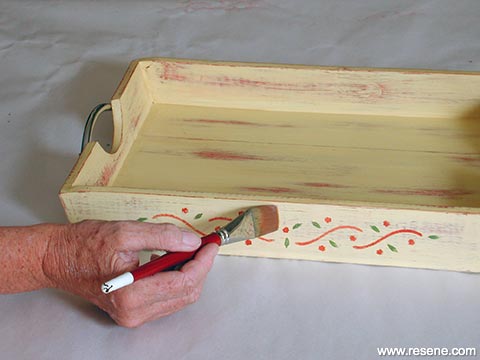
Step 7: Seal with one or two coats of Resene Qristal Clear Poly–Flat or Resene Aquaclear satin. The use of a flat or satin sealer suits the style of a distressed finish as a higher gloss finish tends to suggest the item is newer.
› Download this project as a PDF
Project by Janet Scard. Photography by Joseph Zou.
![]() Get inspired ! Subscribe
Get inspired ! Subscribe ![]() Get saving ! Apply for a DIY card
Get saving ! Apply for a DIY card
![]()
Can't find what you're looking for? Ask us!
Company profile | Terms | Privacy policy | Quality and environmental policy | Health and safety policy
Colours shown on this website are a representation only. Please refer to the actual paint or product sample. Resene colour charts, testpots and samples are available for ordering online. See measurements/conversions for more details on how electronic colour values are achieved.
What's new | Specifiers | Painters | DIYers | Artists | Kids | Sitemap | Home | TOP ⇧


