Resene paint effects projects, project 03
Create a multicoloured tea tray using Resene Colorwood interior wood stain.
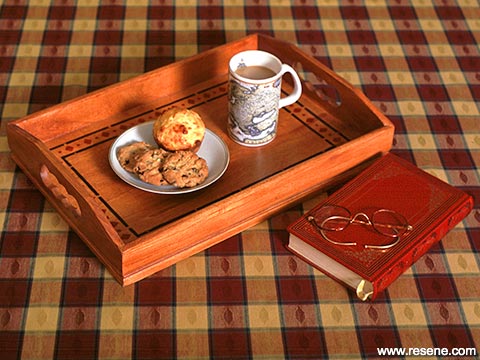
Use coloured stains to decorate a tray
See the Resene Colorwood colour chart for a full range of interior stain colours.
Step 1
Step 2
Step 3
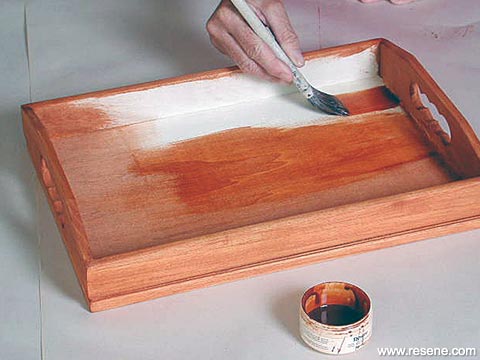
Step 1: Sand tray in the direction of the timber grain and remove all the dust. If the tray is made of MDF a light sand with 400 grit sandpaper is sufficient. Always stir woodstains thoroughly before and during use as the pigments will settle to the bottom, which may cause the colour to appear uneven when applied to a larger area.
Apply a smooth, even coat of the Resene Colorwood Oregon woodstain in the direction of the wood grain. Wipe off any excess with a cloth and leave to dry.
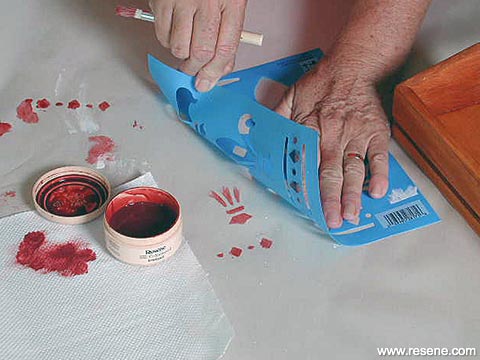
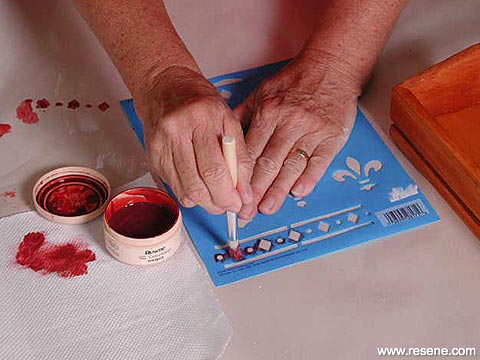
Step 2: Before stencilling the tray, do a practice run on a scrap of paper. Very little stain is required on the brush otherwise it will bleed under the stencil and you will lose the definition of the design. Pour a little stain onto the lid of the pot and load your brush from there. Rub the excess off on a paper towel and pounce gently onto the stencil. When you are happy with the result, start on the tray.
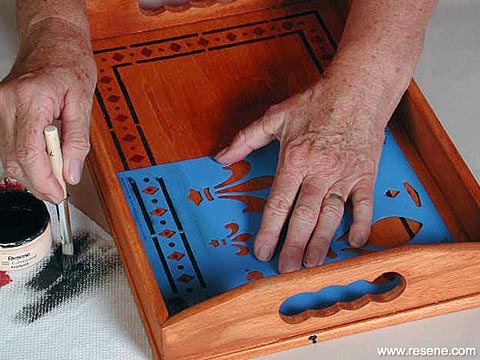
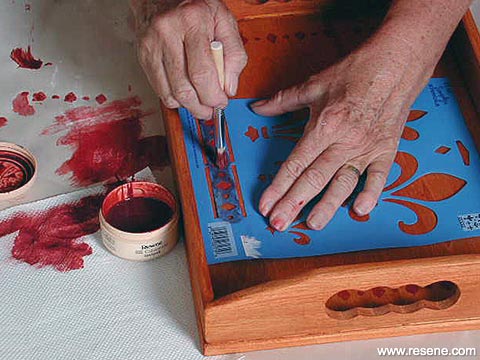
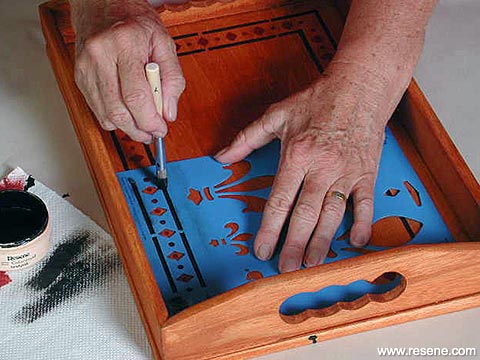
Step 3: Check that the stencil will fit into the area that you have available. If it has to be centred, measure the tray, mark the centre and attach the stencil in position with masking tape then work out either side from there. Apply the Resene Colorwood Rosewood woodstain to the selected areas of the design. Lift the stencil off, wipe clean and move onto the next section. Complete all the red areas. Do not wash the brush, as water in the brush will thin the stain down. Instead, clean it by rubbing the stain off on a paper towel. Place the stencil over the design and use the Resene Colorwood Dark Ebony woodstain for the border.
Step 4
Step 5
Step 5
Step 4: Each time the stencil is lifted to a new position, wipe it clean with a paper towel to remove stain build – up that could cause unsightly blobs on your work.
Step 5: Once the first coat has been applied, you may apply a second coat to darken the colour. Thoroughly dry. Use a small artist brush and a little stain to finish off in the corners or any areas that need tidying up.
Step 6: Apply two to three coats of Resene Aquaclear waterborne polyurethane to protect the surface.
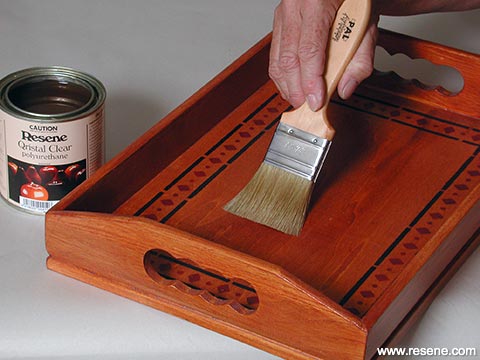
Step 6

Closeup of tray
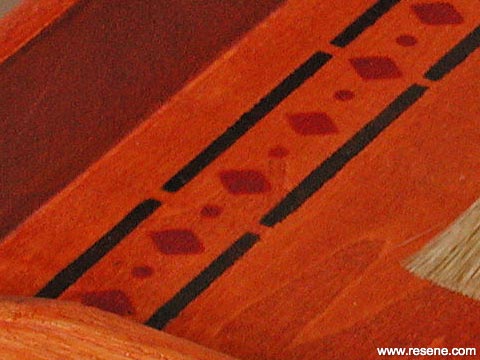
Closeup of tray
› Download this project as a PDF
Project by Janet Scard. Photography by Joseph Zou.
![]() Get inspired ! Subscribe
Get inspired ! Subscribe ![]() Get saving ! Apply for a DIY card
Get saving ! Apply for a DIY card
![]()
Can't find what you're looking for? Ask us!
Company profile | Terms | Privacy policy | Quality and environmental policy | Health and safety policy
Colours shown on this website are a representation only. Please refer to the actual paint or product sample. Resene colour charts, testpots and samples are available for ordering online. See measurements/conversions for more details on how electronic colour values are achieved.
What's new | Specifiers | Painters | DIYers | Artists | Kids | Sitemap | Home | TOP ⇧