Habitat bright ideas with Fleur Thorpe – DIY projects
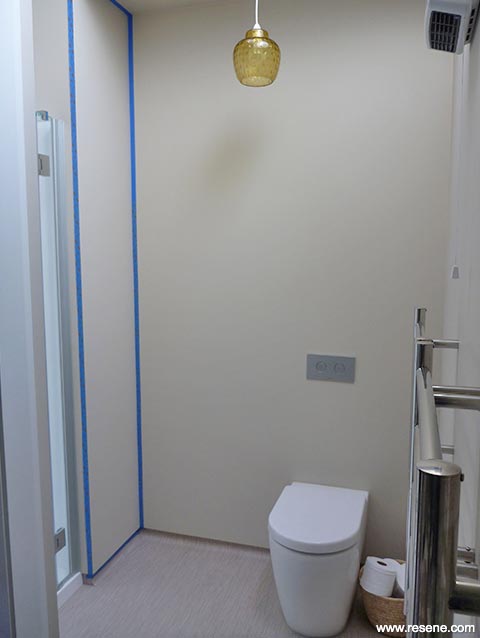
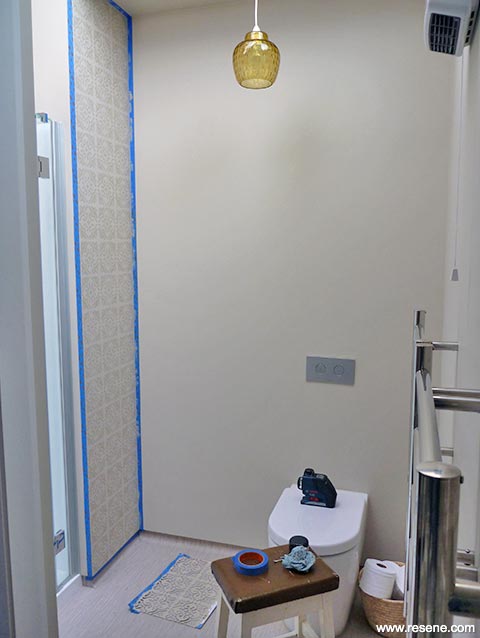
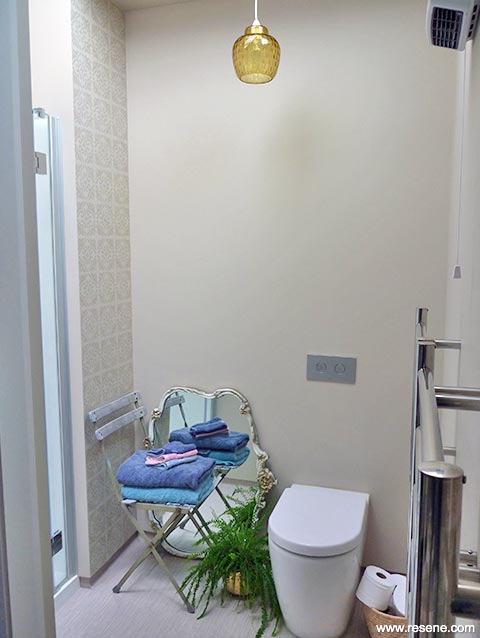
Add interest to a small ensuite through pattern, rather than by adding pictures on the wall or more décor.
Opt for a tone-on-tone palette so that the final design isn’t overbearing in such a small room.

Step 1: Either purchase a stencil online or you can make your own. You can make your own by choosing a stencil pattern you like on the Internet, enlarging it to fit the dimensions of the area you want to stencil, and printing it out on to card. Tape multiple printouts together to get the stencil to the correct size, then cut it out using a craft knife. The advantage of making your own stencil is that you can size it to the dimensions of your area and therefore the number of repeats will fit your space.
Step 2: Start by taping off the area immediately surrounding the wall that is to be stencilled with painters’ tape.
Step 3: Using a measuring tape and pencil, make light pencil marks in the middle of the wall at regular intervals down the whole length of the wall. This will help you to keep your stencil straight and aligned.
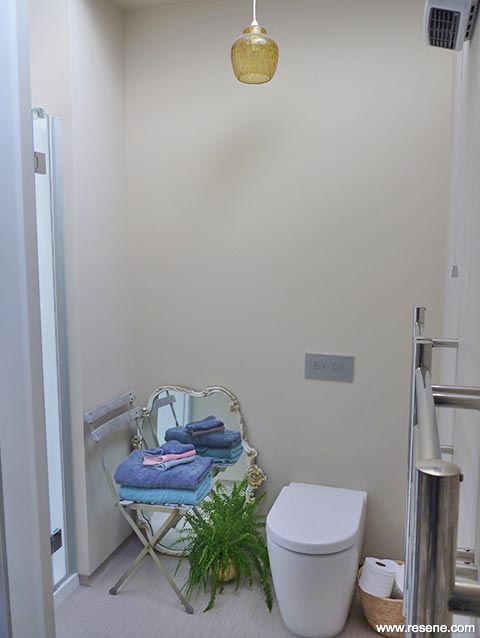 Project before
 Step two
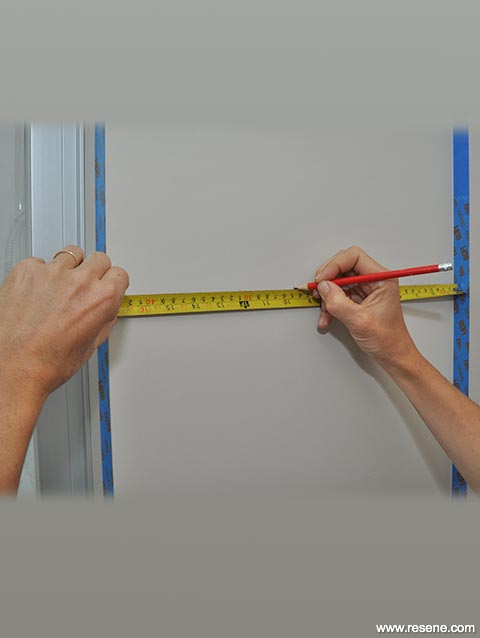 Step three
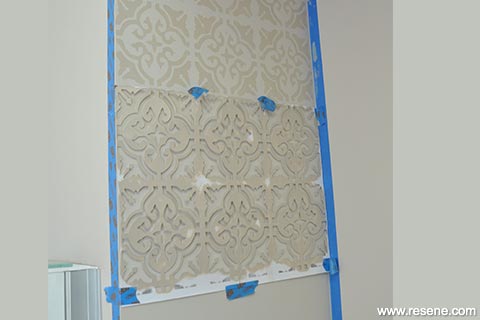
Step 4: Using painters’ tape, position your stencil at the top of your wall. It’s best to start a full stencil repeat in an area that you are going to see the most, like at the top of the wall rather than at the bottom.
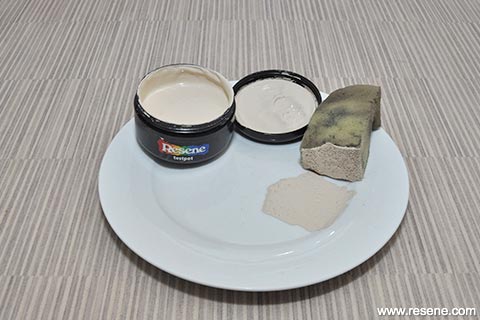
Step 5: Using a small piece of sponge, dip it into your chosen Resene paint colour and then dab it on to a plate or piece or scrap cardboard to ensure that you get a thin and even coverage of paint on the sponge. Too much paint on the sponge will cause bleed-through on the underside of the stencil.
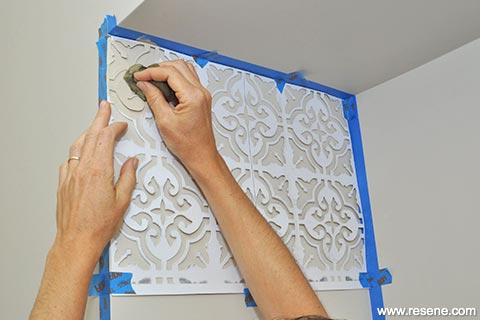
Step 6: Dab the sponge on to the opening holes of the stencil and move it in a circular motion so that paint gets into all the tight corners. Don’t do this too vigorously as bleed-through can occur. Do this all over the stencil until it is all painted in.
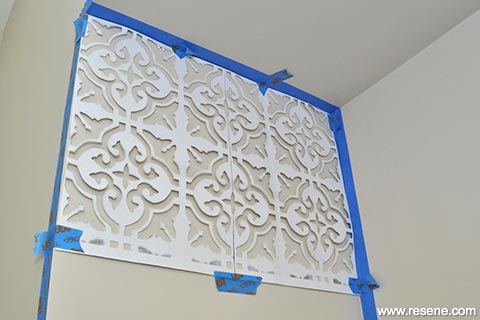 Step four
 Step five
 Step six
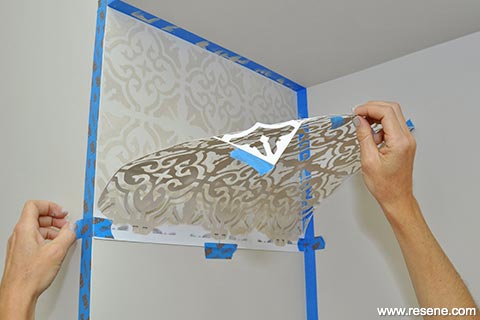
Step 7: Carefully remove the stencil by peeling it off – do not slide it as this will smudge the paint. If you work quickly, any bleed-through can be touched up with a damp Q-tip.
The paint dries quickly and if you are careful not to move it too much, you should be able to re-position it straight away for the next repeat. Make sure you align the centre of your stencil with the central pencil marks you made earlier so that your pattern stays straight.
 Step seven
 Step seven contd.
 Step seven contd.
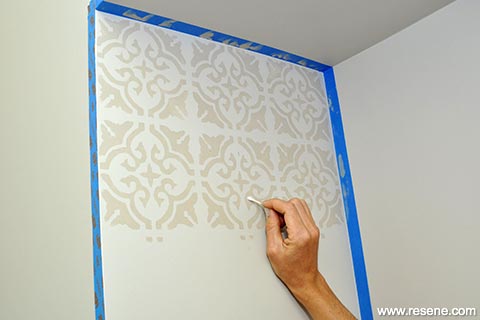
Step 8: Repeat until the whole wall is complete.
Step 9: Remove the surrounding painters’ tape as soon as you are finished.
Top tip: Your contrasting colour can be lighter or darker than your wall colour. To lighten the colour palette in a dark room, use a lighter version of your Resene colour for a tone-on-tone look. For Fleur’s ensuite with Resene Triple Blanc walls, Resene Half Blanc could be used for the stencilled area to lighten the look.
 Step eight
 Step nine
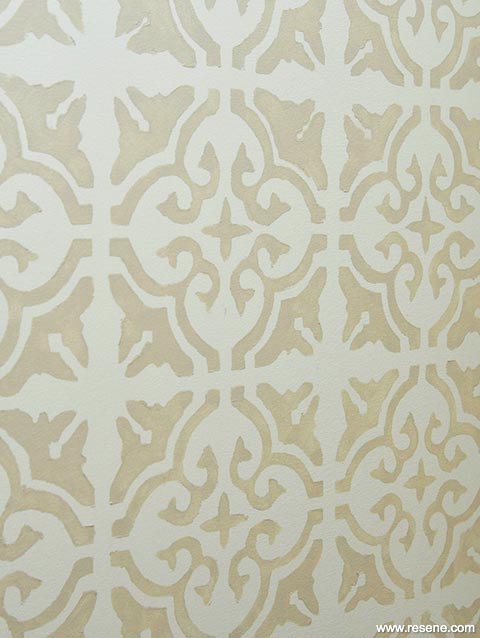
Stencil detail
Styling and images by Fleur Thorpe, 2020.
Habitat bright ideas
Need to add colour, pattern or a little creativity to your place? Check out these easy step by step DIY project ideas created in collaboration with Fleur Thorpe. We hope you enjoy making and painting these bright ideas and bringing colour to your home inside or out.
![]() Get inspired ! Subscribe
Get inspired ! Subscribe ![]() Get saving ! Apply for a DIY card
Get saving ! Apply for a DIY card
![]()
Can't find what you're looking for? Ask us!
Company profile | Terms | Privacy policy | Quality and environmental policy | Health and safety policy
Colours shown on this website are a representation only. Please refer to the actual paint or product sample. Resene colour charts, testpots and samples are available for ordering online. See measurements/conversions for more details on how electronic colour values are achieved.
What's new | Specifiers | Painters | DIYers | Artists | Kids | Sitemap | Home | TOP ⇧


