From Habitat magazine - issue 15
This cool multi-purpose storage box is finished in timber stains for a slightly weathered effect.
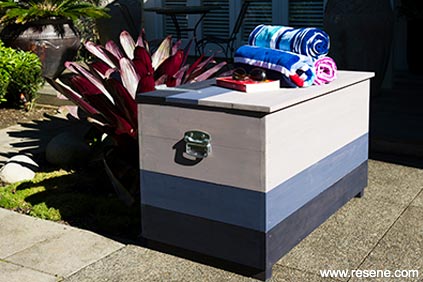
Note that the timber cutting list and the final size of the storage box will vary according to the plank sizes available at your timber merchant.
140mm x 18mm planks (we used dressed timber but you can also use rough-sawn) cut into the following lengths for a trunk that measures 1200mm long x 540mm deep x 623mm high
8 planks at 1200mm long for the front and back
8 planks at 504mm long for the ends
4 planks at 1220mm long for the lid: Either use four more planks at 1164mm long for the base or use a piece of chipboard or plywood measuring 1164mm x 504mm. We used 10mm thick plywood.
25mm x 25mm battens for the inside corners: 4 at 520mm long 25mm x 25mm battens for framing the plywood base, two 1164mm long and two 454mm long
Two 65mm x 18mm battens at 530mm long for the underside of the lid
Two 45mm x 45mm battens at 530mm long for the feet
Resene Waterborne Woodsman timber stain in colours of your choice. We used two testpots of Resene Woody Bay (dark); two testpots of Resene Skywater (mid-tone) and 1 litre of Resene Weathered Grey (light).
Wood screws, galvanised or stainless steel (25mm, 40mm and 65mm)
Electric drill, square
Sanding block and sheets of 120-grit sandpaper, 50mm paint brush
Card or thin plastic to use as spacers and to mask
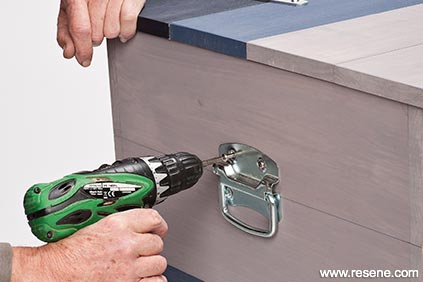
Two galvanised strap hinges and two galvanised trunk handles
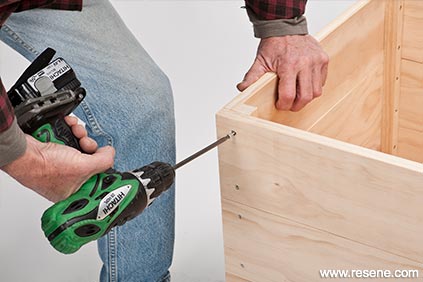 Step 1
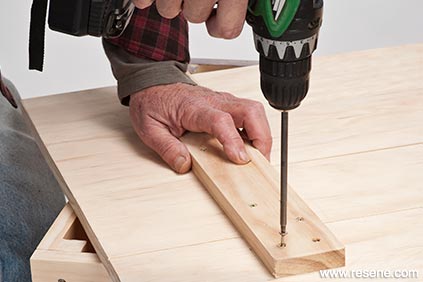 Step 2
Fix 25mm x 25mm battens around the underside of the plywood base.
Lay the end planks (550mm lengths) in two sets of four and screw 25mm x 25mm battens to the edges to hold the planks together, using two screws per plank. If you are doing a striped pattern like ours, you will need to slip a piece of card or thin plastic between each plank as a spacer (later on you will use the card to separate the planks to 'mask' the adjacent plank when staining). If you are doing the entire box one colour or individual sides the same colour, don't worry about the spacer.
Attach the ends to the base with screws along the bottom edge.
Build up the front and back by attaching one 1200mm plank to the base and bottom of the batten, using two screws for each end of the plank. Then add the other three planks on the front and back.
Attach the feet to the underside of the base.
Make the lid by screwing the 65mm x 18mm battens across the underside of the longest (1220mm) planks, making sure to fix the battens so the lid will close neatly.
If you have used dressed timber, give the box a light sand with 120-grit sandpaper. This will allow the stain to penetrate better and give a more transparent look.
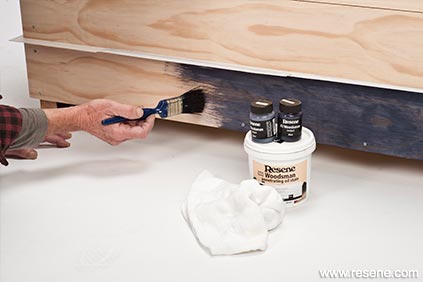 Step 3
 Step 4
Apply the stain in whatever pattern or style you want. With stain, you won't be able to use masking tape to mask off an area as you do with paint as the stain will bleed into the timber and under the tape.
We chose to use the planks for individual colours, sliding a piece of card or plastic between each plank to stop the stain from spreading onto the adjacent plank.
crafted by: Philippe Morin
pictures: Tony Brownjohn
Search habitat magazine stories
Printed copies of habitat highlights are available from late March 2024 at Resene ColorShops and resellers, while stocks last. You can view back issues of habitat magazine online.
Specifiers:
If you have an idea, project or story that you think would suit habitat, we’d love to hear from you. Please drop us an email with your details and include photos if submitting a project.
Sign up for a DIY card and Save! Australia | New Zealand