Craft - inspired by Resene, from Little Treasures magazine
The big reveal – we showcase the first of three winning entries from our Resene Dream Room competition.
From the very beginning, Katherine Bertram’s ambitious plans for screen-printed furniture and fabric flowers got our attention. We thought if the Wellington mum could pull off what she was promising on paper, the finished room would be unique and as pretty as a picture. And she did it.
“I used to sit in here breastfeeding Ravenna on an old blue sofa. Around me were awful maroon curtains and ugly, dark sliding doors and there was a huge rip in the wallpaper. It was drab, nasty and so ugly.
“I used to wonder what I could do to it,” remembers Katherine.
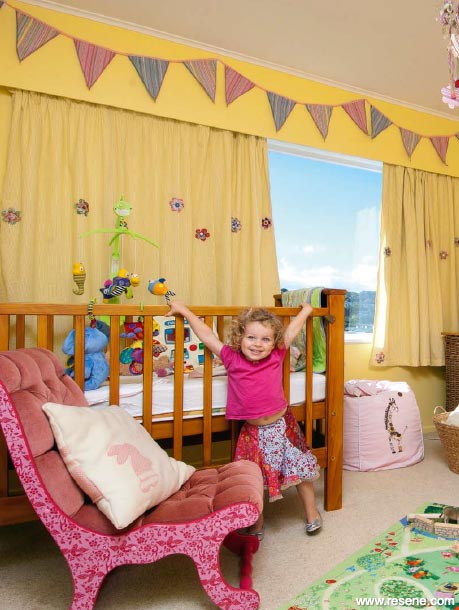
Winning Resene’s Dream Room competition gave the mum of three from Miramar a reason to get creative. With a Fine Arts degree in printmaking, Katherine had the know-how to combine colours and tackle paint techniques that might faze others. But before she could get on to screen Little Treasures April/May 2011 75 printing the furniture, the bedroom walls had to be prepared and painted in the Resene paint colour Resene Sweet Corn.
During the day Katherine’s husband Matthew took over the painting while she looked after their three children: Alexander, four; India, two and a half; and baby Ravenna, 10 months. “We had humidity of 80 to 95 percent in January and you can’t paint when it’s that humid,” explains Katherine. “So we used Resene Hot Weather Additive, which helps by retarding the drying time and giving it a smooth finish.”
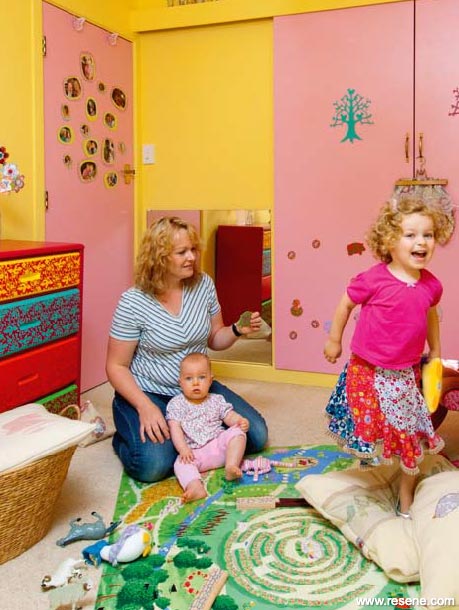
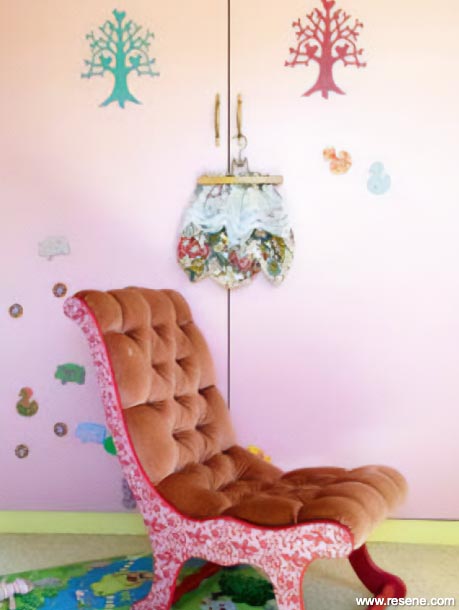
The wardrobe doors and bedroom door received three coats of Resene Magnetic Magic and two topcoats of Resene Hopbush. Katherine then made magnets from wooden animals and tree shapes which she found on Trade Me and at Spotlight. “I used testpots of Resene colours to decorate them and screen printed some and used Resene Crackle Effect on others to give different finishes.”
Next, Katherine attached magnets to framed family photos to make a gallery of special faces on the bedroom door.
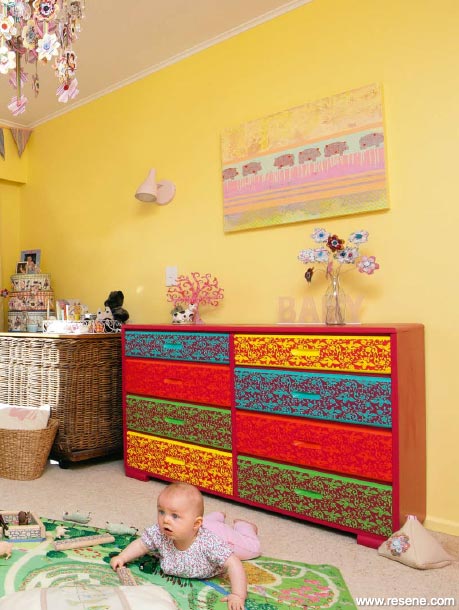
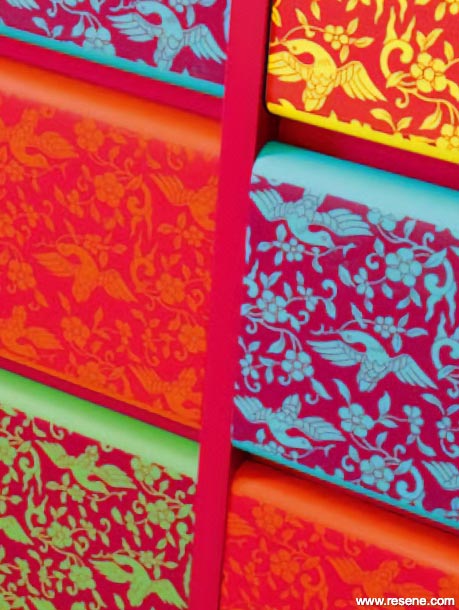
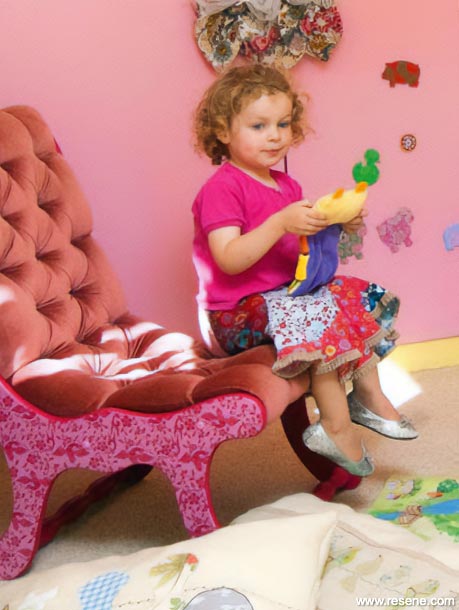
The most dramatic impact comes from the screen-printed furniture – a multi-coloured chest of drawers and the upholstered chair, both second-hand shop finds. Katherine used Resene Lipstick and Resene Hopbush on the chair and parts of the drawers but turned up the volume by painting the drawers in four different Resene colours: Resene Niagara, Resene Pursuit, Resene Wham and Resene Gorse (a testpot per drawer). The screen printing came last.
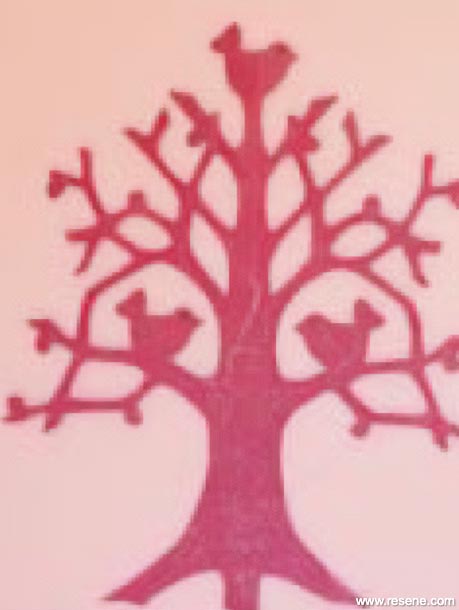
“The screen is made from a hand-drawn Chinese bird pattern, which I had turned into a black-and-white stencil by CCG Industries a few years ago. It’s got a wooden frame with silk stretched across it. If you don’t have a silk screen you can make a stencil and apply the paint using a sponge,” suggests Katherine.
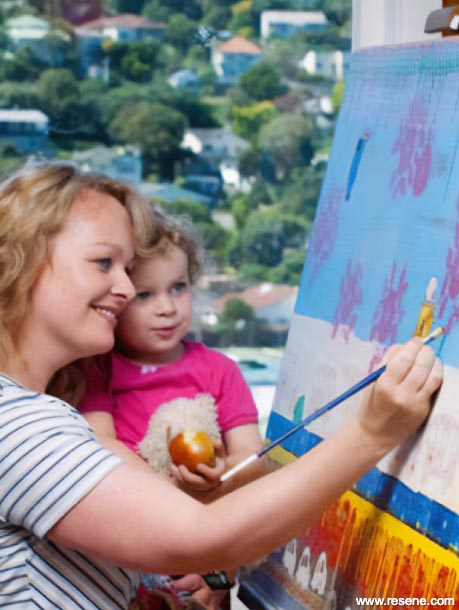
More subtle but equally unique is the painting that now hangs above the drawers. “I wanted it to be muted and didn’t want it to clash. It has lots of different layers and sections with pigs and other animals,” says Katherine.

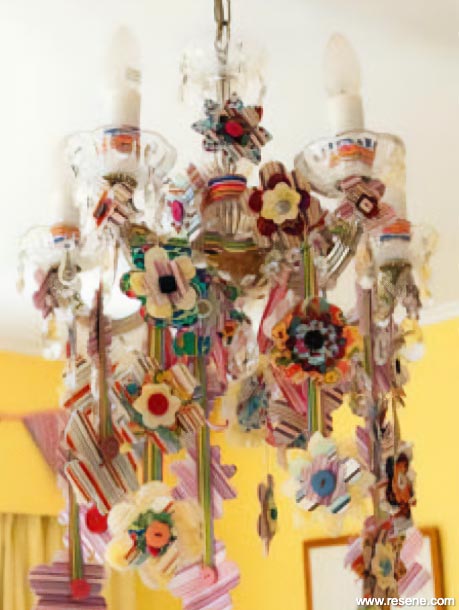
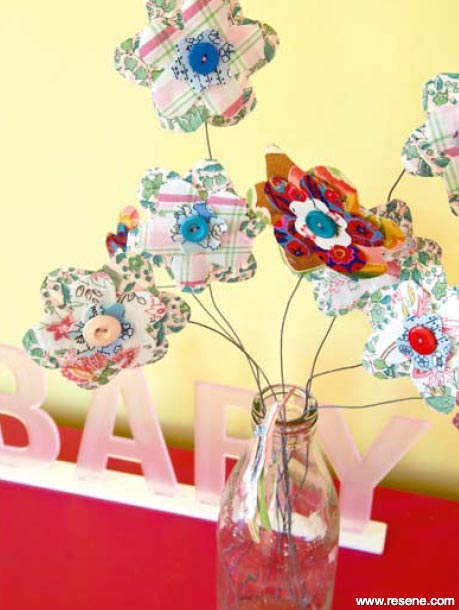
Each fabric flower decorating the chandelier, curtains and doorstop has also been hand-made by Katherine. Her method is to iron the cotton fabric onto interfacing then cut out the petal rounds and secure three fabric layers at the centre with a button. Some are attached to wire so they can be arranged in a milk-bottle vase.
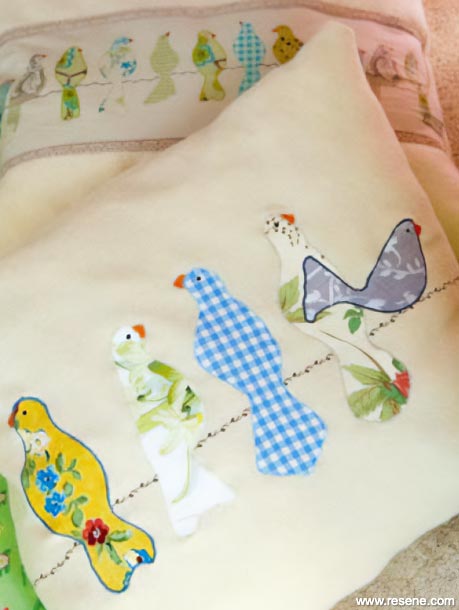
Katherine made wall bunting from striped canvas, and the bunny cushions from woollen blankets. She even made the appliquéd bird cushions on the floor. Her final indulgence is the farm play mat from Moore Wilson in Wellington. It came ready-made, brings together all of the colours and better still, the children adore it.
Once you’ve chosen your stencil design, draw it onto soft cardboard then cut out the shape. Paint can then be applied to the surface using a brush or roller. First remove any excess paint by dabbing the brush or roller on a rag or paper towel. This will help prevent drips. To download free stencil designs or for more tips about using stencils, go to www.resene.co.nz/kids/kids_stencils.htm
If you want to create a crackle finish you need to choose two colours. The base coat is the colour that goes on first and will show through the top coat. First, paint the base coat and wait for that to dry, then paint a coat of Resene Crackle Effect and finally the acrylic top coat colour. Resene Crackle Effect will shrink and crack the top coat to reveal the colour beneath. Go to: www.resene.co.nz/kids for more information.
Created by Vanessa Johnson. Photography by Paul McCredie.
April/May 2011
Kid's Bedroom Decorating Ideas
View more decorating ideas for kids from Little Treasures magazine in the Resene kid's bedroom inspiration gallery.
![]() Get inspired ! Subscribe
Get inspired ! Subscribe ![]() Get saving ! Apply for a DIY card
Get saving ! Apply for a DIY card
![]()
Can't find what you're looking for? Ask us!
Company profile | Terms | Privacy policy | Quality and environmental policy | Health and safety policy
Colours shown on this website are a representation only. Please refer to the actual paint or product sample. Resene colour charts, testpots and samples are available for ordering online. See measurements/conversions for more details on how electronic colour values are achieved.
What's new | Specifiers | Painters | DIYers | Artists | Kids | Sitemap | Home | TOP ⇧


