Craft - inspired by Resene, from Little Treasures magazine
What’s cookin’? Anything your junior chef can dream up with this fully appointed play kitchen made out of an old chest of drawers.
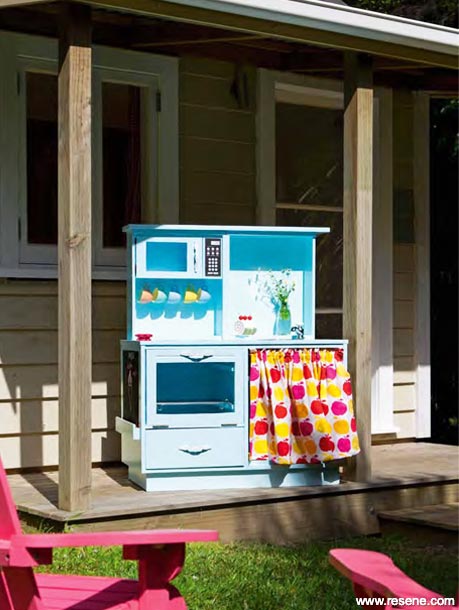
Children love playing in toy kitchens but they’re expensive to buy – even on TradeMe. You don’t have to be a DIY expert to make your own, but you will need a few power tools and the courage to drill some holes. Although you’re not likely to find this exact cabinet, Sarah’s ideas and methods might inspire you to tackle a similar craft project. All-up, this kitchen cost under $100 – and what an awesome present for a preschooler.
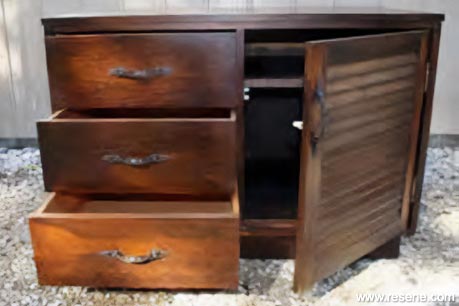
Sarah’s cabinet was roughly 600mm high by 900mm wide and 500mm deep. It had three drawers on the left-hand side and a cupboard with a louvre door on the right (Sarah says two three-drawer bedside cabinets would also work as long as they were the same height).
As well as the basic components provided by the original cabinet, Sarah needed a sheet of particle board which was cut up and used for the top panel, the floor of the oven and the microwave floor, door and front panel.
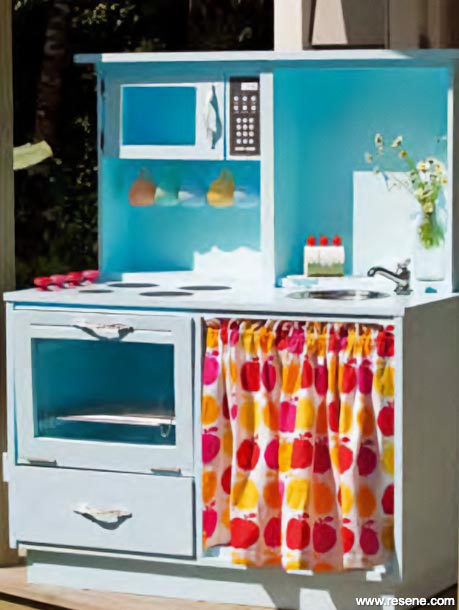
The play kitchen had to include: an oven, stove top, microwave, sink with a tap, some shelves and storage space and as much colour and personality as Sarah could give it.

First, Sarah took the original cabinet apart. She removed the drawers and took off all the handles and the cupboard doors, including the hinges and handles. All of the bits and bobs were kept for reuse later. Everything wooden was sanded back so it could be painted.
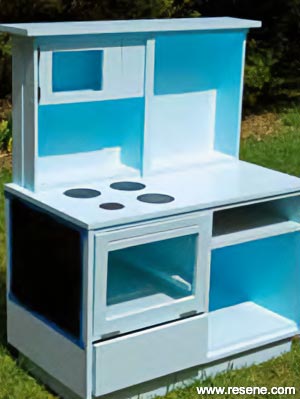
Using a jigsaw, she cut the louvre panel from the cupboard door, leaving the wooden frame intact so that a piece of perspex could be fitted, creating the oven-door window.
Two of the drawers standing on their ends (handle-ends up) created the microwave cabinet and splash back. But before these could be screwed together and into place, the microwave was built from particle board inside the ‘front’ end of one drawer. Sarah measured and cut a base which was screwed into place through the sides of the drawer. Then the face panel was nailed into position – Sarah made sure it was wide enough to fit the digital display plate she found and printed from the internet. The door for the microwave was cut from particle board, with a square cut out for a perspex window.
With the cabinet drawers removed, the ‘oven’ needed a floor. A piece of particle board was measured and cut to fit then screwed into place. Sarah modified the original drawer runners to provide an anchor point.
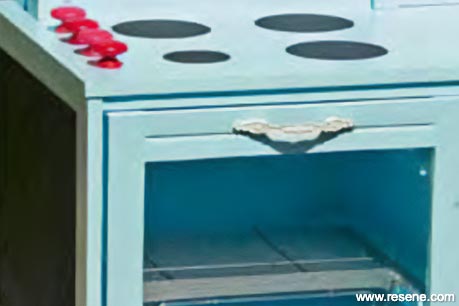
Both doors have perspex windows which Sarah sourced in Auckland from PSP in Albany. The perspex can be ordered to size and comes with an adhesive backing paper to protect it from scratches. Sarah says leave the paper in place until you have drilled the screw holes. And make sure you use a slow drill speed otherwise your perspex might shatter. Each window needed a screw and washer on each side to attach it to the frame.
It makes sense to paint the door frames and wait for them to dry before attaching the windows.
Check that the perspex panels don’t sit too low so that when the hinges are screwed into place the windows don’t stop the doors from closing cleanly.
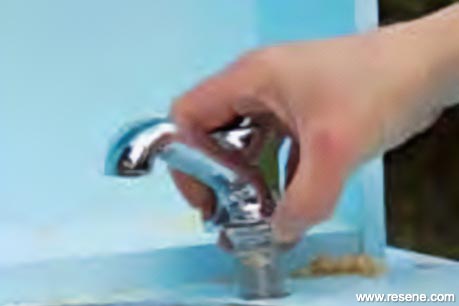
A stainless steel bowl from the $2 shop and a chrome tap fitting make an excellent kitchen sink and tap.
The little bowl Sarah used had a narrow lip edge so that when it dropped into the hole cut into the bench, it didn’t fall all the way through.
Before you mark where your sink is to sit, first measure and mark where the two drawers that make the splash back are going to fit when they are screwed into place. Then measure the bowl and mark a circle in pencil on the top right-hand side of the cabinet top.
Sarah used a auger/spade drill bit to drill three holes about 1cm inside the pencil circle. She then inserted the jigsaw blade into one circle and then cut outward to the pencil line. She followed the line from drill hole to drill hole until the jigsaw had cut out the entire circle for the sink.
Next drill the hole for the tap.
Before screwing the drawers together, drill six holes for cup hooks in the underside of the microwave base – it’s easier to do this while you can still turn the drawer upside down.
Now you can screw the two drawers together. Align the two drawers side-by-side so that their tops are level. The drawers need to be screwed together to make one piece before they can be attached to what is now the kitchen bench top. In the drawer containing the microwave, drill the screw hole down low and in the other drill your hole near the top.
Make sure your tops stay level so a top panel will fit easily across them.
Position the splash back on top of the bench top and mark with a pencil where you will drill holes for six screws that will be screwed through the bottom end of the drawer and into the top of the bench. Two screws should be at the outside edges and two closer to the middle.
Finally screw a top panel onto the top of the splash back. To make sure the screws don’t show, drill the holes from underneath. Two screws go through the roof of the microwave and into the capping piece.
Sarah sealed the kitchen using quick dry sealer undercoat, then applied two coats of Resene Kitchen and Bathroom Lustacryl semi-gloss paint in Resene Charlotte. (Water-based enamel paint means doors will open smoothly.)
Fit cup hooks into the holes beneath the microwave, and eyelets at the top of cavity under the sink for the curtain wire. The curtain is made from a piece of fabric roughly twice the width of the cavity. It is hemmed on three sides with an open-ended hem at the top for threading onto the curtain wire.
Created by Vanessa Johnson. Photography by Frances Oliver.
February/March 2013
Kid's Bedroom Decorating Ideas
View more decorating ideas for kids from Little Treasures magazine in the Resene kid's bedroom inspiration gallery.
![]() Get inspired ! Subscribe
Get inspired ! Subscribe ![]() Get saving ! Apply for a DIY card
Get saving ! Apply for a DIY card
![]()
Can't find what you're looking for? Ask us!
Company profile | Terms | Privacy policy | Quality and environmental policy | Health and safety policy
Colours shown on this website are a representation only. Please refer to the actual paint or product sample. Resene colour charts, testpots and samples are available for ordering online. See measurements/conversions for more details on how electronic colour values are achieved.
What's new | Specifiers | Painters | DIYers | Artists | Kids | Sitemap | Home | TOP ⇧


