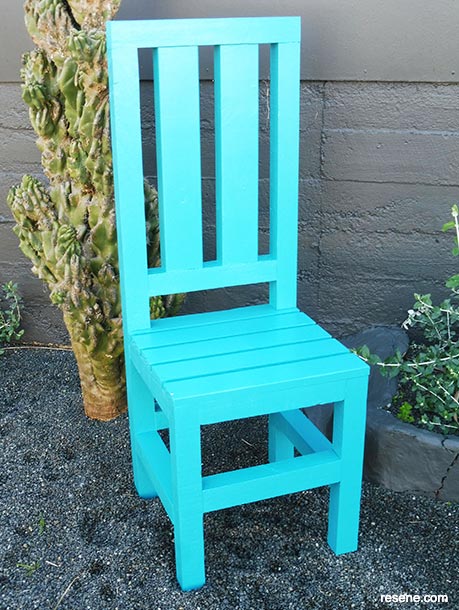
We show you how to build your own garden chair and finish it off with a vibrant Resene blue.
Ways with wood with Mark Rayner - Project 68
Difficulty level: Challenging
To get the look: Mark painted the background wall with Resene Lumbersider tinted to Resene Triple Dune.
Other ideas: For a bright yellow feature paint the chair with Resene Lustacryl tinted to Resene Turbo.
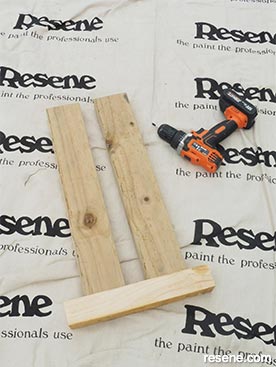
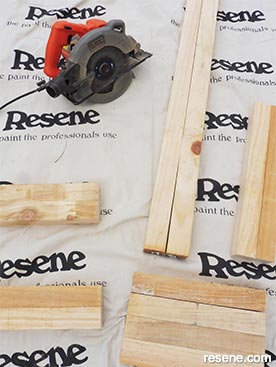 Step one
Measure, mark and cut the pieces of timber to the dimensions listed above using a set square to ensure all cuts are at ninety degrees. Smooth any rough edges with sandpaper.
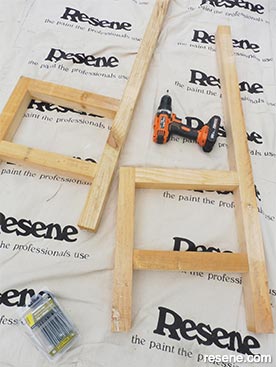 Step two
Assemble the two 1100mm and two 450mm lengths of timber to four of the 320mm lengths of timber to form the sides of the chair frame, as shown. Fix with PVA glue and 100mm screws, drilling pilot holes first.
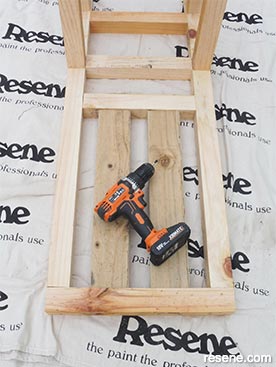
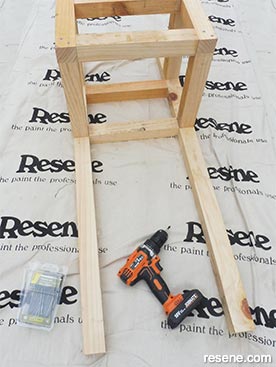 Step three
Attach four of the 320mm lengths of timber, as shown, to join the two side frames. Once again, fix with PVA glue and 100mm screws, drilling pilot holes first.
 Step four
Attach the two 500mm lengths of timber to the remaining 320mm lengths of timber, as shown, fixing with PVA glue and 100mm screws, drilling pilot holes first.
 Step five
Attach the 430mm length of timber across the top of the chair back and then fit the piece from step four into position to complete the back of the chair, as shown. Fix with PVA glue and 100mm screws, drilling pilot holes first.
 Step six
Using PVA glue and 50mm screws, fix the remaining pieces of timber to form the chair seat, as shown. Space each one approximately 15mm apart, cutting the back piece to fit. Fill the screw heads with exterior filler and, once dry, sand smooth.
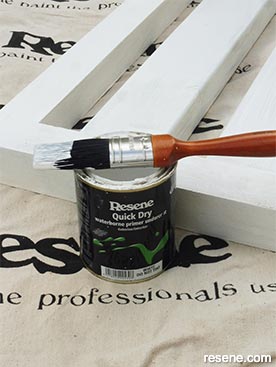 Step seven
Apply one coat of Resene Quick Dry to the chair and allow to dry.
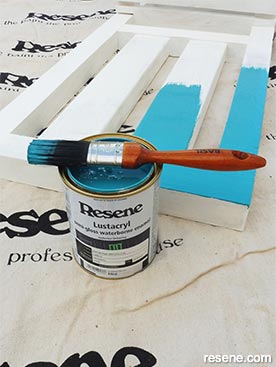 Step eight
Apply two coats of Resene Lustacryl tinted to Resene She’ll Be Right to the chair, allowing two hours for each coat to dry.
![]()
Garden workbench
Fun with furniture
![]()
Garden table
Fun with furniture
![]()
Upcycled table
Fun with furniture
![]()
Succulent trough
Weekend DIY
![]()
Strawberry planter
Ways with wood
![]()
Harvest basket
Weekend Gardener
![]() Get inspired ! Subscribe
Get inspired ! Subscribe ![]() Get saving ! Apply for a DIY card
Get saving ! Apply for a DIY card
![]()
Can't find what you're looking for? Ask us!
Company profile | Terms | Privacy policy | Quality and environmental policy | Health and safety policy
Colours shown on this website are a representation only. Please refer to the actual paint or product sample. Resene colour charts, testpots and samples are available for ordering online. See measurements/conversions for more details on how electronic colour values are achieved.
What's new | Specifiers | Painters | DIYers | Artists | Kids | Sitemap | Home | TOP ⇧

