From the Resene decorating blog
Give the hardest working surface in your home – your floor – some much deserved TLC.
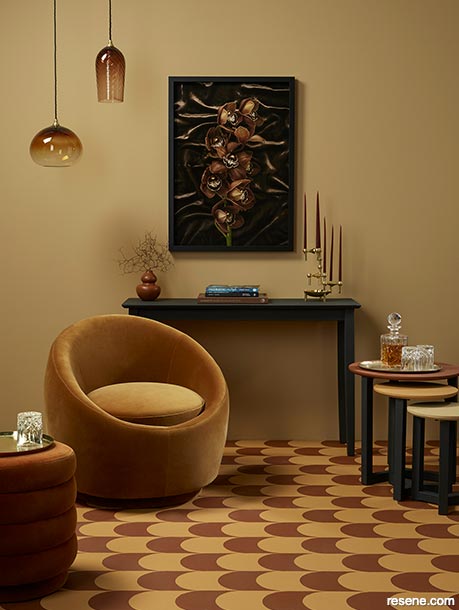
To create a tile-like effect – without the significant spend – purchase or make your own stencil. We made the stencil for this floor using thin cardboard and a craft knife and used masking to hold it in place while we painted the darker Resene Hairy Heath arches on top of a solid background in Resene Pendragon. Wall in Resene Gold Coast, console table in Resene Noir, nesting tables in (from largest to smallest) Resene Hairy Heath, Resene Pendragon and Resene Gold Coast with legs in Resene Noir and vase (with twigs) in Resene Hairy Heath. Project by Melle van Sambeek, image by Bryce Carleton.
Whether it’s timber, concrete, cork or tiles, keeping your hard flooring surfaces in good nick starts with rolling out a welcome mat, removing your shoes and using felt protectors on the feet of your furniture. For maximum attractiveness and longevity, though, ongoing care and maintenance are essentials. Unsure what sort of love your particular flooring type needs to keep on shining? Here are some easy do-it-yourself steps to protect your investment, with help from Resene expert Brooke Calvert.
Wood stains are an elegant way to improve the colour of your wooden or cork flooring while enhancing its natural grain. There’s a whole family tree of hues you can choose in the Resene Colorwood wood stain range to create a look that’s unique to the shade and absorbency of your timber – or layer a couple of colours for a truly custom effect.
Vacuum your floor to remove dust and debris, and clean to remove oil and grease. Apply a coating remover to get rid of old varnish and/or sand to erase imperfections and ensure that you’ll get even penetration of the new product. Apply the new stain in thin coats, wiping away the excess, until you build it up to the darkness and depth that you desire. Allow it to dry for at least 24 hours, then varnish it for extra protection with Resene Qristal Clear, Resene Qristal ClearFloor or Resene Aquaclear according to the level of gloss you’re looking for.
“Applying a protective coating will make your flooring more durable and easier to clean,” says Brooke, and who can argue with that? When it comes to unpainted timber, what you need depends on what you’re after – a varnished versus an oiled finish, for example. The trio of products described above are ideal for varnishing all kinds of flooring.
Top tip: The best Resene products to use for your specific floor can vary based on a number of key factors. It’s recommended to visit your local Resene ColorShop or use the Resene Ask a Tech Expert service to discover which products will work best for you to get the job done – and get it looking great.
To protect your floor with varnish, give it a good vacuum then punch in any protruding nails with a hammer. If you’re recoating a varnished floor, you may need to sand it back to remove gloss, wax and contaminants and provide a good ‘key’ for your new coating to stick to, taking care not to expose the timber underneath. Vacuum once again, then wipe the entire surface down with a damp cloth. Apply your varnish along the grain, nixing dust by vacuuming between coats and minimising activity and airflow in the area.
In time, high-wear areas, such as around your dining suite, where chairs are pulled in and out, might need some extra TLC, but don’t wait until wear is visible, or the underlying timber may be compromised. To find out if your floor is ready for a redo, try this easy trick to inspect the finish in these areas: if a few drops of water bead on the surface, it’s still intact. If the water begins to soak in, the finish is partially worn and it’s time to buff it back and recoat.
Trending among the fashion-forward, “painting your flooring is a popular and easy way to uplift a space without spending a small fortune,” says Brooke. “There’s no limit to what you can do with some design flair and Resene colour.”
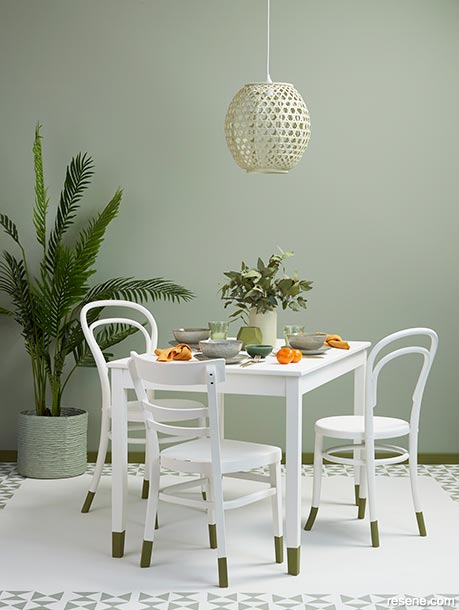

You can paint virtually any type of hard flooring – even some old lino. It’s an on-point approach to adding colour to your home if you prefer white walls. Or you could paint your flooring in the same Resene colour as your walls to create a blank floor-to-ceiling canvas for your décor and artwork, like a live-in art gallery.
But, be warned. “Think about how durable you need the colour to be,” says Brooke. “White looks fantastic, but it also shows marks and dirt.” Very dark colours can be equally problematic, revealing every bit of dust, which means mid-tone colours are the most forgiving choices.
Brooke says off-white Resene White Pointer, salt-bleached grey Resene Half Copyrite, green-grey Resene Helix, pale shell Resene Duck Egg Blue, mango and apricot Resene Just Dance and vintage-effect Resene Colorwood Whitewash timber finish are hot right now for flooring. Whatever colour you choose, test it in situ using Resene testpots or A4 drawdown paint swatches, available for ordering online and from Resene ColorShops and resellers. “We also offer free in-store or virtual colour consultations of to help you with colour selection,” says Brooke.
For the best possible adhesion of paint, prep properly. “It’s important to be thorough,” says Brooke. “If you don’t prepare the floor correctly, you could end up with the paint flaking off within a few weeks. Ensure your floor is free of dirt and dust, apply the right primer for the substrate and make sure it’s completely dry before topcoating.”
“Application is also critical to achieving a pleasing finish,” she continues. “Give yourself plenty of time to complete the job and steer clear of walking on the surface until the paint has hardened.”
If your floor is already painted or has been varnished with a waterborne varnish, vacuuming should do the trick, but if a solvent borne varnish has been used, you may need to sand it too. Apply Resene Quick Dry or the right type of primer for your floor.
Use a roller to apply satin Resene Walk-on tinted to the colour of your choice in long, even strokes. Allow to dry for at least two hours before applying a second coat. Once dry, finish in Resene Concrete Wax.
Check to see if your concrete has a surface curing membrane (used to stop moisture loss) by splashing water onto it. If it is immediately absorbed and darkens, there’s likely no curing membrane. If there is one, your concrete will have to be diamond-ground or acid-etched before you paint it. If not, prime with Resene ConcreteSeal 3-in-1 before applying two coats of Resene Walk-on with a roller. Once dry, seal it with Resene Concrete Wax.

Before you do anything outside, “Be sure to check the weather,” says Brooke. “If the washing on the line isn't drying, neither will your paint.”
If the forecast is favourable, hit the ground running with Resene Walk-on, which is a great bet for exterior pathways, steps and decking (as is Resene Non-Skid Deck & Path, which can also be used inside where you need a non-slip finish). Wash to clean and remove flakes of paint or varnish, then treat with Resene Moss & Mould Killer. Prime with a coat of Resene Walk-on thinned with water, let dry for at least two hours, then paint with two or three coats of Resene Walk-on.
To stain exterior timber, use Resene Woodsman. If you want to seal but not paint your exterior concrete, go for Resene Walk-on Concrete Clear.





July 31, 2020
For expert advice and everything you need to finish your floor, visit your local Resene ColorShop.
Book a colour consult | Ask a Colour Expert | Ask a Paint Expert
Resene's decorating blog
Paint your home beautiful! Discover the latest decorating trends, tips and colour news.