From the Resene decorating blog
A lick of paint can completely revitalise an old fence or give a wonderfully crisp finish to a new one.
Besides its cosmetic effects, paint also provides your fence with protection against the elements. Depending on how much of it you have, painting a fence can be a time-consuming undertaking, so it's important to do it correctly so that your work lasts for as long as possible.
Before you get stuck in, take these six crucial considerations into account.
Make a plan and give yourself plenty of time to complete all necessary prep required. Check the weather conditions – if your clothes will not dry on the line, then your paint won’t dry either. Use the best tools you can afford – Resene ColorShops have a wide variety of tools to suit every job and every budget. Be sure to shop for what you need early so that you don’t get caught missing something fundamental to the task when you've already dipped your brush.
The key to a great finish is to have a beautifully clean and smooth surface to paint on. No matter what material your fence is – be it timber, PVC, iron, concrete or brick, the prep is primarily the same. Remove mould with Resene Moss & Mould Killer, clean with the right Resene cleaner – e.g. Resene Timber and Deck Wash for wooden fences or Resene Paint Prep and Housewash for painted fences allow it to dry. Check for repairs and fix any flaking paint. Failing to prep properly could result in blistering, flaking and poor adhesion of your chosen Resene topcoat. Do it right to ensure the time and dollars you've invested last.
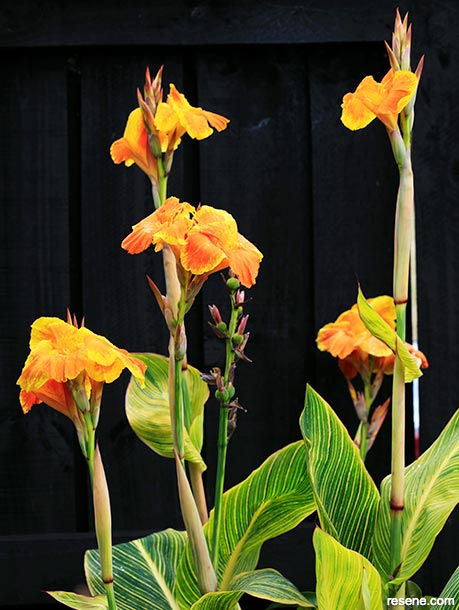
Colourful flowers are accentuated by dark fencing, like this fence finished in Resene Crowshead wood stain. Project by Sandra Batley.
Once your fence is prepped and dry, you will need to apply a primer. Resene Quick Dry Primer Undercoat is the recommended choice for timber fences and Resene Sureseal is the right choice for concrete and brick fences. Not only do these primers increase the life of your Resene topcoat but they also improve coverage – meaning you will use less topcoat paint. The primer also prevents bleed-through, so fence imperfections and knots in wood won't form dark spots on your finished surface.
When it comes to the choice between paint or stain for a timber fence, it mostly comes down to personal preference and your intended maintenance schedule.
Paint provides better UV protection and will last longer before requiring maintenance than a stain. Resene Lumbersider comes in a plethora of colours and can be used on timber, iron, brick, PVC and concrete fences – try Resene Double Tea if you’re looking for a stone grey tone or Resene Half Villa White for a more classic aesthetic.
Remember, though: stains are for timber fences only. They are semi-transparent, which allows the natural grain of the wood to show though and require recoating every two to three summers. The Resene Woodsman range of timber stains come in a variety of colours and is available in waterborne and solvent-borne options. For a contemporary look why not try a deep brown-black tone like Resene Woodsman Crowshead. Or try Resene Woodsman Nutmeg for a spicy mid-range brown.
When it comes to repainting or restaining, a stained finish is usually easier to prepare for restaining but will need restaining more often than paint. Conversely, paint will need repainting less often, but requires more prep.
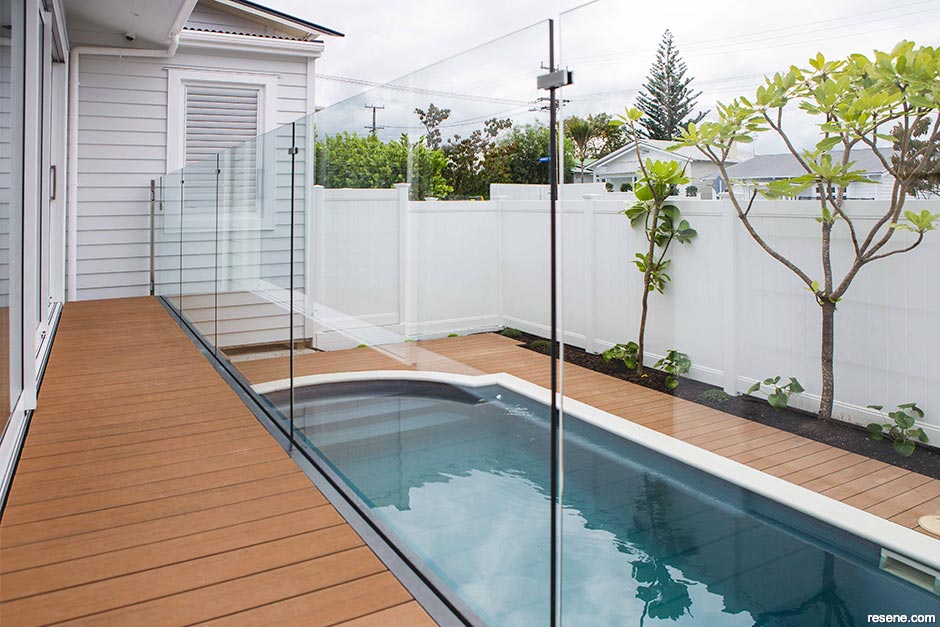
If you have an older weathered fence, such as rough sawn timber, using a low sheen paint like Resene Lumbersider will help hide the imperfections. A semi-gloss product such as Resene Sonyx 101, however, may well highlight any defects in your fence which could lead to a patchy looking finish. But if your fence is new and in good condition, you can use durable Resene Sonyx 101 in a semi-gloss or Resene Hi-Glo high gloss to transform your timber, concrete, brick, PVC or iron fence into a striking feature. A higher gloss finish will be easier to clean. Try Resene Eighth Thorndon Cream, Resene Spanish White or Resene Concrete for a refined and elegant finish. If you are choosing a light colour, higher gloss finishes will be glarier so take care where fences are near pools or large window areas. You may need to choose a darker colour or lower gloss to reduce the glare.
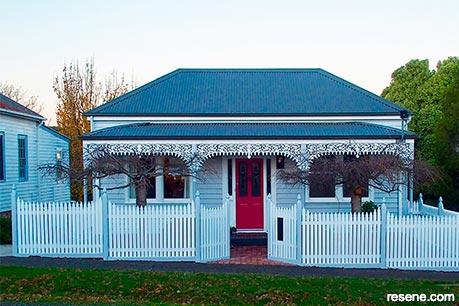
The best recommendation for front timber fences would be to use the lightest colour paint possible so that the wood absorbs the least amount of heat – try Resene Sea Fog, Resene Half Spanish White or Resene Black White. Dark colours absorb heat and can cause timber to warp or splinter. Unlike the front fence, boundary fences serve quite a different purpose and are often not needed as a feature. In that case, painting your boundary fences in a dark colour will allow them to blend away behind foliage so planting can be the hero – try Resene Oilskin, Resene Swamp, Resene Foundry, Resene Ironsand or a wood stain finish like Resene Pitch Black.
When using dark colours outside, choose a topcoat with Resene CoolColour technology. It’s available in a wide range of paints and stains. “Resene CoolColour will look the same as a standard colour, but surface heat will build up slower; and to a significantly lower level than a 'not so cool' traditional colour. Resene CoolColour doesn't promise to resolve all heat related issues, but it definitely reduces the stress on the substrate caused by the heat absorption of a standard dark colour,” explains Resene Paint Expert Jay Sharples.
Precautions If staining, wear gloves – you want to stain the fence not your hands! Always wear a mask when sanding, as well as safety glasses as stain and paint can splash about. Put down a drop cloth as big drops of paint on the paths, tiles or garden beneath your fence look messy and have an adverse effect on plants.
Top tip: “We don’t recommend clear coating over Resene exterior wood stains. The stain itself will help protect the timber against UV rays. Keeping a good maintenance schedule will help protect the timber and keep it looking its best for years to come,” says Resene Paint Expert Jay Sharples.
June 29, 2020
Visit your local Resene ColorShop for more colour ideas and all the expert advice and products you need for a superb finish on all your decorating projects.
Book a colour consult | Ask a Colour Expert | Ask a Paint Expert
Resene's decorating blog
Paint your home beautiful! Discover the latest decorating trends, tips and colour news.
![]()
Previous «
Diving into total drama
![]()
Blog home
View the latest trends, tips and news
![]()
» Next
How to paint a fence
![]() Get inspired ! Subscribe
Get inspired ! Subscribe ![]() Get saving ! Apply for a DIY card
Get saving ! Apply for a DIY card
![]()
Can't find what you're looking for? Ask us!
Company profile | Terms | Privacy policy | Quality and environmental policy | Health and safety policy
Colours shown on this website are a representation only. Please refer to the actual paint or product sample. Resene colour charts, testpots and samples are available for ordering online. See measurements/conversions for more details on how electronic colour values are achieved.
What's new | Specifiers | Painters | DIYers | Artists | Kids | Sitemap | Home | TOP ⇧