Close Give Feedback
Resene Paints - home page
Follow us on Facebook Follow us on Pinterest Follow us on Instagram Follow us on YouTube

Dino-tastic!

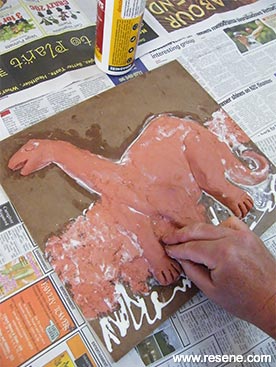
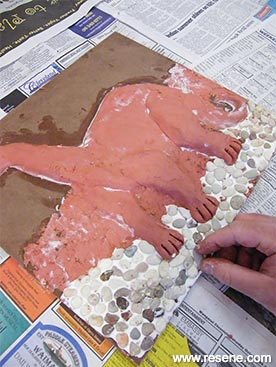
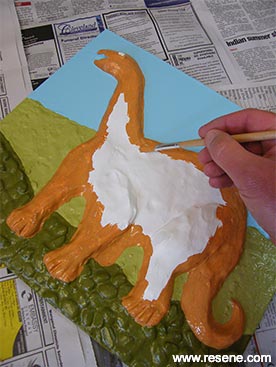
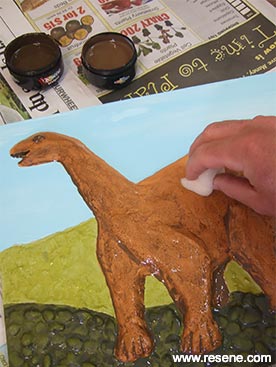
Make this fabulous 3D dinosaur picture using self-hardening clay, Resene Paint Effects medium and some Resene testpots.

Dino-tastic! - instruction sheet

Download PDF

Resene kids art with Mark Rayner - Project 72

Difficulty level: Challenging

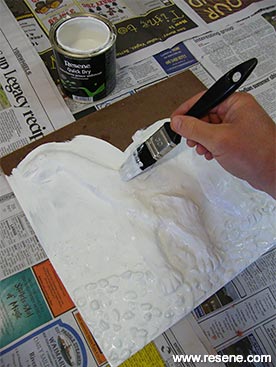
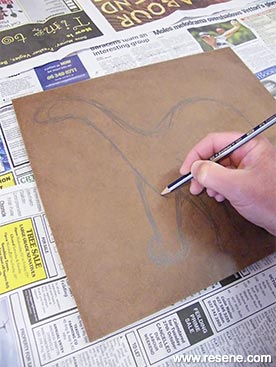
You will need: Self-hardening modelling clay, Small pieces of sponge or foam rubber, Small pots for mixing paint effect medium (old yoghurt pots are ideal), Piece of 6mm hardboard (ours measured 300mm x 340mm), Paintbrushes (including artists’ brushes) Pencil, PVA glue, Resene Paint Effects medium, Resene Quick Dry waterborne primer undercoat, Resene Testpots of Resene Alabaster, Resene Burnt Umber, Resene Gingko, Resene Grasshopper, Resene Karaka, Resene Light Tan, Resene Nero, Resene Planter and Resene Spray, Small pebbles

Top tip: The clay and glue will dry quicker if you leave it outside in the sun or in the airing cupboard overnight.

Here's another idea: This 3D butterfly picture was made from a piece of MDF, PVA glue, cut foam rubber and black pipe cleaners. It was painted with Resene Havoc, Resene Malibu and Resene Hi Jinx.
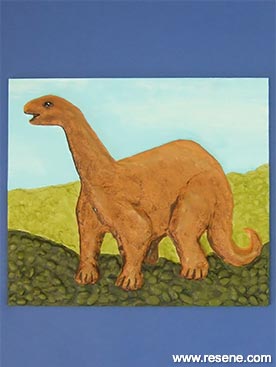
Make a 3d dinosaur
Dino-tastic!

Make a 3d butterfly
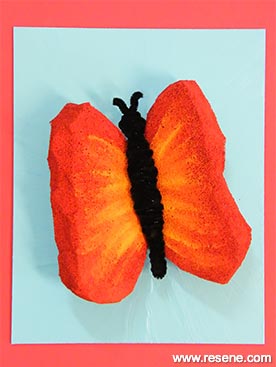
Another idea: Butterfly

Step 1
Step one
With a pencil, draw a dinosaur shape on the piece of hardboard.
Step 2
Step two
Mould pieces of clay onto the hardboard to form the dinosaur, as shown. Use plenty of PVA glue to stick the clay to the board. Continue applying flat pieces of clay until the ground area is also covered.
Step 3
Step three
Apply a generous amount of PVA along the bottom of the picture, as shown, and glue down the pebbles, pressing them into the soft clay. Allow the glue and clay to dry thoroughly - at least overnight, depending on the thickness of the clay.
Step 4
Step four
Apply one coat of Resene Quick Dry to the picture and allow two hours to dry.
Step 5
Step five
Paint the sky with Resene Spray, the background hill with Resene Gingko, the ground with Resene Planter and the dinosaur with Resene Light Tan. After two hours, apply a second coat of each colour and allow to dry for a further two hours.
Step 6
Step six
Pour some Resene Paint Effects medium into a pot and mix in a little Resene Alabaster. Carefully apply to the sky with a sponge to form clouds. Repeat this step using paint effects medium and the following colours to build up shadows and texture – Resene Grasshopper (background hill), Resene Karaka (ground), Resene Burnt Umber (dinosaur). Finish off eyes with Resene Nero and Resene Alabaster. Leave to dry for two hours. Wow!

Other projects you might like to try

Paint a kitty lampshade
Kitty lampshade

Kids art projects
Make a egg man toy
Egg man

Kids art projects
Paint a funky portrait
Crackle man

Kids art projects
Make a gumboot creature
Great gumboots!

Kids garden projects
Paint a skateboard
Hoopla

Toys and games
Paint a glitter mirror
Glitter mirror

Toys and games

View more projects


Order online now:
Testpots | Paints | Primers and Sealers | Stains | Clears | Accessories

Get inspired Get inspired ! Subscribe      Get saving Get saving ! Apply for a DIY card

Resene Paints Ltd

Can't find what you're looking for? Ask us!

Resene Paints Ltd   – www.resene.com

Follow us on Facebook Follow us on Pinterest Follow us on Instagram Follow us on YouTube
Videos on how to paint and stain your house
 

Colours shown on this website are a representation only. Please refer to the actual paint or product sample. Resene colour charts, testpots and samples are available for ordering online.   See measurements/conversions for more details on how electronic colour values are achieved.

What's new | Specifiers | Painters | DIYers | Artists | Kids | Sitemap | Home | TOP ⇧