DIY project from NZ Gardener magazine
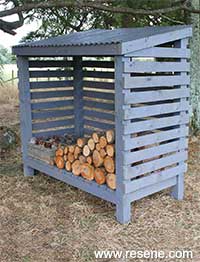
Rose Hughes shows how to keep your logs dry for warming fires this winter.
You will need: four 100mm x 100mm 2.1m H4 treated pine posts, 15.6m 100mm x 50mm pine bars, 61m 100mm x 25mm panels, six 52mm x 90mm joist hangers, sixteen 100mm coach screws, 50mm galvanised screws, corrugated iron, 65mm roofing screws, galvanised clouts or nails, power saw, power drill, clamps, wood chisel, roof paint, wood stain and brushes.
Cutting measurements: posts cut 2 x posts at 1830mm and 2 x at 2025mm with a 13° angle cut off the top of each. bars 5 x 2000mm front & back & rafter, 1 x 1600mm back support, 2 x approx 1120mm top side, 2 x 800mm sides panel s 20 x approx 1050mm for the sides, 11 x 2000mm for the back, 16 x approx 1100mm for the floor.
Cost: $410.
Step 1
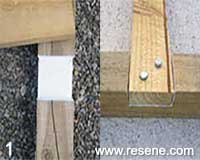
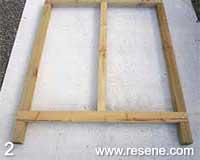
Back Lay the posts with the 13° angle facing downwards; 200mm up from the bottom of each, cut a rebate 50mm deep x 100mm wide, undercoat then coach-bolt a lower bar into the rebates. Front Lay the posts with the 13° angle facing upwards, repeat the bottom bar procedure. Coach-bolt an upper bar to the outside of the two front posts, about 10mm below the top edge.
Step 2
Using a skill saw, cut a 13° angle off the top of the back top bar, cut a rebate into the post and coach-bolt into position, level with the top of the post. Add a central support between the two posts, skew nail into position.
Step 4
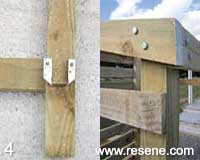
Nail the joist hangers into position, 200mm from the bottom on the inside of the four posts. Stand the back panel up and support well. Stand the front panel up and nail the lower side bar into each joist hanger. Attach a side panel to each upper side so the front and back are held together. Trim the angle off each end and attach the top bar to each side, matching the roof angle.
Step 1
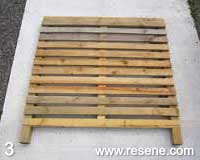
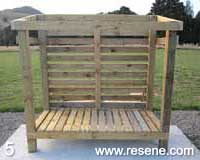
Attach evenly spaced panels to floor. Attach the side panels, matching the back spacing and ensuring they are level.
Step 1
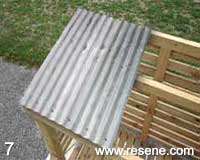
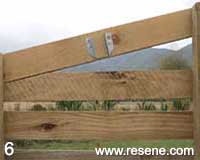
Centred on the inside of the top side bars, attach joist hangers and nail a rafter into these.
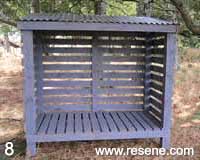
Step 1
For paint, we used Resene Waterborne Woodsman Resene Silvered Grey and Resene Hi-Glo Resene Grey Friars for the roof.
Order online now:
Testpots |
Paints |
Primers and Sealers |
Stains |
Clears |
Accessories
![]() Get inspired ! Subscribe
Get inspired ! Subscribe ![]() Get saving ! Apply for a DIY card
Get saving ! Apply for a DIY card
Can't find what you're looking for? Ask us!
Company profile | Terms | Privacy policy | Quality and environmental policy | Health and safety policy
Colours shown on this website are a representation only. Please refer to the actual paint or product sample. Resene colour charts, testpots and samples are available for ordering online. See measurements/conversions for more details on how electronic colour values are achieved.
What's new | Specifiers | Painters | DIYers | Artists | Kids | Sitemap | Home | TOP ⇧

