Close Give Feedback
Resene Paints - home page
Follow us on Facebook Follow us on Pinterest Follow us on Instagram Follow us on YouTube

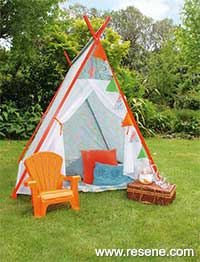
Play tent

DIY project from NZ Gardener magazine

Rose Hughes designs a delightful retreat for little ones to enjoy.

You will need: 10m of 24mm x 24mm dressed pine, 3.5m of 50mm x 25mm dressed pine, drop saw, gutter bolts – 4 x m5 50mm & 2 x m5 60mm, plus washers and m5 wing nuts, drill and 6mm drill bit, sandpaper, chisel, clamp tape measure, pencil, Resene undercoat, paint and brushes, 5.5m fabric 160cm wide, 1.5m net 160cm wide and 4m ribbon.

Cutting list: from the 24mm x 24mm dressed pine: 4 x 1915mm for uprights & 1 x 2150mm for centre strut from the 50mm x 25mm pine: 2 x 1635mm for side braces.

Cost: $340, excluding paint.
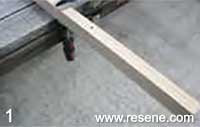
Step 1 how to make a play tent Step 1
Drill a hole in the uprights 250mm from the top. Cut a 30° angle in each base.
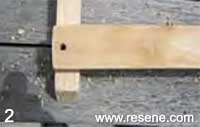
Step 2 how to make a play tent Step 2
Lay two uprights on a flat surface, with the inside face upwards, mark 20mm up from the bottom. Clamp the brace and drill a hole through the brace and upright. Repeat for the other side.
Step 3 how to make a play tent Step 3
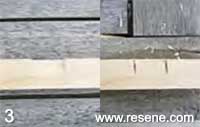
Assemble the tent frame; the base of the uprights should be about 1500mm apart. Lay the centre strut in the ‘V’ of the uprights. Mark a cut-out where it crosses each outside upright. Using a hand saw and chisel create the cut-out at each end.
Step 4 how to make a play tent Step 4
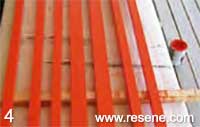
Sand, undercoat and paint the pieces. I used Resene Quick Dry Primer and Resene Lustacryl semi-gloss waterborne enamel in Resene Daredevil.
Step 5 how to make a play tent Step 5
Cut one piece of fabric 3560mm long; fold in half. Create a pocket across the width by sewing a seam 50mm from the top. At the bottom fold under 20mm and fold again to create a 60mm pocket; stitch.
Step 6 how to make a play tent Step 6
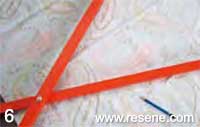
For the back, lay the uprights over the fabric, mark the shape, add a seam allowance and cut out. Attach to the sides as far as the stitch line for the bottom pocket. Hem and turn in the lower side. Repeat for the front using two pieces of net fabric attached to the triangular fabric top as shown.
Step 7 how to make a play tent Step 7
Cut ribbon into 4 x 60cm and 4 x 40cm. Stitch the centre of the 60cm lengths along the seam lines front and back 90cm down from the top. Add the ribbons to tie the front flaps.
Step 8 how to make a play tent Step 8
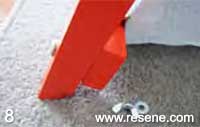
Assemble by feeding the centre strut through the top pocket and the side braces though the lower pockets. Put the frame together using the 60mm gutter bolts at the top of the uprights. Place the centre strut between the Vs with the cut-outs sitting over the outer uprights. Pull the side braces out to the width of the fabric using the 50mm gutter bolts and attach at each end. Tie the ribbons over the frame to secure.

View more projects


Order online now:
Testpots | Paints | Primers and Sealers | Stains | Clears | Accessories

Get inspired Get inspired ! Subscribe      Get saving Get saving ! Apply for a DIY card

Resene Paints Ltd

Can't find what you're looking for? Ask us!

Resene Paints Ltd   – www.resene.com

Follow us on Facebook Follow us on Pinterest Follow us on Instagram Follow us on YouTube
Videos on how to paint and stain your house
 

Colours shown on this website are a representation only. Please refer to the actual paint or product sample. Resene colour charts, testpots and samples are available for ordering online.   See measurements/conversions for more details on how electronic colour values are achieved.

What's new | Specifiers | Painters | DIYers | Artists | Kids | Sitemap | Home | TOP ⇧