DIY project from NZ Gardener magazine
An easy DIY basket for harvesting or carrying tools.
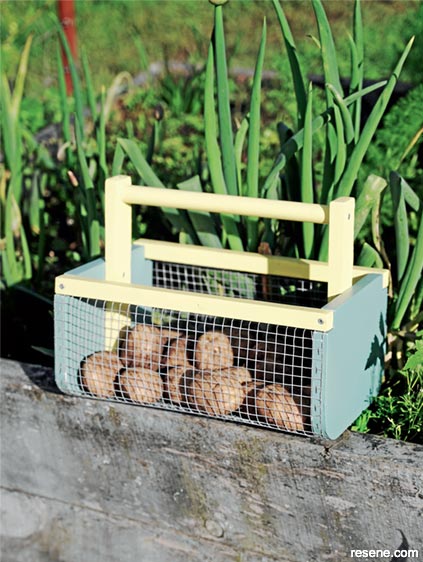
How to make your own harvest basket
Materials
Paint colour
Cutting list - frame
Cost: $20, excluding Resene products.
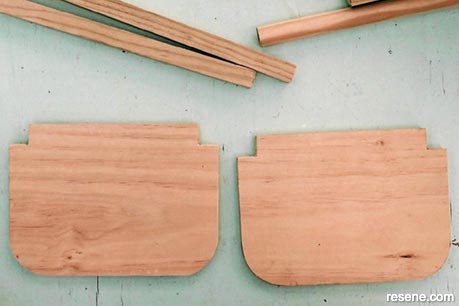 Step one
Mark the notched corners at the top of each end piece (I used the rails as my guide). Mark the curved corners at the bottom of each end piece (I used a 500ml paint can as my guide). Clamp and then carefully cut these out. Once you have cut all your wooden pieces to size, sand off any rough bits before painting.
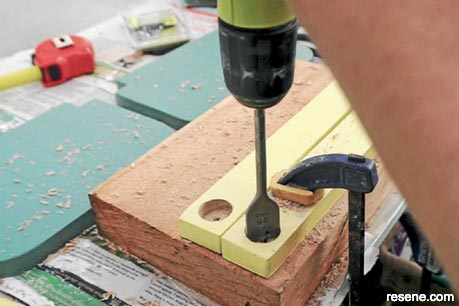 Step two
Take the two 300mm x (40mm x 19mm) handle supports, secure these with a speed clamp or vice, then drill a 4mm pilot hole 30mm from the top of each piece. With the 25mm spade bit, carefully drill halfway through each of the handle supports.
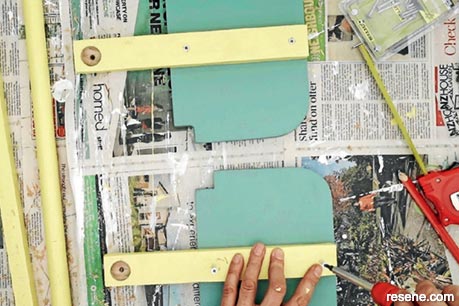 Step three
Attach the handle supports to the centre of each end piece, drill pilot holes and screw in place.
 Step four
Attach the handle between the two handle supports with some PVA glue and a screw through each end.
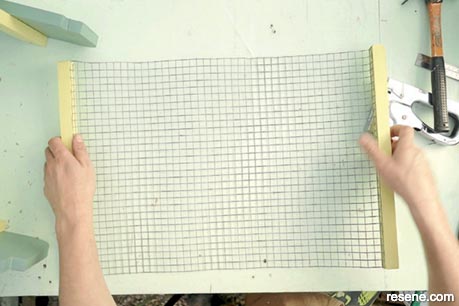 Step five
Measure and cut the wire to fit the length of the rails (400mm), and the diameter of three sides of the end piece (580mm). Attach the rails to each end of the wire with a staple gun.
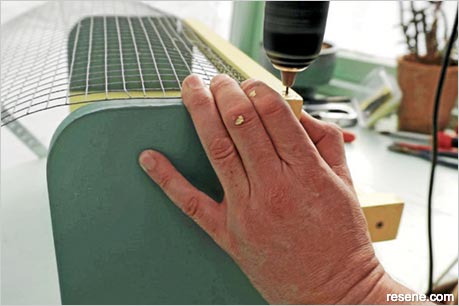 Step six
Attach the first rail to one side of the basket so it sits in the notched end pieces, drill pilot holes and screw in place. Wrap the wire around to the other side, then staple it onto the end pieces until you reach the other notch, then screw the last rail in place.
![]() Get inspired ! Subscribe
Get inspired ! Subscribe ![]() Get saving ! Apply for a DIY card
Get saving ! Apply for a DIY card
![]()
Can't find what you're looking for? Ask us!
Company profile | Terms | Privacy policy | Quality and environmental policy | Health and safety policy
Colours shown on this website are a representation only. Please refer to the actual paint or product sample. Resene colour charts, testpots and samples are available for ordering online. See measurements/conversions for more details on how electronic colour values are achieved.
What's new | Specifiers | Painters | DIYers | Artists | Kids | Sitemap | Home | TOP ⇧

