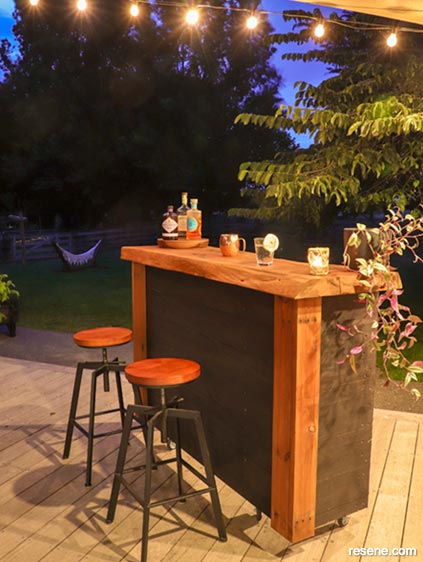
A great addition to any outdoor entertaining space that will have you sipping drinks in style.
![]()
Materials
Tools
Top tip: Your pallets could be a different size from ours, and your outdoor space may fit a smaller or larger bar, so adjust your measurements to suit your garden.
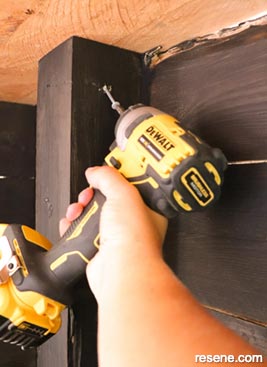
Handy hint: Pilot holes are used to create an easier path for driving screws into wood and prevent the wood from splitting. Choose a drill bit that’s slightly smaller than the screw
Before you begin: Check your pallet for any loose slats and hammer them back down if needed.
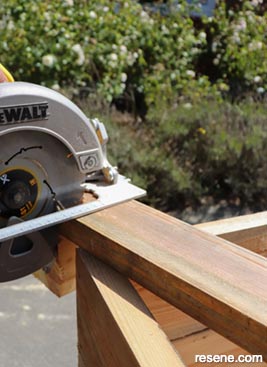
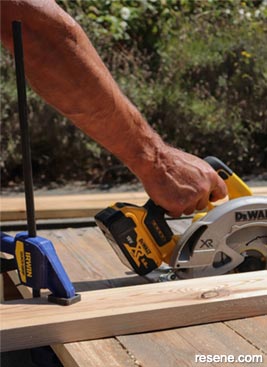 Step one
Measure, mark and cut your pallet into three sections – one for the front and two shorter, equal lengths for the sides. We cut our sides at 400mm, leaving 1400mm for the front panel. Ideally, your cuts will leave vertical supports in place on each section to keep the slats held together and to have something to screw the wheels to later on (if using).
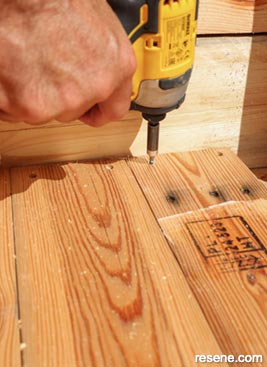
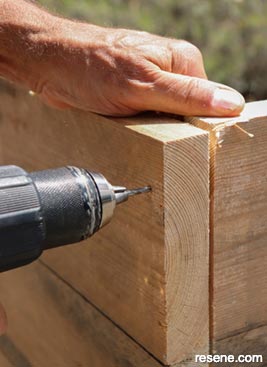 Step two
Stand all three pieces in position and drill pilot holes along both ends of the front slat – two holes per slat.
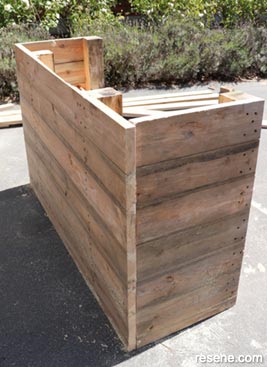 Step three
Using the pilot holes as guides, screw the panels together using 35mm screws.
 Step four
Cut the loose pallet slat timber to size. You will need two lengths to be the width of the inside of the bar for the shelves (ours were 1360mm), four the height of the bar (ours were 1000mm) for the corners, and two the depth of the inside of the bar for shelf supports (ours were 300mm).
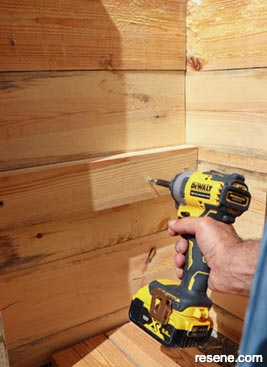 Step five
Attach the two shelf supports at each inside end of the bar 250mm up from the ground using 35mm screws, drilling pilot holes first.
 Step six
Place your two lengths of timber for the shelves in place, drill pilot holes and screw down using 35mm screws.
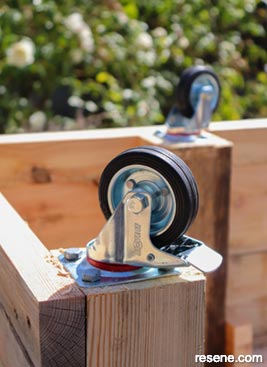 Step seven - Optional
Flip your bar upside down and attach the wheels to the vertical supports using the coach screws. We put the two wheels with brakes at the back of the bar (the open side with the shelf).
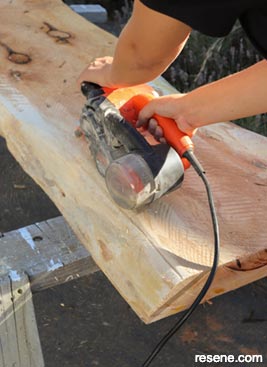 Step eight
Sand the macrocarpa slab – the top of your bar – using a belt sander. If your slab is rough like ours, use 60 grit sandpaper first, followed by 120 grit, before finishing with 180 grit. Brush off the sanding dust when finished.
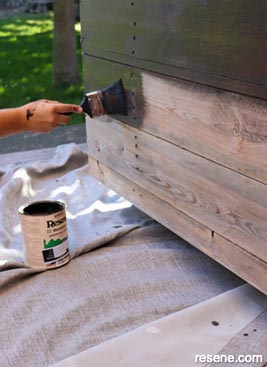 Step nine
Stain the entire bar (excluding the four corner lengths and the macrocarpa slab), with Resene Waterborne Woodsman penetrating oil stain tinted to Resene Crowshead.
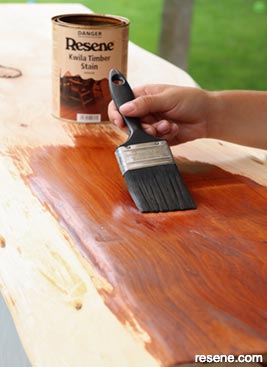
 Step ten
Stain the four corner lengths of timber with Resene Kwila Timber Stain.
 Step eleven
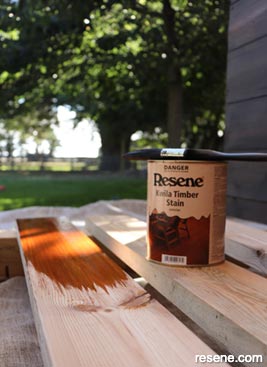
Stain the macrocarpa slab with Resene Kwila Timber Stain. All faces of the timber should be treated, with special attention being paid to the end grains.
 Step twelve
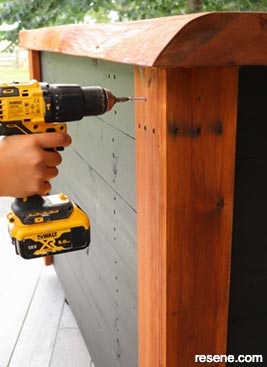
Once the macrocarpa slab is dry, place it into position on top of the base of your bar, making sure it is centred. Secure it in place with 100mm screws from the underside, as shown.
 Step thirteen
Fix the four corner covers into position with 35mm screws when they are dry, drilling pilot holes first.
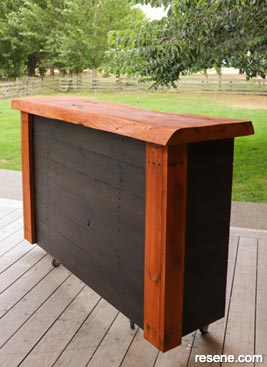 Finished project
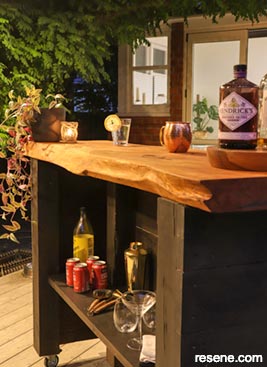 Your pallet bar
![]() Get inspired ! Subscribe
Get inspired ! Subscribe ![]() Get saving ! Apply for a DIY card
Get saving ! Apply for a DIY card
![]()
Can't find what you're looking for? Ask us!
Company profile | Terms | Privacy policy | Quality and environmental policy | Health and safety policy
Colours shown on this website are a representation only. Please refer to the actual paint or product sample. Resene colour charts, testpots and samples are available for ordering online. See measurements/conversions for more details on how electronic colour values are achieved.
What's new | Specifiers | Painters | DIYers | Artists | Kids | Sitemap | Home | TOP ⇧

