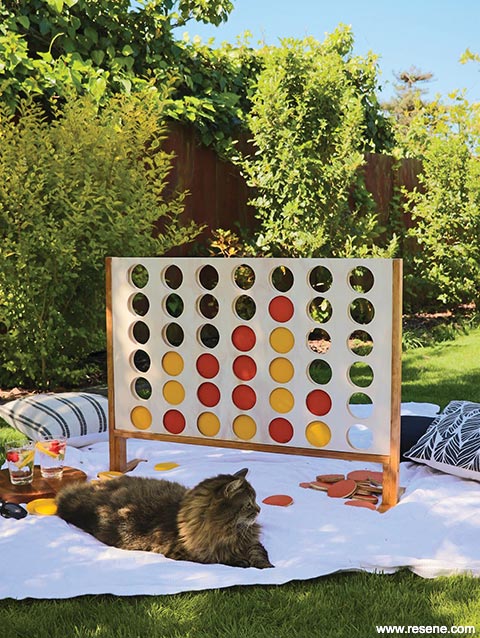
This super-sized game makes a perfect summer project that will have both adults and children alike battling it out for the win.
![]()
Before you start: You can scale this project up or down to suit your plywood or hole saw sizes. Just remember to recalculate all the measurements so the discs can drop smoothly in the space allowed between the batons (pine moulding) and then stack neatly in the centre of each hole.
Handy hint: The hole saw measurements (for my saw) referred to the hole size left in the plywood, rather than the disc size it cuts. Take the actual disc size into account if adjusting the project size.
Extra colour: Paint or stain the two inside faces of your panels before gluing them together and the extra colour will show through the finished product.
Another idea: Create plywood legs that the board can slot into for easy removal and flat storage.
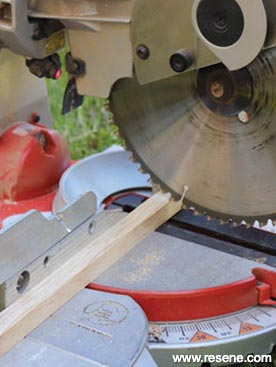
Step one
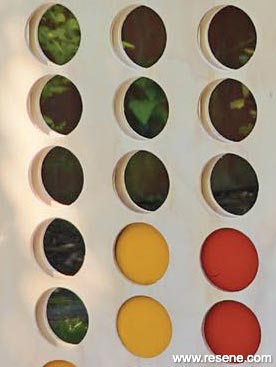
Game detail
Step two
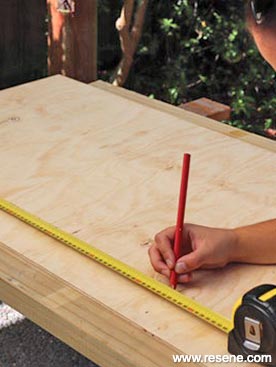
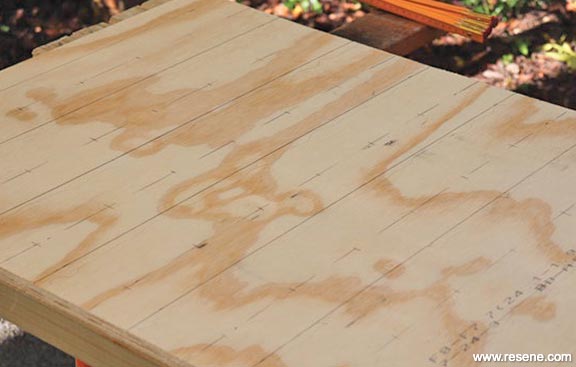
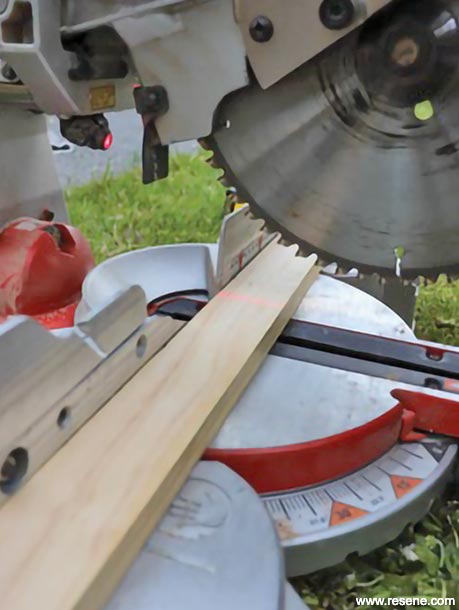
Step one: Measure and mark your two pieces of 7mm plywood to 833mm x 530mm.
Step two: Clamp one of your 18mm x 40mm mouldings to the first piece of 7mm plywood and use it as a straight edge to cut the first panel to size using the mitre saw. Repeat for the second panel.
Step three
Step four
Step five
Step three: Starting from the left-hand short edge of one of your plywood panels, draw a vertical line 40mm in and then every 110mm. These marks will be where you place the 18mm x 18mm batons that will create the drop channels for the discs. Draw a dashed line 86mm in from the left and then every 110mm. Lastly, starting from the bottom, mark out a point at 43mm and then every 86mm along each dashed line. These will be the centre points of your 42 drill holes.
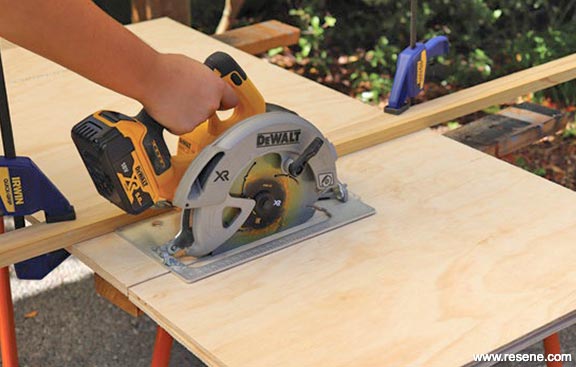
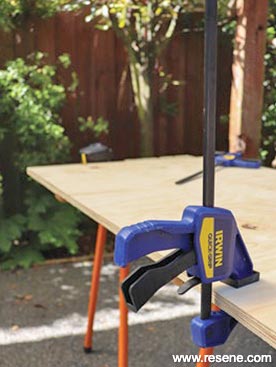
Step four: Clamp both 7mm panels together, making sure they are tight enough to stay aligned as you cut.
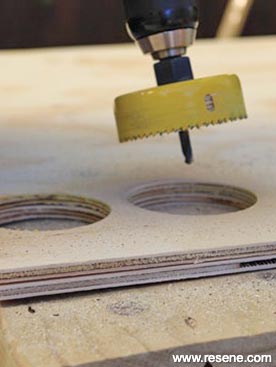
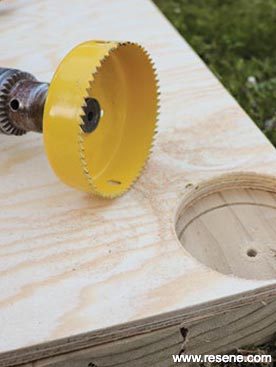
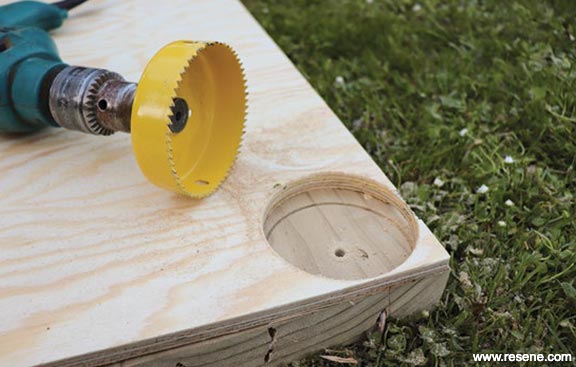
Step five: Using the 75mm hole saw, cut out holes in the panels at each of your 42 marked centre points.
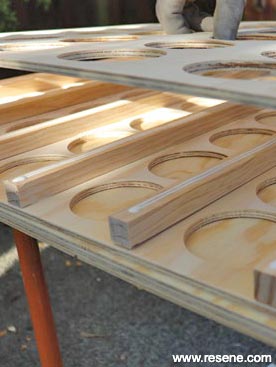
Step six
Step seven
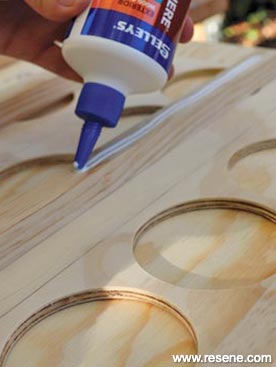
Step eight
Step nine
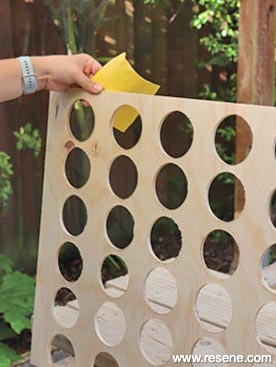
Step six: Unclamp your panels and sand down any rough edges.
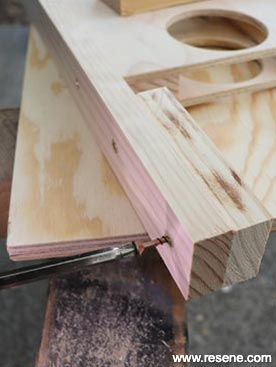
Step seven: Cut six 525mm length batons from your 18mm x 18mm pine moulding and two 525mm length batons from your 18mm x 40mm pine moulding.
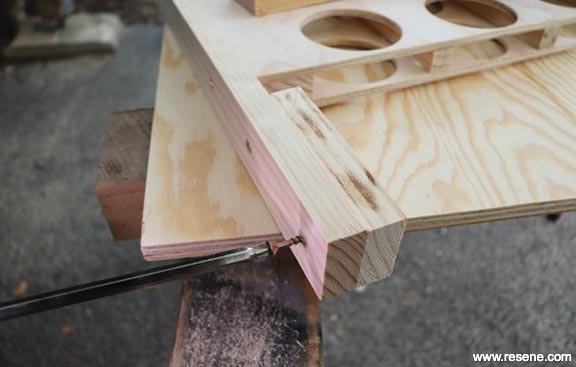
Step eight: Place your two wider batons on the outside edges of your marked panel and the remaining six along your drawn guides. Fix into place with PVA glue.
Step nine: Apply a line of glue along the top of each of the eight batons and carefully place your second board on top, making sure your edges are flush.
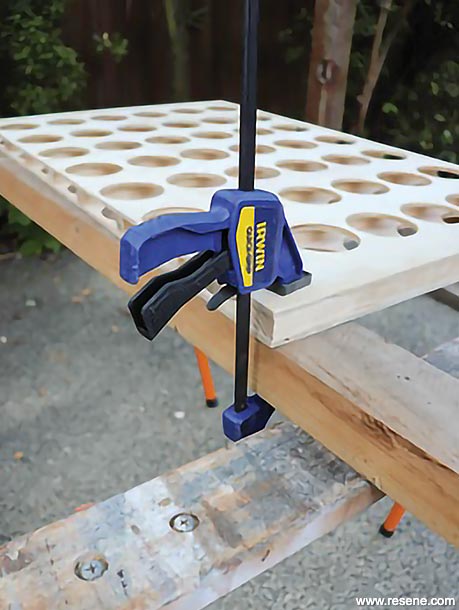
Step ten
Step eleven
Step eleven
Step twelve
Step ten: Clamp your panels together and allow the glue to dry. (You can place weights on top if you don’t have enough clamps.)
Step eleven: While the glue is drying, cut 42 discs from your 12mm plywood using an 88mm hole saw. Sand down any rough edges.
Step twelve: Time to start making your legs. Cut your remaining 18mm x 40mm pine moulding to the following lengths: 2 x 667mm, 2 x 115mm, 2 x 285mm and 1 x 850mm. This last piece will become the ‘base board’, which will keep your discs from dropping out of the bottom of the game.
Step thirteen
Step fourteen
Step eleven
Step fifteen
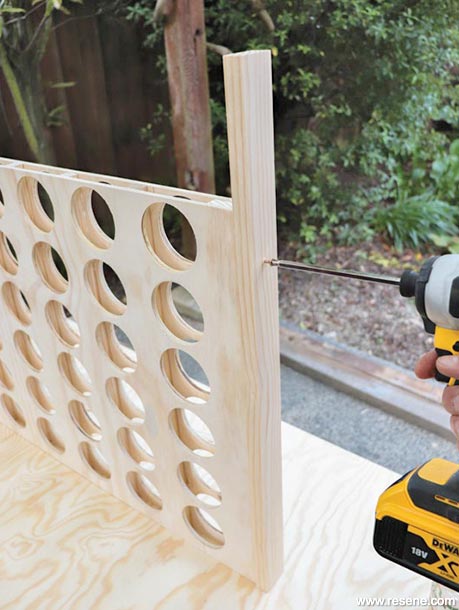
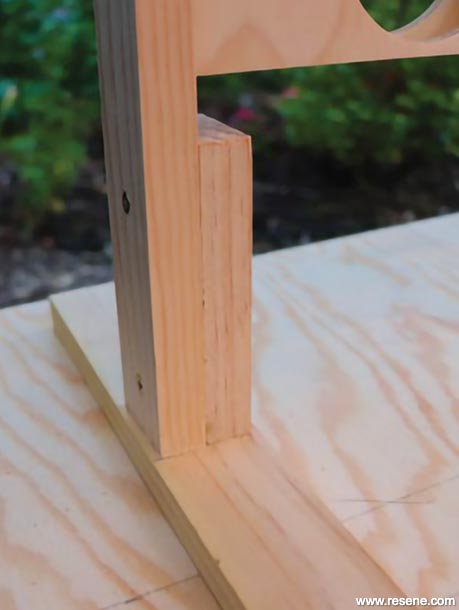
Step thirteen: Screw the two 667mm pieces to each side of your board, long side touching, and aligned at the top (turn your board upside down if needed).
Step fourteen: Screw the two 115mm pieces onto the inside of the legs, aligning at the bottom, as shown.
Step fifteen: Mark the centre of one 285mm piece length. Use a screw to attach it to a leg, perpendicular to the board, as shown. Repeat with the second leg and your board will now be able to stand by itself and the base board will have a space to fit into.
Step sixteen
Step seventeen
Step eleven
Step eighteen
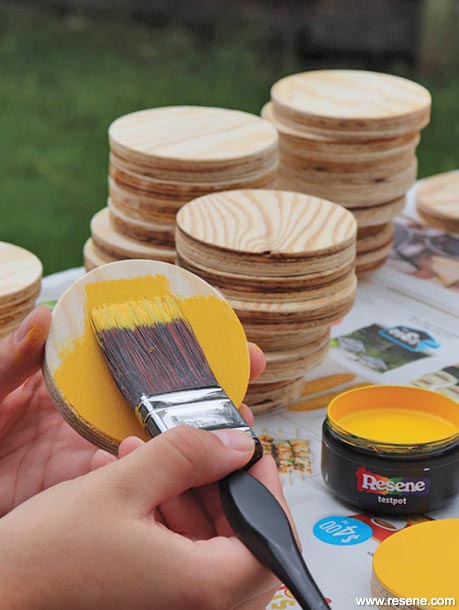
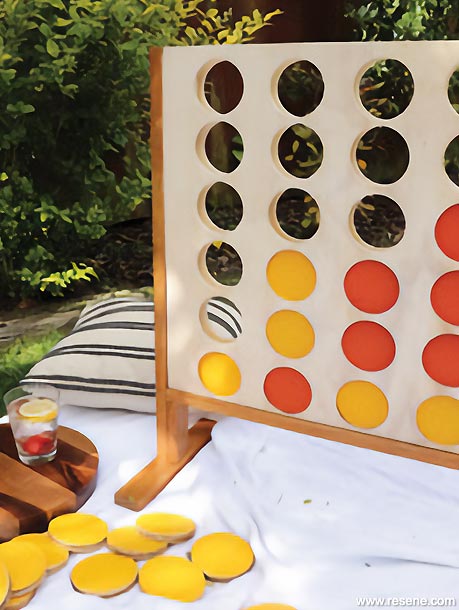
Step sixteen: Now’s the time to get the kids involved! Paint 21 discs in one colour and the remaining 21 discs in a different colour. Apply a second coat if required.
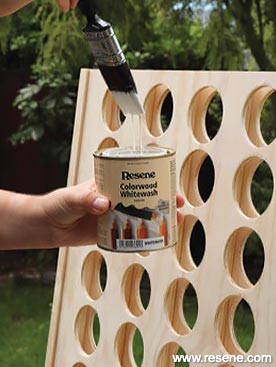
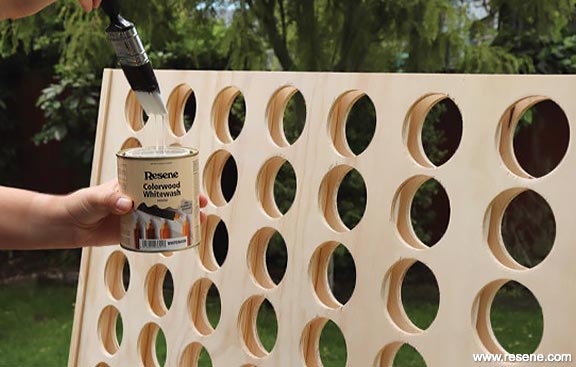
Step seventeen: Paint the panels using Resene Colorwood Whitewash and paint the legs and base board using Resene Colorwood Stain in Walnut. Apply a second coat of each if required.
Step eighteen: Once everything is dry, set up a game, grab an opponent and battle to get four discs in a row, vertically, horizontally or diagonally. When the game is over, pull out the base board to release the discs and play again!
Handy hint: If you wish to paint or stain the legs a different colour, do so before fixing them to the board.
Painting tips:
Use Resene FX Metallic paints to jazz up your game with a shimmery finish that will glisten in the summer sun.
Want to keep playing once the sun goes down? See what happens when you use the Resene FX Nightlight range.
![]() Get inspired ! Subscribe
Get inspired ! Subscribe ![]() Get saving ! Apply for a DIY card
Get saving ! Apply for a DIY card
![]()
Can't find what you're looking for? Ask us!
Company profile | Terms | Privacy policy | Quality and environmental policy | Health and safety policy
Colours shown on this website are a representation only. Please refer to the actual paint or product sample. Resene colour charts, testpots and samples are available for ordering online. See measurements/conversions for more details on how electronic colour values are achieved.
What's new | Specifiers | Painters | DIYers | Artists | Kids | Sitemap | Home | TOP ⇧

