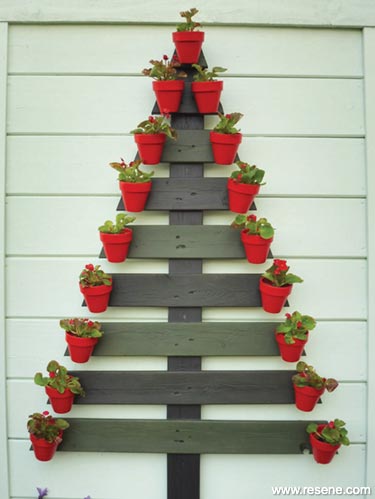
Pallet Christmas tree
Create a festive splash of colour in the garden with this easy-to-build recycled Christmas tree decoration.
You will need:
- Old wooden pallet (ours measured approx 900mm x 1200mm)
- Piece of reclaimed wood measuring approx 90mm x 20mm x 1330mm
- 30mm and 50mm galvanised nails
- 75mm exterior wood screws and drill with 5mm drill bit
- Hammer, paintbrush, pencil, sandpaper, saw, screwdriver, tape measure, stiff-bristled brush, straight edge (we used a thin length of timber)
- Potting mix and rubber gloves
- Small terracotta pots (x 17)
- Small potted colour (x17) – we used red flowering, green-leafed begonias
- Bucket with clean water
- Hose with clean running water
To get the look: Mark painted the background fence with Resene Lumbersider tinted to Resene Surf Crest.
Top tip: If the pallet is badly weathered it may be necessary to treat it with Resene Moss & Mould Killer prior to step eight.
Handy hint: Pallet sizes vary so it may be necessary to adjust our measurements and material quantities accordingly.
Here's another idea: Prime the wooden Christmas tree with Resene Quick Dry and paint the slats with a selection of Resene testpot colours.

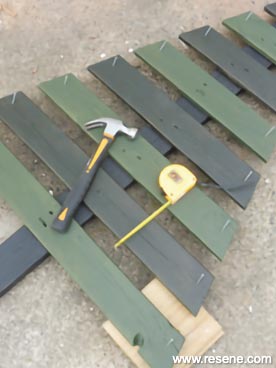
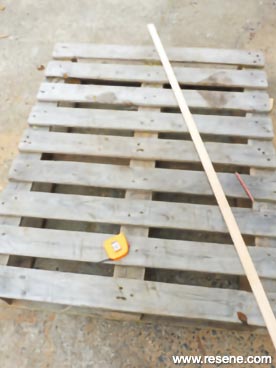 Step one
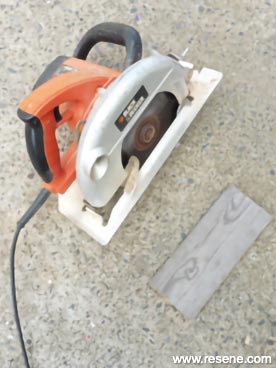
Measure and mark a triangular Christmas tree shape on the wooden pallet, as shown.
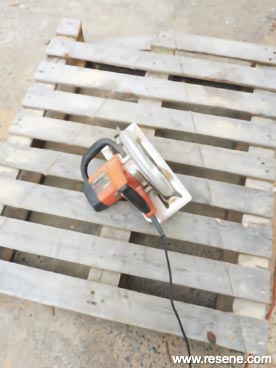 Step two
Carefully cut out the triangular shape with a saw, taking care to avoid any nails in the pallet.
 Step three
Carefully remove the rest of the pallet, leaving the triangular shape, as shown.
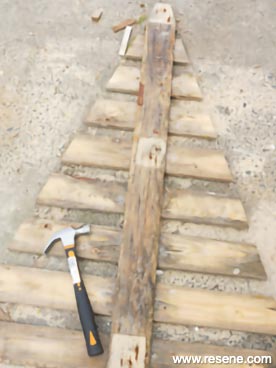
 Step four
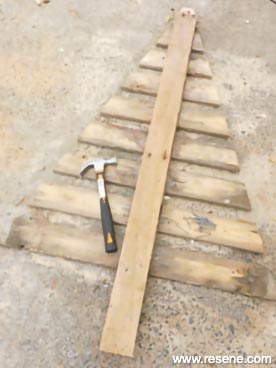
Attach the 1330mm length of wood to the back of the Christmas tree shape, as shown, fixing with 30mm nails.
 Step five
Measure, mark and cut a 230mm piece of wood from the discarded pieces of pallet in step three.
 Step six
Attach this to the base of the Christmas tree (at the front) with 30mm nails to form the bottom of the trunk, as shown.
 Step seven
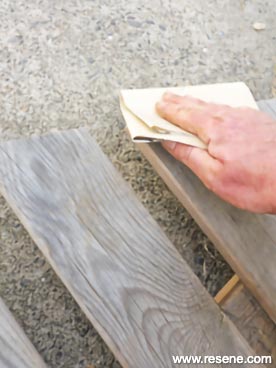
Smooth any rough edges with sandpaper and then brush off any sanding dust.
 Step eight
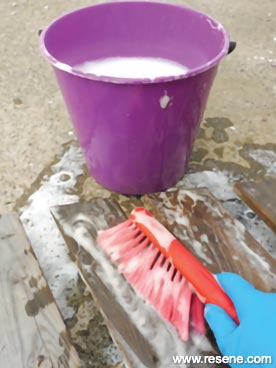
Mix one part Resene Timber and Deck Wash to three parts clean water.
 Step nine
Wearing rubber gloves, vigorously scrub the wooden Christmas tree with the solution, as shown, and then rinse off with clean running water. Allow to dry.
 Step ten
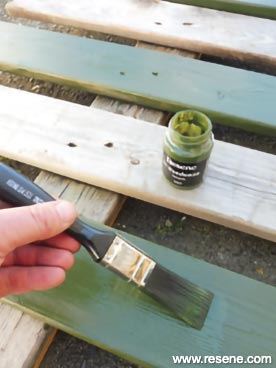
Apply two coats of Resene Grey Green to alternate horizontal slats of the Christmas tree. Ensure the first coat is dry before applying the second.
 Step eleven
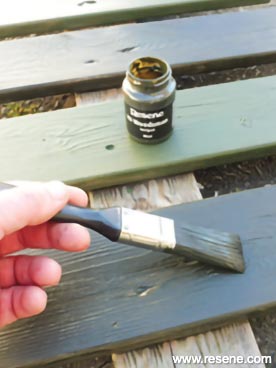
Apply two coats of Resene Touchwood to the remaining horizontal slats of the Christmas tree. Again, ensure the first coat is dry before applying the second.
 Step twelve
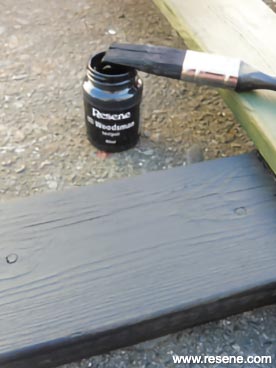
Apply two coats of Resene Crowshead to the trunk of the Christmas tree. Once again, ensure the first coat is dry before applying the second.
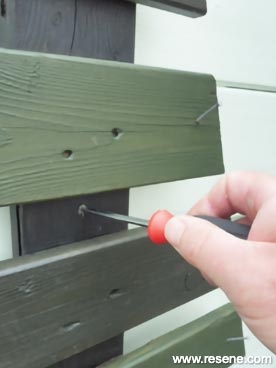
 Step thirteen
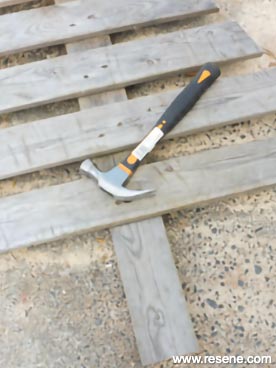
Partially sink 50mm nails at the ends of each slat, as shown, ensuring the nails are angled upwards.
 Step fourteen
Carefully drill a hole in each terracotta pot, just below the rim, as shown.
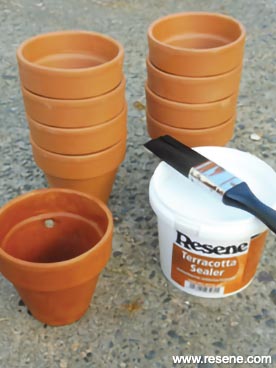 Step fifteen
Apply one coat of Resene Terracotta Sealer to each of the pots and allow to dry.
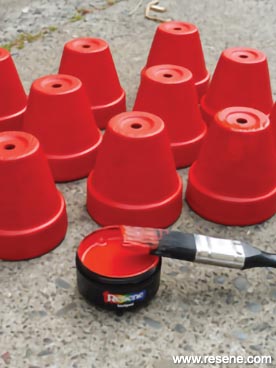 Step sixteen
Paint each of the pots with two coats of Resene Poppy, allowing two hours for each coat to dry.
 Step seventeen
Fix the Christmas tree to a wooden fence or shed wall using 75mm screws.
 Step eighteen
Fill each of the pots with potting mix and plant up with potted colour. Hang each pot by sliding the drilled hole over the protruding nail, ensuring they are securely attached.
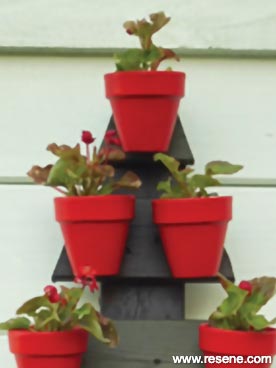 Detail
The top of the Christmas tree.