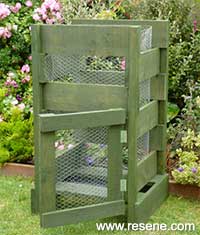
Mark Rayner suggests you keep your compost well aerated with this nifty space-saving raised composter made from fence palings and chicken wire.
You will need: 6 x 1.8m treated fence palings, 4.4m x 50mm x 50mm treated timber, chicken wire, stainless steel or galvanised hinges, catch, 50mm galvanised nails, galvanised staples, hammer, saw, screwdriver, sandpaper, set square, paintbrush, paint stirrer, pencil, tape measure, tin snips or wire cutter, exterior PVA glue and Resene Woodsman tinted to Resene Grey Green.
Top tips for great compost: Position your composter in a sunny spot and prevent compost from becoming too soggy in heavy rain by placing a square of carpet across the top. When filling your composter, make sure you alternate twiggy layers with leafier layers (such as grass clippings) to ensure a better breakdown of the organic matter.
![]()
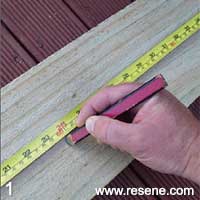
Step 1
Measure and mark each of the fence palings into equal 600mm lengths.
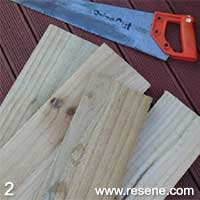
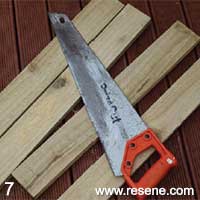
Step 2
Cut the fence palings into 600mm lengths and cut the 50mm x 50mm timber into four lengths, each measuring 1.1m. Smooth any rough edges with sandpaper.
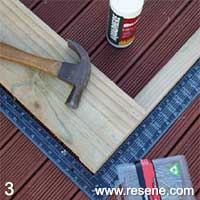
Step 3
Fix a piece of fence paling to one of the 1.1m lengths using PVA glue and 50mm nails. Use the set square to ensure it is at right angles.
Step 4
Fix two more pieces of fence paling to the remaining 1.1m lengths to form the base of the composter. Again, use the set square to ensure corners are all at right angles.
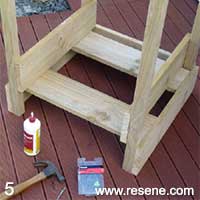
Step 5
Attach two more pieces of fence paling across the base of the composter with PVA glue and nails, and two pieces across either side.
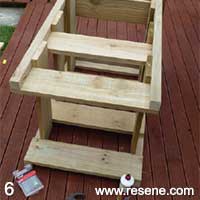
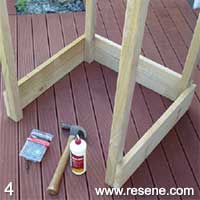
Step 6
In the same way, continue attaching pieces of fence paling to form the front, back and sides of the composter, “staggering” each piece. Leave an opening at the front base of the composter to accommodate the hinged door.
Step 7
Fix these four pieces together to form a rectangular frame. Use the set square to ensure corners are at right angles.
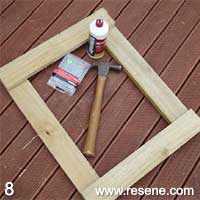
Step 8
Fix these four pieces together to form a rectangular frame. Use the set square to ensure corners are at right angles.
Step 9
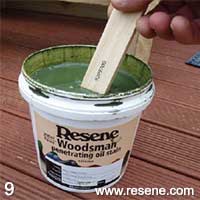
Carefully stir the Resene Woodsman with a paint
stirrer.
Step 10
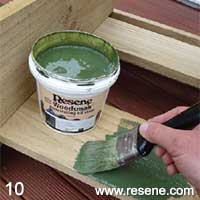
Apply two coats of Resene Woodsman to the composter and door frame, allowing 24 hours for each coat to dry.

Step 11
Cut pieces of chicken wire to fit the door frame and line the inside of the composter.
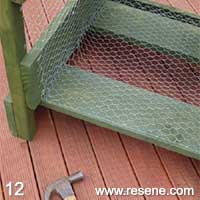
Step 12
Fix the chicken wire into position with galvanised staples. Fix door into position with hinges and fix the catch to keep door closed.
![]() Get inspired ! Subscribe
Get inspired ! Subscribe ![]() Get saving ! Apply for a DIY card
Get saving ! Apply for a DIY card
![]()
Can't find what you're looking for? Ask us!
Company profile | Terms | Privacy policy | Quality and environmental policy | Health and safety policy
Colours shown on this website are a representation only. Please refer to the actual paint or product sample. Resene colour charts, testpots and samples are available for ordering online. See measurements/conversions for more details on how electronic colour values are achieved.
What's new | Specifiers | Painters | DIYers | Artists | Kids | Sitemap | Home | TOP ⇧