Mark Rayner shows how to make a mosaic sunflower.
You will need: Piece of treated 25mm plywood measuring 400mm x 600mm, pencil, exterior PVA glue, paintbrush, tile cutter and nippers and felt pen. Ceramic tiles in the following colours: bright yellow for the petals, dark brown for the centre of sunflower, pale green stem and leaves and assorted shades of orange, paler yellow, reddish brown, pale brown and mustard for the back ground. A bucket of dark brown exterior grout, latex gloves and rubber squeegee.
To get the look: Mark primed the side, edges and back of the panel with Resene Quick Dry primer undercoat and finished it with two coats of Resene Lumbersider tinted to Resene Woodburn. The background wall was painted with Resene Rob Roy.
![]()
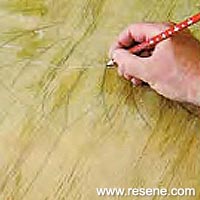 Step one
 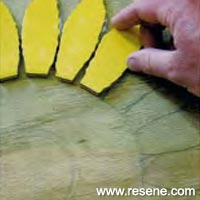 Step two
 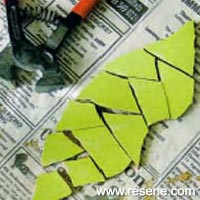 Step three
 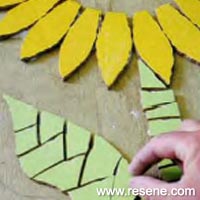 Step four
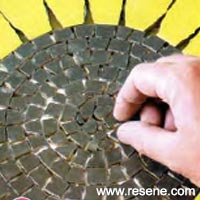 Step five
  Step six
 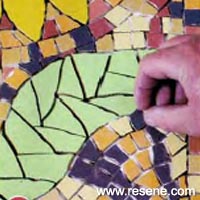 Step seven
 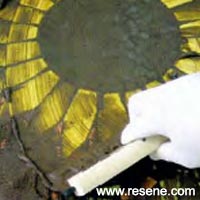 Step eight
 ![]() Get inspired ! Subscribe
Get inspired ! Subscribe ![]() Get saving ! Apply for a DIY card
Get saving ! Apply for a DIY card
![]()
Can't find what you're looking for? Ask us!
Company profile | Terms | Privacy policy | Quality and environmental policy | Health and safety policy
Colours shown on this website are a representation only. Please refer to the actual paint or product sample. Resene colour charts, testpots and samples are available for ordering online. See measurements/conversions for more details on how electronic colour values are achieved.
What's new | Specifiers | Painters | DIYers | Artists | Kids | Sitemap | Home | TOP ⇧


