From Habitat magazine - issue 20
Join the grow-your-own movement by making this easy-to-use raised vege garden complete with built-in tomato or bean rack.

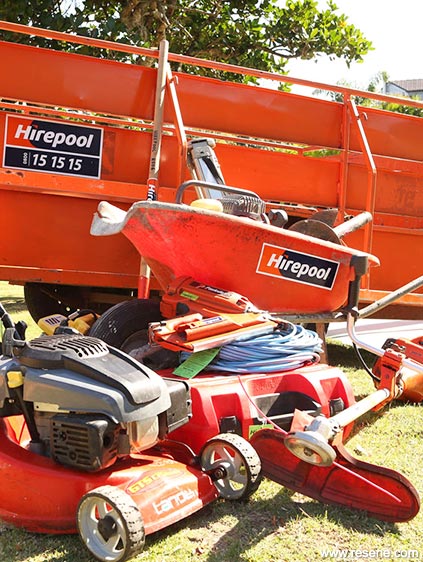
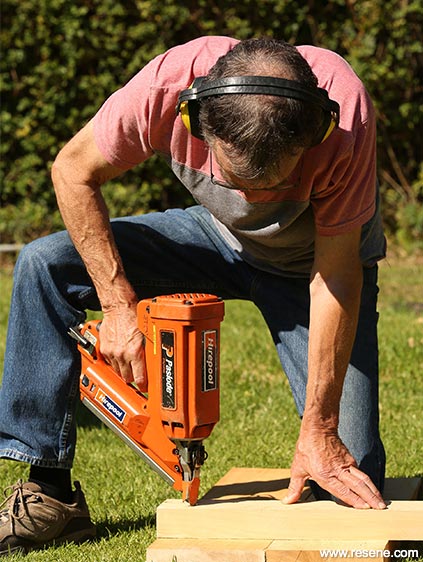
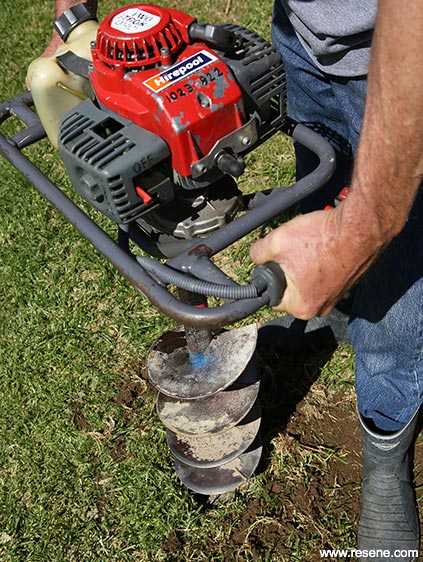
Tools and equipment: Trailer, mitre saw, level, electric leads and RCD power box, personal protection equipment, post hole borer, ready-mix cement, nail gun, wheelbarrow, shovel and spade, lawn mower, weedeater, tape measure, compost, H3 treated timber or untreated hardwood, galvanised nails, pins and eyelets, 15m plastic twine, Resene Lumbersider or Resene Woodsman stain.
Timber: 4 x 2.4m lengths of 200 x 50 for long sides; 4 x 1.1m lengths of 200 x 50 for short sides; 10 x 600mm lengths of 100 x 50 for battens/corner posts; 2 x 2m lengths of 75 x 75 for high posts; 2 x 2.5m lengths of 125 x 25 and 2 x 1.3m lengths of 12 5x 25 for capping.
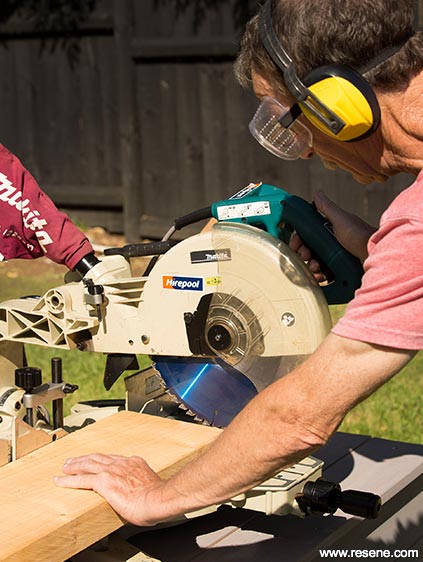
Step 1: Prepare the site by mowing the lawn, weedeating and clearing any debris. Measure and mark your timber to the correct length and cut with the mitre saw, making sure you use personal protection equipment at all times. Our garden is 2.2m (l) x 1.2m (w) x 0.43m (h).
Step 2: Pin the side boards together using the 100mm x 50mm timbers. Make all four sides first, then nail two long and one short together. The fourth and final short side will be attached once the garden is in place.
Step 3: Measure the area where the garden is to be placed. Bore holes for each corner post and cement the corner posts in place. Sit the pre-nailed three sides in place.
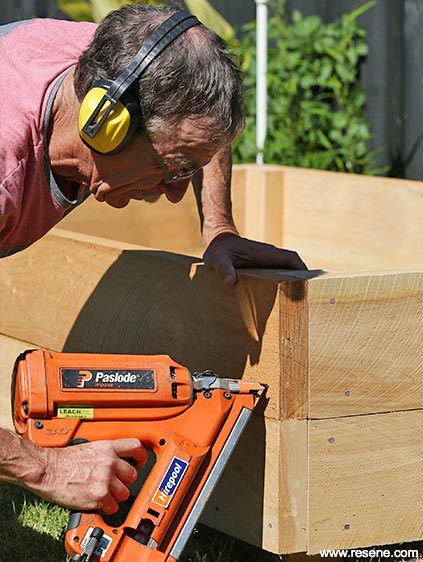
Step 4: Nail the remaining short side and the high posts in place, ensuring the posts and the completed box are level. Measure and cut the capping timber using the mitre saw on the corners for a professional finish and hand-nail these in place to prevent splitting.
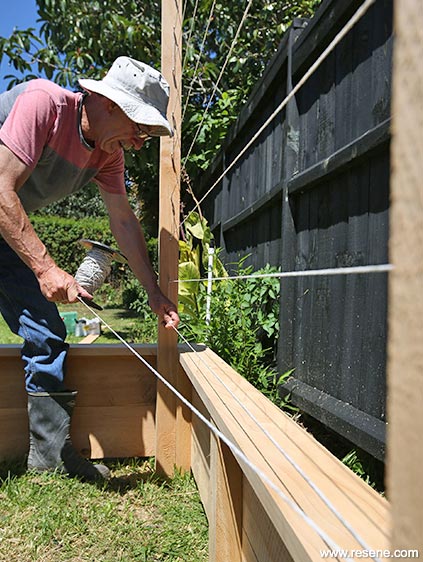
Step 5: Screw eyelets into the high post at 10-15cm spaces. Run the twine through the eyelets to form the bean or tomato rack.
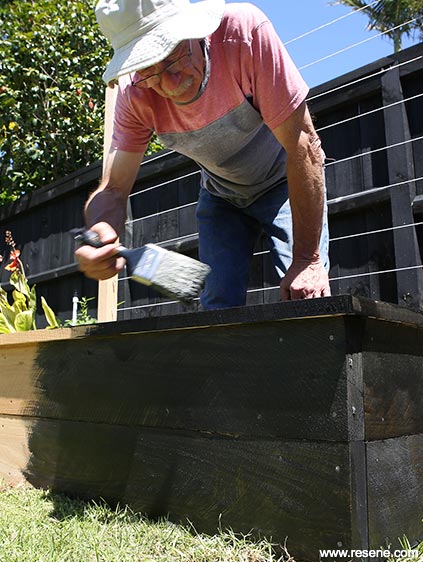
Step 6: Finish the vege garden in a Resene Lumbersider paint or Resene Woodsman stain – we used Resene Treehouse stain. Fill your garden with compost using the wheelbarrow and shovel, or a dingo.
Top tip: You can use H3 or H4 treated pine for your vege garden but line it with polythene before adding the soil. For an eco approach use macrocarpa, cypress, saligna or any untreated hardwood.
All equipment and expertise from Hirepool. Visit www.hirepool.co.nz.
Search habitat magazine stories
Printed copies of habitat highlights are available from late March 2024 at Resene ColorShops and resellers, while stocks last. You can view back issues of habitat magazine online.
Specifiers:
If you have an idea, project or story that you think would suit habitat, we’d love to hear from you. Please drop us an email with your details and include photos if submitting a project.
Sign up for a DIY card and Save! Australia | New Zealand
![]() Get inspired ! Subscribe
Get inspired ! Subscribe ![]() Get saving ! Apply for a DIY card
Get saving ! Apply for a DIY card
![]()
Can't find what you're looking for? Ask us!
Company profile | Terms | Privacy policy | Quality and environmental policy | Health and safety policy
Colours shown on this website are a representation only. Please refer to the actual paint or product sample. Resene colour charts, testpots and samples are available for ordering online. See measurements/conversions for more details on how electronic colour values are achieved.
What's new | Specifiers | Painters | DIYers | Artists | Kids | Sitemap | Home | TOP ⇧