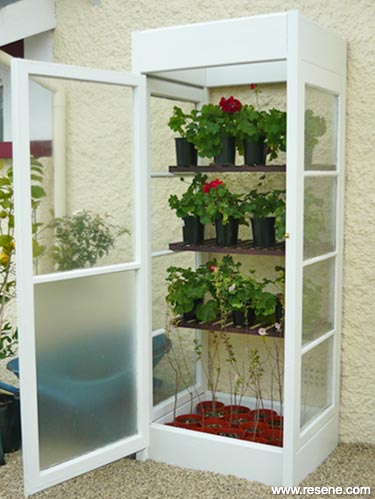
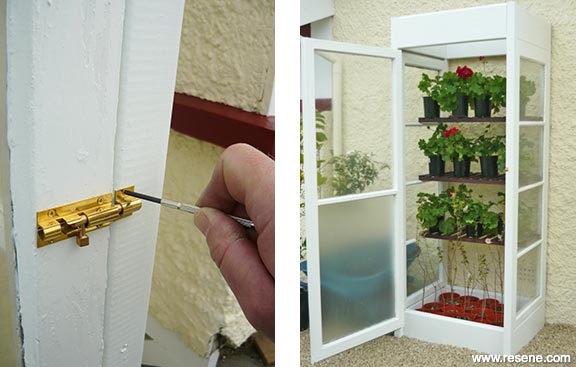
Vertical glasshouse
Create this fabulous upright glasshouse from recycled wooden windows to provide winter protection for your potted beauties.
You will need:
- 19mm stainless-steel nails
- 20mm galvanised clouts
- 25mm x 25mm timber (approx. 4.7m)
- 38mm x 10mm trellis batten (approx. 13.8m)
- 40mm exterior screws
- 50mm x 50mm treated timber (approx. 8.4m)
- 75mm exterior screws
- Brass barrel bolt
- Clean cloth
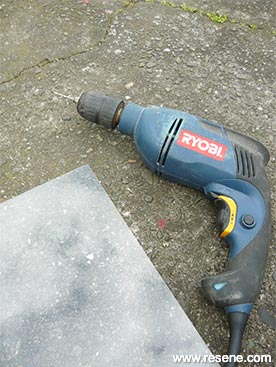
- Drill
- Exterior wood glue
- Sandpaper
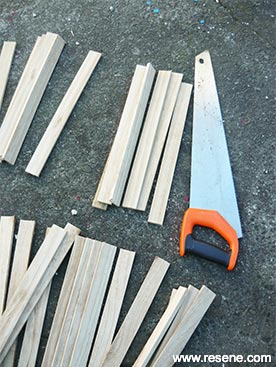
- Saw
- Screwdrivers
- Set square
- 3 x stainless-steel hinges
- Tape measure
- Tongue and groove landscaping timber (approx 5.4m)
- Wooden window measuring 1790mm x 715mm
- Wooden windows measuring 1700mm x 610mm (x 2)
To get the look: Mark painted the background stucco wall with Resene AquaShield tinted to Resene Pipi.
Handy hint: If your side windows don’t have glazing bars to rest the shelves on, simply cut and fix lengths of 25mm x 25mm timber and attach these to the window frames instead.

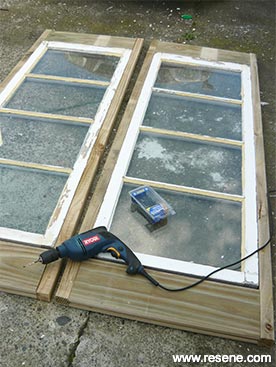
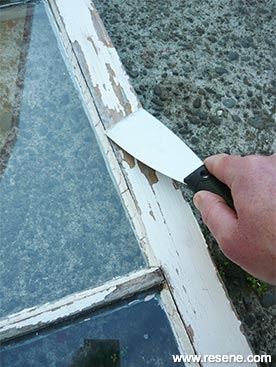 Step one
Scrape off any loose or flaking paint from the window frames and then sand smooth. Wipe off any sanding residue with a clean cloth.
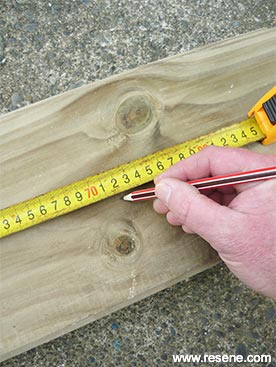 Step two
Measure and mark four pieces of landscaping timber at 720mm and four pieces at 610mm. Measure and mark four pieces of 50mm x 50mm timber at 2100mm.
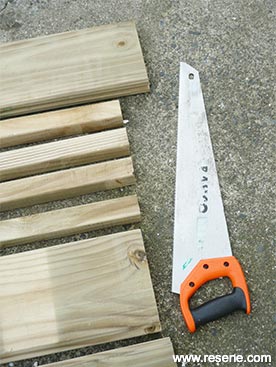 Step three
Cut the timber to size and smooth any rough edges with sandpaper.
 Step four
Attach the four lengths of 50mm x 50mm timber and the four 610mm lengths of landscaping timber to the two side windows, as shown. Fix with 75mm screws, drilling pilot holes first.
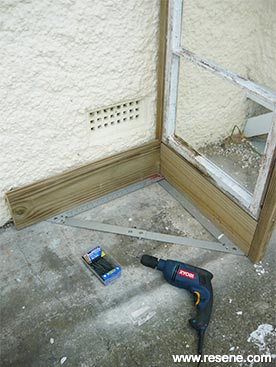 Step five
Stand one of the side panels upright on a level surface and attach one of the 720mm lengths of landscaping timber along the back, as shown, using a set square to ensure it’s at 90 degrees.
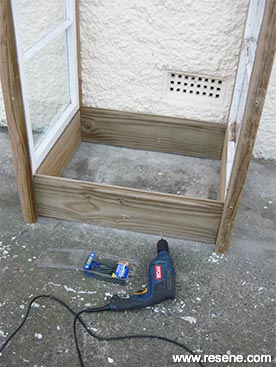 Step six
In the same way, fix the other side panel into position and attach a second 720mm length of landscaping timber along the front, as shown (ensure that it’s positioned approximately 50mm back to accommodate the thickness of the door).
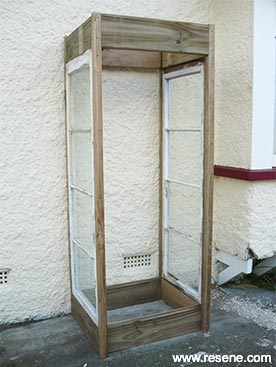 Step seven
In the same way, fix the two remaining 720mm lengths of landscaping timber into position at the top, as shown.
 Step eight
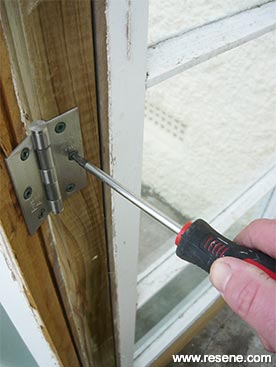
Fix the door into position using the three hinges and 40mm screws.
 Step nine
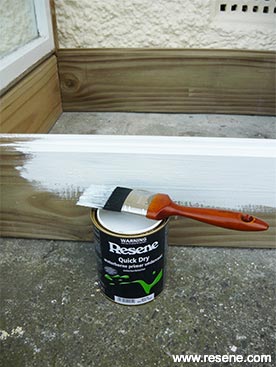
Apply one coat of
Resene Quick Dry to any areas of bare wood and allow to dry.
 Step eleven
Drill 3mm holes around the edge of the piece of clear plastic and fix to the glasshouse roof with 20mm galvanised clouts.
 Step twelve
Drill 3mm holes around the edge of the piece of clear plastic and fix to the glasshouse roof with 20mm galvanised clouts.
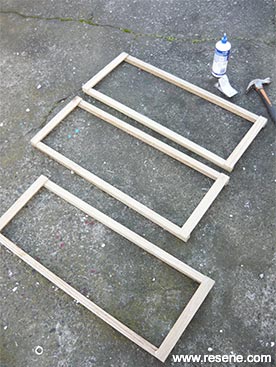 Step thirteen
Attach the six 30mm lengths of batten to the six 770mm lengths of timber to form three rectangles, as shown. Fix together with exterior wood glue and 19mm nails.
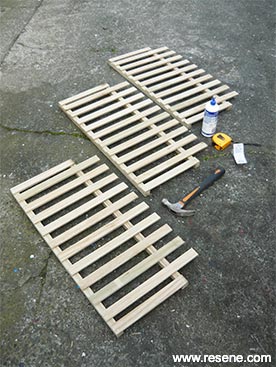 Step fourteen
Attach the remaining lengths of batten to the rectangular frames, as shown. Again, fix with 9mm nails and exterior wood glue. Allow glue to dry.
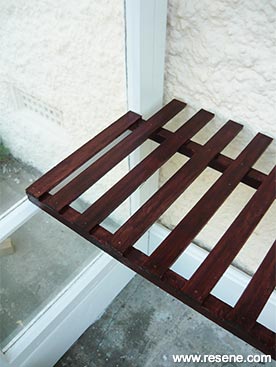 Step sixteen
Place the glasshouse shelves into position, resting on the glazing bars of the side windows, as shown.
Step seventeen
Place the glasshouse shelves into position, resting on the glazing bars of the side windows, as shown.
 Step ten
 Step fifteen