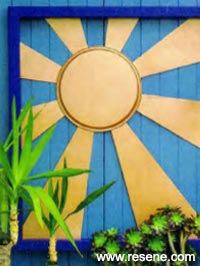
Mark Rayner simple step-by-step instructions and bring a ray of sunshine to your backyard.
You will need: Flat Zincalume sheet, 900mm x 1000mm, round stainless steeltray, tanalised pine, 2000m x 50mm x 70mm wooden offcuts for temporary bracing, 8 brass screws for fixing frame, 30 galvanised clouts (25mm x 2.5mm), super strength epoxy resin adhesive (e.g. Araldite), exterior construction glue, builder's filler, permanent ink marker, tin snips, hammer, metal file, sandpaper, mineral turps, small paint roller and brushes and 2 galvanised hooks or brackets for hanging, Resene Enamacryl Metallic in Resene Bullion, Resene Lumbersider in Resene Porsche basecoat for Resene Bullion, Resene Lumbersider Resene Paua, Resene Galvo One galvanised iron primer, Resene Quick Dry Acrylic Primer/Undercoat and Resene Concrete Clear.
To get the look: Mark hung his Zincalume sun on wooden panelling painted with Resene Lumbersider in Resene Astronaut.
![]()
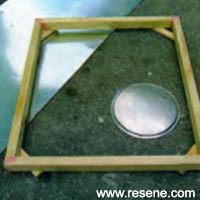 Step one
 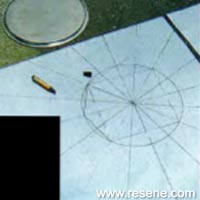 Step two
 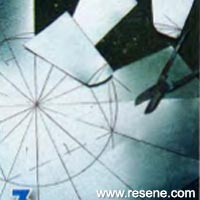 Step three
 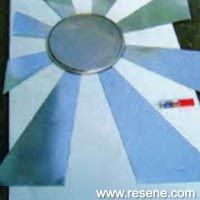 Step four
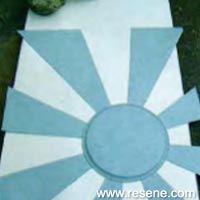 Step five
 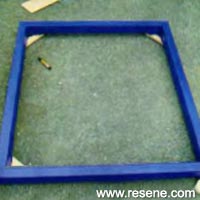 Step six
 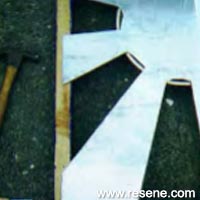 Step seven
 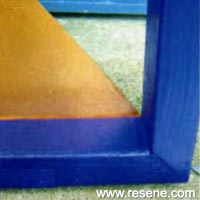 Step eight
 ![]() Get inspired ! Subscribe
Get inspired ! Subscribe ![]() Get saving ! Apply for a DIY card
Get saving ! Apply for a DIY card
![]()
Can't find what you're looking for? Ask us!
Company profile | Terms | Privacy policy | Quality and environmental policy | Health and safety policy
Colours shown on this website are a representation only. Please refer to the actual paint or product sample. Resene colour charts, testpots and samples are available for ordering online. See measurements/conversions for more details on how electronic colour values are achieved.
What's new | Specifiers | Painters | DIYers | Artists | Kids | Sitemap | Home | TOP ⇧