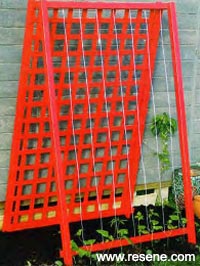
Mark Rayner shows how to build a frame that makes bean picking easy.
You will need: 2 x 100mm stainless steel, piece of trellis measuring l.2m x 1.8m. 50mm x 50mm treated timber cut to: four pieces measuring 1.9m for the legs, four pieces measuring l.2m for the top and bottom supports. PVC coated washing line, 4 x metal brackets, 75mm galvanised jolt head nails, 30mm galvanised flat head nails, galvanised fencing staples, 600mm length of galvanised chain, two 100mm stainless steel or zinc plated butt hinges, exterior PVA glue, hammer, large set square, pliers, screwdriver and paintbrush. Resene Quick Dry acrylic primer undercoat and Resene Lumbersider tinted to Resene Red Hot.
Note: To secure the bean frame, stand it upright (you may need two people for this), then sink the metal brackets into lightly cultivated soil until the bottom of each leg is just touching the ground. Then firm down the soil around each bracket. This frame could also support a cucumber or an ornamental climber, such as sweet peas, up its other side. It could also be used as a screen in the flower garden.
Top tip: To secure the frame even further you can sink two garden stakes into the ground at either end and fix them to the bean frame with galvanised bolts.
![]()
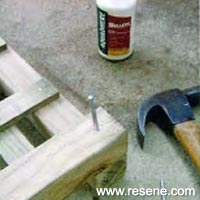 Step one
 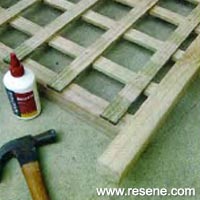 Step two
  Step three
 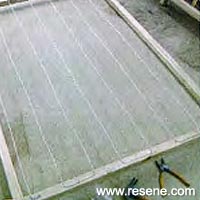 Step four
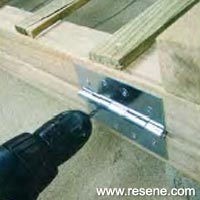 Step five
 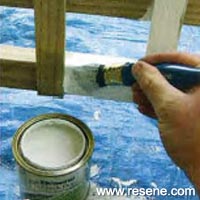 Step six
 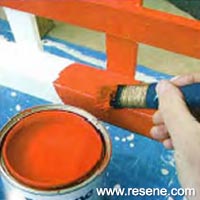 Step seven
 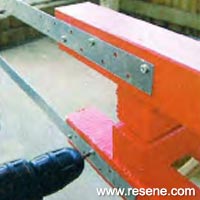 Step eight
 ![]() Get inspired ! Subscribe
Get inspired ! Subscribe ![]() Get saving ! Apply for a DIY card
Get saving ! Apply for a DIY card
![]()
Can't find what you're looking for? Ask us!
Company profile | Terms | Privacy policy | Quality and environmental policy | Health and safety policy
Colours shown on this website are a representation only. Please refer to the actual paint or product sample. Resene colour charts, testpots and samples are available for ordering online. See measurements/conversions for more details on how electronic colour values are achieved.
What's new | Specifiers | Painters | DIYers | Artists | Kids | Sitemap | Home | TOP ⇧